Categories
Creative Cookery Healthy Living Recipes

Kid-Friendly Vegetable Recipes

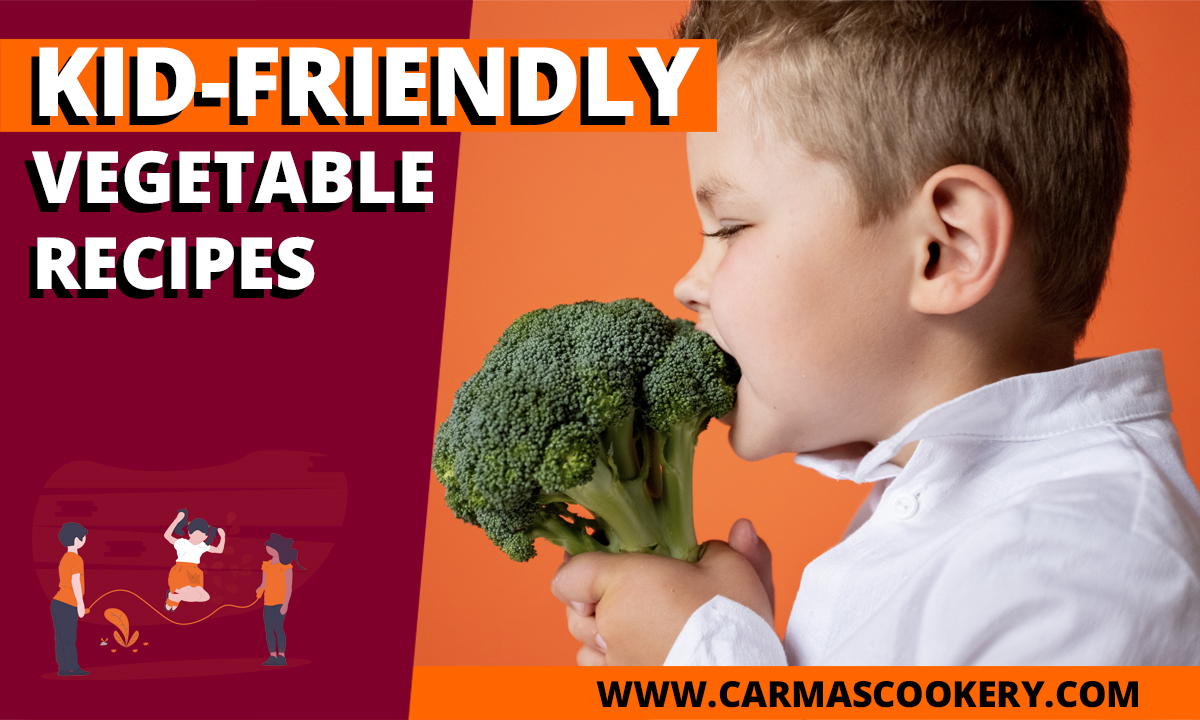
Are you looking for some kid-friendly vegetable recipes? Bella Cupcake Couture provides two creative options.

Kid-Friendly Vegetable Recipes

Creative Vegetable Recipes for Children

By the staff at Bella Cupcake Couture

When it comes to cooking, one of the greatest struggles is finding a vegetable recipe that is interesting and appealing for children. Knowing that vegetables are an essential aspect of proper nutrition, parents often have to find ways to make their kids want to eat vegetables as often as possible. So, if you’re looking for some creative ways to cook and present your vegetable dishes, you are in the right place. Here are some unique vegetable recipes that will surely unleash your kitchen creativity.

Kale Chips

If you’re tired of seeing your kids munch on a bag of unhealthy potato chips, take matters in your hand and make amazing kale chips as an alternative.

  • First, wash and dry the kale before removing the stems and cutting it into smaller, bite-size pieces.
  • Then, generously pour some oil to cover the kale and season it with your seasonings of choice. You can simply season it with some sea salt or go the extra mile and use either cayenne pepper, cinnamon, cumin, curry powder, chili powder, garlic powder, hot sauce, or maple syrup for added flavor.
  • Once properly coated with your seasoning of choice, place the kale on a baking sheet. Make sure not to overcrowd the pan and have some space in between pieces so that the kale comes out nice and crisp.
  • Place the pan in your oven to cook for about 15 minutes before stirring the pieces gently and let it completely bake until golden brown.

Popcorn Cauliflower

There is no doubt that kids love fried food. Taking this into consideration, here is how you can make popcorn cauliflower as an alternative for chicken. This can be an amazing movie snack or even a recipe good enough for lunch or dinner.

  • First, cut your cauliflower into bite-size florets.
  • To create the batter, mix a cup of buttermilk, ¾ cup of flour, 2 tablespoons of hot sauce, and a teaspoon of Kosher salt until smooth.
  • Simply dredge your cauliflower florets in the batter until fully coated. Make sure to let the excess batter drip off before rolling the pieces on some breadcrumbs for an added crunch.
  • Fry the cauliflower for about 2 to 3 minutes until golden brown. Let the popcorn drain on paper towels before serving with some ranch dressing.

Conclusion

Vegetables are an essential part of proper nutrition and a must for kids to grow as healthy as they can be. Taking this into consideration, it is important for parents to find creative ways to make vegetables feel, look, and taste familiar to their children. Hopefully, this article was able to provide you with amazing ideas for appealing vegetable recipes for kids.

[divider]

[one_fifth] Bella Cupcake Couture logo [/one_fifth]
[four_fifth_last]

Enjoyed these vegetable recipes?

Want more baking hacks and tips? The pro bakers from Bella Cupcake Couture are happy to help you out. Go to www.bellacupcakecouture.com. [/four_fifth_last]

Categories
Recipes

Apple Crumble

I have a soft spot for Apple Crumble (and Apple Crisp) because it is one of the recipes my teacher used in my first cooking class in high school. However, it can be high in sugar, carbs, and other ingredients that many people today are trying to avoid. So I offer you this treat.

One taste of this delicious dessert and you’ve won’t believe it is both gluten and refined sugar-free. The addition of fresh thyme adds a subtle savory note to the otherwise sweet flavor profile of this classic recipe.

Apple Crumble

Apple Crisp
Print

Apple Crumble

A gluten- and sugar-free recipe.
Course Dessert
Cuisine American
Keyword apples, dessert
Prep Time 20 minutes
Cook Time 50 minutes
Servings 6

Ingredients

  • 6 large apples, cored, peeled, and sliced
  • 1 Tablespoon fresh lemon juice
  • 1/3 cup real maple syrup
  • 2 Tablespoon 100% apple juice, sugar-free
  • 1 teaspoon ground cinnamon
  • ½ teaspoon ground allspice
  • teaspoon fresh thyme leaves
  • ¼ teaspoon salt

Topping Ingredients:

  • 1 cup old-fashioned rolled oats
  • 1/3 cup almond flour
  • 1/3 cup almonds, sliced
  • 1/3 cup honey, preferably local
  • 3 Tablespoon unsalted butter, melted

To Serve: (Optional)

  • Vanilla bean ice cream or freshly whipped cream

Instructions

  • Place top oven rack in the center position and pre-heat oven to 350°F. Grease an 8” x 8” baking dish and set it aside.
  • In a large non-reactive bowl, toss apples with fresh lemon juice.
  • Add maple syrup, apple juice, cinnamon, allspice, thyme leaves, and salt. Toss to combine and set aside.
  • In a separate bowl, combine topping ingredients and stir until oats are thoroughly coated and all ingredients are well combined. Set aside.
  • Pour apple mixture into the prepared baking dish and spread into an even layer.
  • Spread the topping evenly across the top in a uniform layer, as well.
    Apple Crisp ready to bake
  • Place into the preheated oven and bake for 30 minutes. If the top layer is nicely browned, cover the dish loosely with aluminum foil to prevent over-browning.
  • Continue baking for another 15-20 minutes or until the apple crisp is nice and bubbling. Remove from the oven and set aside to cool for 5-10 minutes.
  • Serve warm with some vanilla bean iced cream or freshly whipped cream, if desired.
    Apple Crisp with Ice Cream on top

Tip: Choose firm apples, such as Granny Smith or Pink Lady, for this recipe. These varieties will hold up well to the heat of baking without turning to mush. Read my apple tips on the page for Cinnamon Baked Apples.

What is the difference between an Apple Crumble and an Apple Crisp?

If you’re a Brit, Aussie, or Kiwi, then you are probably asking this question because in the UK, Australia, and New Zealand, the term “Apple Crumble” refers to both. However, here in the United States, as well as in Canada, we make a distinction between the two desserts.

An Apple Crisp, also called an Apple Streusel, is made with a streusel topping. Streusel is made by cutting together a fat, usually butter, some flour, sugar, and more often than not, some cinnamon. The topping is crumbly and sweet. If you use a leavened flour, such as Bisquick (which is my go-to), then it puffs up a little, as well.

An Apple Crumble, on the other hand, has a topping made from rolled oats and brown sugar. In this recipe, I use honey instead — thus removing the refined sugar.

Interestingly enough, if you try to look up the history of the Apple Crumble, you find a lot of information about the Apple Streusel, which was invented in Britain around World War II. Other related dishes include:

  • Apple Cobbler, which has a biscuit topping
  • Apple Brown Betty, which has a buttered bread topping
  • Apple Pandowdy, which has a pastry topping

All are related to the Apple Pie.

From what I could gather in my research — and I’ll have to dig deeper at a later time — is that most of these recipes were created out of something akin to necessity. The cook didn’t have the ingredients to make an apple pie, so they invented something that worked with what they did have. That is how much kitchen creativity happens — taking a look at the ingredients on hand and pulling them together in new ways.

Creative Cooking Tips Banner

Wondering how you can unleash your kitchen creativity on this recipe while preserving its gluten-free and processed-sugar-free qualities. Here are a couple of ideas:

  • Try molasses instead of honey. Molasses is made from brown sugar, so you’ll get a bit of the recipe’s original qualities. However, it will be less sweet than honey or brown sugar.
  • Try a different gluten-free flour. You can substitute almond flour with oat flour, buckwheat flour, cashew flour, or sunflower seed flour. You can also experiment with coconut flour, but it will change the flavor profile significantly enough that you’ll need to play around with other ingredients, as well.
  • Substitute the allspice for cloves. They have very similar flavor profiles.
  • Use another natural syrup instead of maple syrup. Molasses is a good choice. You can also try out honey or agave nectar.
Categories
Recipes

BBQ Beef Ribs with Memphis Dry Rub

Ribs need to be cooked slowly to become tender and juicy. While one might think that BBQ beef ribs need to be smoked, that isn’t the case. In this recipe, you use your oven.

BBQ Beef Ribs with Memphis Dry Rub

BBQ Ribs
Print

Beef Ribs with Memphis BBQ Dry Rub

Course Main Course
Cuisine American
Keyword barbecue, bbq, beef, ribs
Prep Time 20 minutes
Cook Time 2 hours
Servings 4

Ingredients

  • 8 Tablespoons paprika
  • 4 Tablespoons powdered garlic
  • 4 Tablespoons chili powder
  • 3 Tablespoons black pepper
  • 3 Tablespoons kosher salt
  • 2 Tablespoons celery seed
  • 1 Tablespoon oregano
  • 1 Tablespoon thyme
  • 1 Tablespoon all-purpose Greek seasoning, Cavender's Seasoning is a good option
  • Your favorite BBQ sauce, homemade or store-bought (optional)
  • 2 slabs beef ribs, for BBQ

Instructions

  • Preheat oven to 250 degrees.
  • In a medium-sized bowl, add all spices and mix them together.
  • Rinse beef ribs and allow excess water to drip away.
  • Line a flat baking sheet with aluminum foil for easier cleanup. Lay ribs on sheet.
  • Thickly coat both sides of ribs.
  • Place them on a cooking sheet and cover tightly with foil, sealing the edges.
  • Place an oven-safe pan of water next to or below the ribs on another rack.
  • Bake at 250 Degrees for 2 hours, turning once halfway through.
  • For wet ribs, after 2 hours, add a generous coat of your favorite BBQ sauce and cook for an additional 30 minutes.

Notes

You may have more rub mix than necessary for your ribs. If so, save it in a Ziploc bag or sealed container for another time.

Note: If you can’t find Cavender’s Seasoning in your local grocery store, you can buy it on Amazon.

How to Cook BBQ Beef Ribs

There are several methods for producing mouthwatering barbecued ribs without the expense of buying a smoker. Here are a few tried and true options.

  • Cooking in an oven at low temperature: Place ribs in a roasting pan with 1/2 inch of water in the bottom. Cover with foil and seal the edges. Bake at 250 degrees for 2 hours, turning over once after an hour.

    If you don’t have a roasting pan, simply use a cooking sheet and cover tightly with foil. Place an oven-safe pan of water next to the ribs or on another shelf in the oven.

    For wet ribs, after two hours, add a generous coating of your favorite BBQ sauce and cook for an additional 30 minutes.

  • Grill over low heat: Wrap the ribs tightly in foil and grill over low heat (around 250 degrees) for 3 hours, turning once half-way through.

    For web ribs, during the last 15 minutes of cooking time, coat them with your favorite BBQ sauce.

  • Make wet ribs in a Slow Cooker: Place the ribs in a slow cooker, cover with your choice of sauce and cook 8 to 12 hours on low.

One thing to remember about cooking BBQ beef ribs is you need to set it and forget it. No matter which way you’re cooking them, it’s important that the temperature remains steady. The more times you peek at the meat, the more heat is released and the less tender and juicy the ribs will become. In addition, it will take longer to cook — something the family will not like!

Creative Cooking Tips Banner

Creativity in the kitchen doesn’t stop at the recipe itself. You can have all sorts of creative culinary fun with leftovers! Here are some ideas for what you can do with BBQ beef ribs leftovers.

  • BBQ sandwiches: Of course! Slice open a hoagie roll, slather some BBQ sauce on it, pull the meat off the ribs, and stack on the bread. That’s your basic recipe. However, you might also enjoy adding some grilled onions, coleslaw, or plain shredded cabbage.
  • BBQ casserole: Toss the meat into a casserole dish. Add some bacon and Monterey Jack cheese, top with mashed potatoes, and bake at 350 degrees for about 45 minutes. Yum!
  • BBQ Pot Pie: Using store-bought pie crusts, add your favorite veggies and a can of cream of mushroom soup. Bake at 375 degrees for 30 minutes or until the crust becomes golden brown.
  • BBQ pizza: Start with a store-bought crust, top with more BBQ sauce, meat, veggies, and cheese. Bake according to crust directions.
  • BBQ Burritos: Wrap beef and 1 Tablespoon BBQ sauce in a flour tortilla, ensuring the ends are sealed. Deep fry (or bake) until golden brown and crispy. Excellent when served with ranch dip.
  • BBQ Macaroni: Cook macaroni and cheese according to directions on the box — or make your own. Warm the meat in the microwave, adding more BBQ sauce if necessary to keep meat from drying out. Mix the warmed meat into the prepared mac-n-cheese. Sprinkle with bacon bits and your favorite shredded cheese.
Categories
Recipes

Stuffed Papaya Breakfast Bowls

I love papaya. When I was little, I would eat the small, yellow kind with a bit of lemon juice sprinkled on. Then, a few years ago, I discovered the large, red-fleshed variety and fell in love all over again.

Stuffed Papaya Breakfast Bowls

Stuffed Papaya Breakfast Bowls
Print

Stuffed Papaya Breakfast Bowls

Course Breakfast
Cuisine Tropical
Keyword breakfast, papaya
Prep Time 10 minutes
Servings 4

Ingredients

  • 2 very ripe papayas
  • 3 cups coconut yogurt
  • 3 Tablespoon chia seeds
  • 1 cups blueberries
  • ½ cup raspberries
  • ½ cup blackberries
  • ½ cup coconut flakes, unsweetened and lightly toasted
  • Mint or basil sprigs for garnish

Instructions

  • Slice each papaya in half lengthwise. Scoop out the seeds with a large spoon and discard.
  • In a small bowl, combine yogurt and chia seeds. Stir to combine.
  • Divide the coconut yogurt mixture equally between the papaya halves.
  • Top with blueberries, raspberries, blackberries, and toasted coconut flakes.
  • Garnish with a sprig of fresh mint or basil and serve immediately.

A Bit About Papayas

Papayas grow in tropical climates. When I was little and living in East Africa, I knew them as pawpaws, which can also be spelled papaws. They are sweet and mildly flavored and come in a variety of colors from yellow to orange to red.

The papaya fruit provides a variety of benefits, including:

  • Easing digestion. It contains an enzyme called papain, which can break down the tough protein chains found in muscle meat. In fact, papaya has been used as a meat tenderizer, as well.
  • High in Vitamin C. One small, 5-ounce papaya contains more than a day’s supply of this antioxidant vitamin. Vitamin C has been linked to a better performing immune system, increased heart health, and possibly better eyesight.
  • Potential lower risk of certain types of cancer. Papaya contain lycopene, which has anti-cancer properties.

How to Select Your Papaya

Unripe papaya should not be eaten raw. Besides, it tastes its best when properly ripe. So how do you find papaya that’s perfect for this breakfast bowl? Keep in mind these tips:

  • Look for papayas that are mostly yellow and a little green, then let them fully ripen at home. You’ll know when the papaya is fully ripe because it will be bright yellow.
  • Choose fruit that is firm, yielding to gentle pressure, have smooth skin, and are heavy for their size.
  • Don’t buy papaya that has blemishes, cuts, and are overly soft.

Why Chia Seeds?

In addition to the yogurt in this recipe, chia seeds add protein. A one-ounce serving of chia seeds contains 4 ounces of protein. They also are a good source of fiber, packing 11 grams of fiber into that same 4 ounces. Chia seeds are also considered superfoods because they contain so much nutrition without many calories.

Creative Cooking Tips Banner

Here are some alternatives and substitutions you can try out for this recipe:

  • Using coconut yogurt makes this recipe dairy-free, but if that’s not an issue for you why not experiment with other yogurts? Peach, orange, tropical, and even plain greek yogurt could go very well with the medley of fruits.
  • You don’t have to stick with plain chia seeds either. You could really pump up the nutrition with Nutiva® Superseed Blend (a mixture of ground flax, chia, hemp & coconut) instead.
  • This recipe calls for summer fruits, but that doesn’t mean you can’t mix it up. Pears, pomegranates, bananas, and cranberries are all available in the stores right now. So give them a try!
  • The coconut flakes add texture. Instead, you could use granola, sliced almonds, sunflower seeds, or pumpkin seeds. Some things you could try for sweetness include raisins, dried cranberries, dried apricot, crushed banana chips, or dehydrated blueberries.

And, you don’t have to use these ideas as just a way to switch out an ingredient — you can add them in, as well!

Categories
Recipes

Cinnamon Baked Apples

Ah! The smell of cinnamon and apples wafting from your oven. There’s nothing like it! This tasty cinnamon and baked apples dessert is delicious and satisfying by itself or paired with whipped cream or your favorite frozen yogurt or ice cream.

Cinnamon Baked Apples

Baked Cinnamon Apples
Print

Baked Cinnamon Apples

This simple dessert is perfect for cold Autumn and Winter nights.
Course Dessert
Cuisine American
Keyword apples, cinnamon
Prep Time 10 minutes
Cook Time 30 minutes
Servings 4

Ingredients

  • 3 Tablespoons unsalted butter, melted (plus extra for greasing)
  • 2 large apples, peeled and diced
  • 2 teaspoons ground cinnamon
  • 3 Tablespoons pure maple syrup, divided
  • 3/4 cup almond flour

Instructions

  • Preheat oven to 350°F and lightly grease a small baking dish with a little butter. Set aside.
  • In a large bowl, toss together the apples, cinnamon and one Tablespoon of maple syrup.
  • Pour into the prepared baking dish.
  • Spread apple mixture into an even layer and set aside.
  • In a small bowl, combine the almond flour, melted butter, and remaining maple syrup. Stir to combine thoroughly.
  • Evenly spread the mixture over the cinnamon apples.
  • Place in the pre-heated oven and bake until the topping is golden brown and the apples are tender, approximately 25 - 30 minutes.
  • Remove from oven and cool for a couple minutes before serving.

Best Baked Apples: How to Choose the Apples for Baking

Apples get sweeter and more mild-flavored as they bake, so you want to find apples that are firm and tart. That’s why recipes often call for Granny Smith apples. But they aren’t the only game in town. Here are some others that you can experiment with.

  • Honeycrisp are my husband’s favorite. They aren’t as tart as Granny Smiths, but they are firm and hold up well in the oven.
  • Jonagold are tart and sweet, but they don’t store well. So buy them fresh and bake them soon.
  • Braeburn have an intense flavor that balances well with a lot of cinnamon.
  • Crispin apples are mild-flavored like Golden Delicious but don’t turn to mush when gently baked.
  • Pink Lady apples have an interesting flavor that balances between tart, sweet and acidic. They tend to hold their shape very well in the oven.
  • Winesap can also be a good choice because they pair well with stronger flavor fruits such as figs.

Creative Cooking Tips Banner

There are lots of ways that you can make this recipe your own. Here are some suggestions:

  • Experiment with different kinds of apples. I made a few suggestions above.
  • Have fun with different kinds of fruit. You don’t have to use apples alone or even at all. Mix and match with pears, peaches, or even quince.
  • Try different blends of spices. You can use pumpkin pie spice, which is a mix of cinnamon, ginger, nutmeg, and cloves. Cardomom might also be nice.
  • Add some texture to the topping. Add some rolled oats. Or even switch out the almond flour for oat flour, coconut flour or a home-made flour made from nuts and seeds.

Love to bake with apples? Check out The Apple Lover’s Cookbook by Amy Traverso. It’s available on Amazon.

[divider]

[one_third] Top 8 Pie-Making Tips [/one_third]
[two_third_last]

What do top pie bakers do
for pie-baking success?

I’ve researched the best pie-making tips — from ingredients to techniques to tools — and gathered them in this special Top 8 Pie Tips report. Armed with these tips, you’ll make your perfect pie time and time again.

>> Grab your copy of Top 8 Pie-Making Tips Now! <<

[/two_third_last]

Categories
Recipes

Pork and Cabbage Skillet

If you enjoyed the Pineapple Beef Stir-Fry, then you might enjoy this simple Pork and Cabbage Skillet, as well. It’s easy to make and with a simple flavor profile, you can leave it as is or spice up to make it your own.

Pork and Cabbage Skillet

Pork and Cabbage Skillet
Print

Pork and Cabbage Skillet

Course Main Course
Cuisine American
Keyword cabbage, pork
Prep Time 10 minutes
Cook Time 30 minutes
Servings 4

Ingredients

  • 1 lb. pork loin, cut into thin medallions
  • 1 Tablespoons extra virgin olive oil
  • 1 medium red onion, thinly sliced
  • 1 head green cabbage, thinly sliced
  • 3 Tablespoons tamari or coconut aminos,
  • Sea salt and black pepper, to taste (optional)

Instructions

  • Heat a large, high-sided skillet over medium heat.
  • Add the pork and season with salt and black pepper, if desired.
  • Cook until the pork develops a golden crust on all sides and is almost cooked through, approximately 6-8 minutes.
  • Remove from skillet and set aside.
  • Add olive oil to the skillet, along with the red onion and cabbage.
  • Season with salt and black pepper, to taste, and cook until the veggies become soft and slightly glossy, around 15-20 minutes.
  • Return the pork to the skillet and sprinkle with the tamari or coconut aminos.
  • Cook until the pork is fully cooked through and the mixture develops a nice glaze, approximately 3-4 minutes.
  • Remove from heat and serve immediately.

Tips and Pointers for Pork and Cabbage Skillet

Tamari and coconut aminos are alternatives to soy sauce. If you can’t find them in your local grocery store. You can find them on Amazon.com. For information about these ingredients, go to the Pineapple Beef Stir-Fry page. For substitutions, scroll down to the Creative Cookery section.

You can cook this in any kind of skillet with high sides, however, I’ve found that a cast iron pan or wok works really well for this kind of dish.

Creative Cooking Tips Banner

As I mentioned in the intro, this simple dish is easy to tailor to your tastes. Here are some suggestions.

Experiment with cabbage. The recipe calls for green cabbage, but you can use red. The main difference between the two, besides the color, is that green cabbage can turn sweeter when cooked and red cabbage doesn’t. Using red cabbage in this recipe would give it some color, as well as a more earthy flavor.

Switch up the meats. Yes, pork and cabbage go well together, but so do other meats. You can use chicken, sirloin steak, ground beef, or even bratwurst.

Experiment with onions. Yellow, white, or Vidalias might work well, too. Yellow and especially Vidalias will carmelize (sweeten) when they cook, so they might go well with the red cabbage suggested above.

Pump up the flavor. Experiment with herbs and spices. Throw in some curry powder, garlic powder, and a touch of turmeric and you’ll give this dish an Indian cuisine twist. Or, toss in some sage, rosemary, and thyme for a more earthy flavor.

Categories
Recipes

Pineapple Beef Stir-Fry

Pineapple is usually paired with pork or chicken, but it goes well with beef as well. For example, this Pineapple Beef Stir-Fry has a nice, fresh tang to it.

Pineapple Beef Stir-Fry

Although you can make this recipe with canned pineapple chunks, I don’t advise it. Fresh pineapple tastes much better and will stay firm when you cook it. I’ve included pineapple handling tips below the recipe.

Pineapple Beef Stir-Fry
Print

Pineapple Beef Stir-Fry

This recipe gives a tropical spin to an Asian dish.
Course Main Course
Cuisine Chinese
Keyword Asian Cuisine, pineapple, Tropical
Prep Time 10 minutes
Cook Time 5 minutes
Servings 4

Equipment

  • High-sided skillet or wok.

Ingredients

  • 1 Tablespoon coconut oil
  • 1 lb. beef flank steak, thinly sliced against the grain
  • cups pineapple chunks
  • 3 Tablespoons tamari or coconut aminos (see below for definitions)
  • 3 scallions, sliced thinly
  • salt and black pepper, to taste (Optional)

Instructions

  • In a large, high-sided skillet or wok, heat the coconut oil over high heat.
  • Add the beef and pineapple. Season with a small pinch of salt and black pepper, if desired.
  • Stir-fry the beef and pineapple over high heat until the beef is cooked through and the pineapple develops a slight golden color, approximately 2-3 minutes.
  • Add the tamari or coconut aminos and stir-fry for another 1-2 minutes, or just until the mixture is warm and bubbly.
  • Taste and season with additional salt and black pepper, if desired.
  • Remove from heat and stir in the scallions.
  • Transfer to individual plates and serve immediately.

Additional Ingredient Information for Pineapple Beef Stir-Fry

What is beef flank steak? It is a cut of beef taken from the abdominal muscles or lower chest of the steer. See the chart on this page for a visual idea.

What is tamari? This popular sauce used in Japanese cuisine is a type of soy sauce. Tamari sauce has gained popularity not only for its rich flavor but also because it is vegan and usually gluten-free. If you can’t find it at your local grocery store in the Asian foods section, you can order it from Amazon.

What are coconut aminos? This is also an alternative to traditional soy sauce. Coconut aminos is salty-sweet and has a buttery finish. It is made by fermenting coconut-blossom nectar and then blending it with sea salt. Again, if you can’t find it in your grocery store, you can find it on Amazon.

How do you know a pineapple is ripe? There are three signs that a pinapple is fresh and ready to use:

  1. Its crown is bright green.
  2. The rind is firm but yields to slight pressure.
  3. The base of the fruit has a fragrant pineapple smell.

pineapple chunks
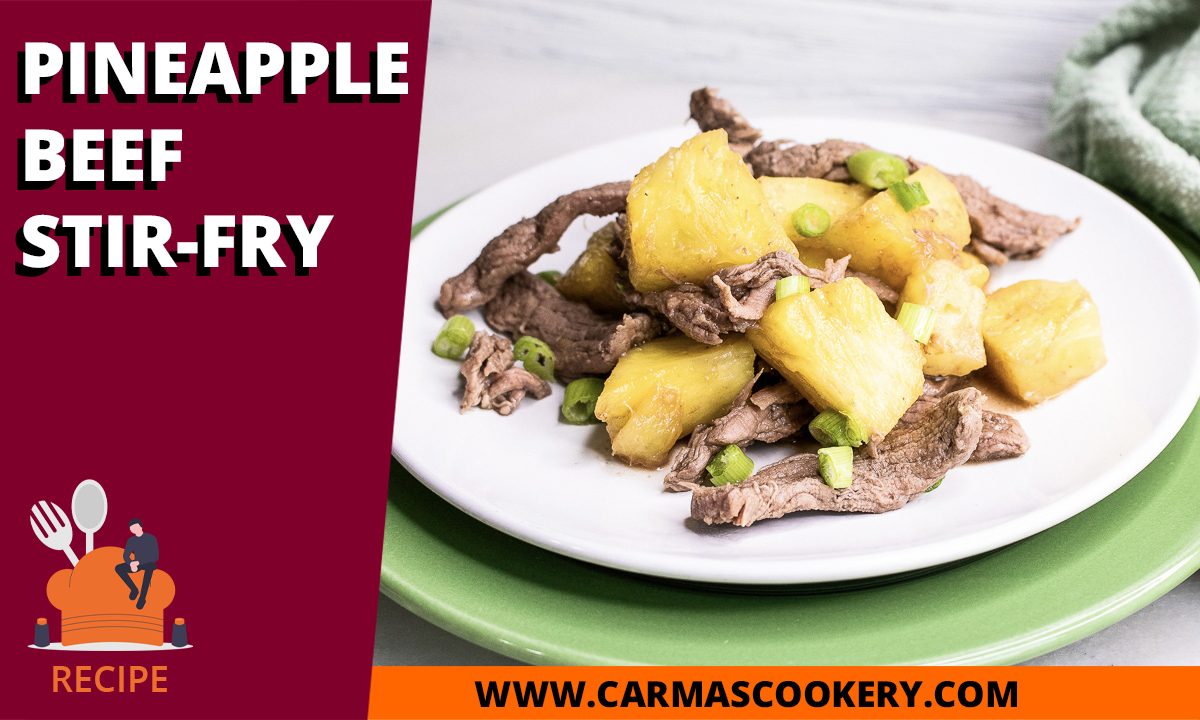
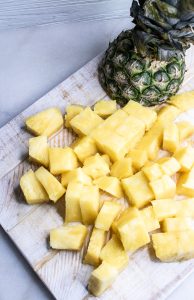
Don’t let the pineapple go unused for long — it can quickly get too ripe and start fermenting!

How do you cut a fresh pineapple into chunks? First, start by removing the pineapple’s inedible parts — the crown, skin, and eyes. Lay the pineapple on its side. Chopping off the crown and base. Stand it back up and cut the rind away in 1/2-inch strips, slicing from top to bottom. Now you’ll see the eyes — firm, brown circles embedded in the exposed flesh. To remove them, cut a V-shaped trench for each row of eyes, then pluck out that trench to remove them.

Now, with the pineapple still standing up, slice it in half, then into quarters. Lay each quarter on its side and slice out the core. Cut these de-cored wedges lengthwise into spears. Finally, chop the spears into smaller chunks.

Carma's Cookery Creative Cooking Tips

This dish is pretty good as it is, but you can still give it your own twist by adding touches or serving it with unique condiments. Here are some ideas I came up with:

  • Add in some shredded coconut. This can be added at the second step, so the coconut gets toasty. Or it can be sprinkled on top at the last step.
  • Season with a touch of curry powder in the second and fifth steps to taste.
  • Experiment using another alternative to soy sauce that tamari or coconut aminos. Options include fish sauce, Maggi seasoning sauce, or Worcestershire sauce.
The owner of this website has made a commitment to accessibility and inclusion, please report any problems that you encounter using the contact form on this website. This site uses the WP ADA Compliance Check plugin to enhance accessibility.