Are you looking for some kid-friendly vegetable recipes? Bella Cupcake Couture provides two creative options.
Creative Vegetable Recipes for Children
By the staff at Bella Cupcake Couture
When it comes to cooking, one of the greatest struggles is finding a vegetable recipe that is interesting and appealing for children. Knowing that vegetables are an essential aspect of proper nutrition, parents often have to find ways to make their kids want to eat vegetables as often as possible. So, if you’re looking for some creative ways to cook and present your vegetable dishes, you are in the right place. Here are some unique vegetable recipes that will surely unleash your kitchen creativity.
Kale Chips
If you’re tired of seeing your kids munch on a bag of unhealthy potato chips, take matters in your hand and make amazing kale chips as an alternative.
First, wash and dry the kale before removing the stems and cutting it into smaller, bite-size pieces.
Then, generously pour some oil to cover the kale and season it with your seasonings of choice. You can simply season it with some sea salt or go the extra mile and use either cayenne pepper, cinnamon, cumin, curry powder, chili powder, garlic powder, hot sauce, or maple syrup for added flavor.
Once properly coated with your seasoning of choice, place the kale on a baking sheet. Make sure not to overcrowd the pan and have some space in between pieces so that the kale comes out nice and crisp.
Place the pan in your oven to cook for about 15 minutes before stirring the pieces gently and let it completely bake until golden brown.
Popcorn Cauliflower
There is no doubt that kids love fried food. Taking this into consideration, here is how you can make popcorn cauliflower as an alternative for chicken. This can be an amazing movie snack or even a recipe good enough for lunch or dinner.
First, cut your cauliflower into bite-size florets.
To create the batter, mix a cup of buttermilk, ¾ cup of flour, 2 tablespoons of hot sauce, and a teaspoon of Kosher salt until smooth.
Simply dredge your cauliflower florets in the batter until fully coated. Make sure to let the excess batter drip off before rolling the pieces on some breadcrumbs for an added crunch.
Fry the cauliflower for about 2 to 3 minutes until golden brown. Let the popcorn drain on paper towels before serving with some ranch dressing.
Conclusion
Vegetables are an essential part of proper nutrition and a must for kids to grow as healthy as they can be. Taking this into consideration, it is important for parents to find creative ways to make vegetables feel, look, and taste familiar to their children. Hopefully, this article was able to provide you with amazing ideas for appealing vegetable recipes for kids.
[divider]
[one_fifth] [/one_fifth]
[four_fifth_last]
Enjoyed these vegetable recipes?
Want more baking hacks and tips? The pro bakers from Bella Cupcake Couture are happy to help you out. Go to www.bellacupcakecouture.com. [/four_fifth_last]
Sodium imbalance can cause several health concerns such as high blood pressure, osteoporosis, etc… However, all of this can be prevented with just one effective measure — replacing table salt with Himalayan pink salt. After all, a tablespoon of regular table salt contains around 2300 mg of sodium, which is the maximum daily limit. According to studies, an average person consumes salt all through the day. It is either used to add flavor to the food or added as a preservative.
Therefore, to prevent sodium imbalance, one needs to keep the overall consumption under check. You can do this by limiting processed foods like canned food, instant soups, pickles, and snacks like potato chips and salted nuts. In fact, even before you substitute table salt with Himalayan pink salt, you need to do some hardcore research. That’s because you need to have a thorough understanding of Himalayan pink salt and its health risks.
What causes Sodium imbalance?
Presently, a busy lifestyle makes it impossible to eliminate processed foods from your everyday diet. After all, canned foods and cereals are a way of life since those are time-saving, economical and easy to store. However, you must limit them as it contains natural preservatives like salt that can considerably increase sodium levels in the body.
So, it only makes sense to reduce the amount of sodium consumed through table salt. Therefore, health experts recommend substituting table salt with Himalayan pink salt, which is said to be lower in sodium and serves the same purpose. Doing this reduces the overall sodium intake and brings down the possibilities of health risks associated with it.
Do you need Sodium?
Despite all the health risks associated with sodium, it plays a critical role in several bodily functions. It regulates bodily fluids and influences blood pressure. Also, it influences the way nerves respond to a certain situation. Hence, eliminating sodium entirely from the diet or even reducing its intake considerably, can prove to be quite dangerous. Some health risks associated with low sodium levels include fatigue, bodily weakness, foggy mind, muscle cramps, etc… Conversely, overconsumption can lead to health issues such as kidney-related health concerns, hypertension, osteoporosis, etc… So, there is a sheer need to strike a balance and consume it in the right quantity.
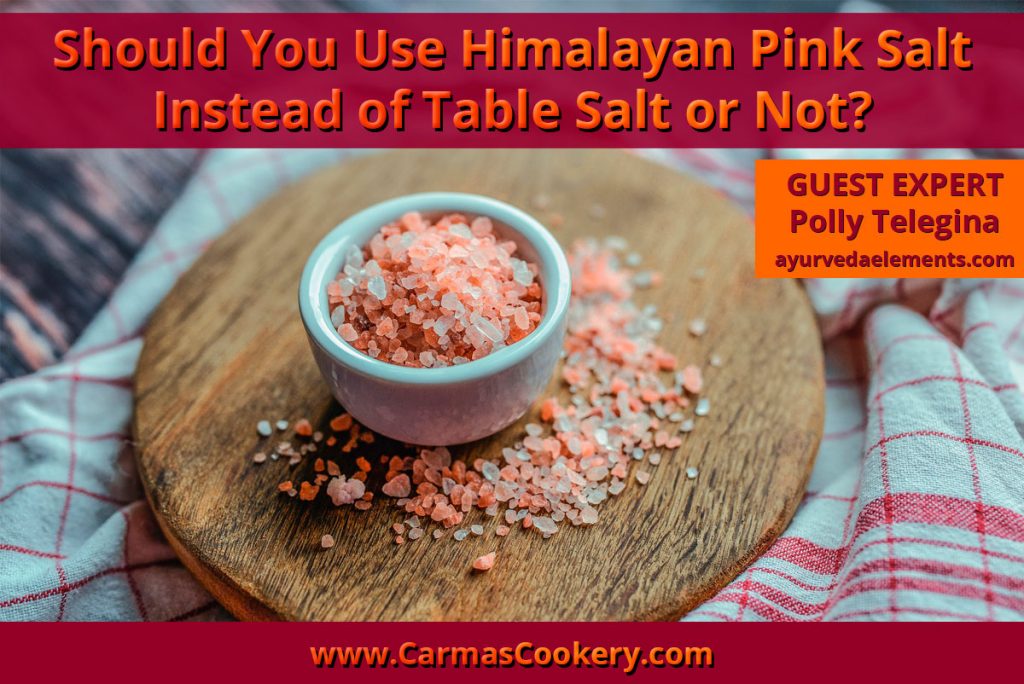
What is Himalayan Pink Salt?
Himalayan pink salt is a mineral-rich compound that was formed by the evaporation of shallow seawater, and intense geological pressure. These deposits have formed over a period of 250 million years. The Himalayan pink salt gets its name from its crystalline properties and the region where it is available — the Himalayas. Its pinkish hue is a result of over 84 trace minerals which make the Himalayan pink salt a nutrient-dense health food. It is a nutrient-dense food that contains calcium, iron, magnesium and several other beneficial nutrients. You can use it in everyday cooking or for seasoning your salads and add a mineral-packed punch to it.
The Himalayan salt is available in the form of chunks or blocks that can be used for cooking and other purposes. It can be powdered and substituted with regular salt or can be used in the form of ‘Sole’ which is made by dissolving these Himalayan pink salt chunks in water. You can then use it in your recipes without losing out on its nutrients. No matter how you use it, make it a point to avoid overconsuming it. However, the Himalayan pink salt is non-renewable, but since it is available in abundance, it can be mined for several hundred years. Currently, it is mined from the Salt Range in Punjab, Pakistan which extends to about 185 miles.
Himalayan Pink Salt Health Risks and Benefits
Himalayan pink salt’s health risks include sodium imbalance which can cause cardiac health issues, hypertension, and osteoporosis. Therefore, it must be consumed in moderation and while the maximum sodium intake limit is set to 2300 mg per day, it could be much lesser depending on pre-existing medical conditions. So, you need to have a word with your medical practitioner regarding the same.
Most Health Experts recommend substituting table salt with Himalayan pink salt because it is much lower in sodium and contains beneficial trace minerals. However, as in the case of table salt, it is strongly recommended that you limit it. When consumed in the right quantities, there are several health benefits that come with the Himalayan Pink salt such as electrolyte balance, balanced pH, increase in metabolic function, and stronger bones.
Although some Experts recommend eliminating all types of salts from the diet, we do not. That’s because sodium plays a pivotal role in regulating bodily fluids which is essential for the body. However, it does not taste like the regular table salt and you need to develop a taste for it before entirely substituting it with table salt. You could start by sprinkling some on your salads and fruits to feel the difference, and then replacing it with table salt. So, with a little compromise, you can greatly benefit from its mineral-rich properties. However, have a word with your General Physician before making the shift — especially if you suffer from depression, heart-related health concerns, hypertension or kidney-related issues.
[divider]
About Polly Telegina
I am a holistic health expert from Siberia. Ayurveda, yoga and Himalayan shilajit are the main areas of my knowledge. Deeply intuitive I find that true healing surpasses the boundaries of the physical body and embraces the emotional, energetic and subtlest layers of our being. I help people to know how to be healthy and beautiful using only natural remedies. I believe that nature is the best source of human health. To know more, check my blog about elements of Ayurveda.
[divider]
[one_third] [/one_third]
[two_third_last]
What is the secret to a long and healthy life?
It is in the food that we eat. As you well know, all foods are not created equal. Choosing and eating the right foods may help increase your life expectancy as well as the quality of your life.
I’ve created a quick and easy guide to 10 of the top power-packed foods designed to give you energy, vitality, and all-around good health. Incorporate these foods into your meals and you’ll improve your health.
[button3 size=”medium” color=”red_light” link=”https://www.carmascookery.com/free-guide/”] Download your PDF guide today! [/button3]
Settling down in front of the TV is a beloved American past time, and thanks to at-home streaming services like Netflix, TV has become more than just a Saturday night hobby. Getting ready for a night camped out on the couch takes some preparation if you want to get the most out of the experience. Whether you’re watching Rick and Morty or binging the latest season of Orange Is the New Black, the right snacks are essential for the optimal viewing experience. Why not make them healthy snacks?
Don’t settle for potato chips or an unsatisfying candy bar that’s over before it’s even truly begun; it’s time to master the art of TV snacking.
There are two facets of TV snacks that must be met for maximum pleasure: They have to be easy and quick to make (no more than 5 minutes of prep time) and they have to meet you halfway between healthy and delicious.
Healthy Snacks Idea #1: Home-popped Popcorn
You might think that buttery, calorie-loaded popcorn is one of the worst snacks, but it’s actually quite healthy when prepared properly. You don’t even need your own popper to prepare; just put three to four tablespoons in a brown paper bag and microwave for 2 to 3 minutes.
A cup of popcorn without butter is just 31 calories! Just lightly season with your preferred seasoning and prepare to munch and crunch with delight all evening!
Healthy Snacks Idea #2: A Cheese and Fruit Plate
Sounds fancy, right? Fruit and cheese are great healthy snacks. You can slice up an apple and use snack cheeses that are already wrapped in serving size portions, or you can buy a block and cut up your own.
Don’t be afraid to experiment and try pairing different fruits and cheeses like fresh pears and brie.
Healthy Snacks Idea #3: Pizza Bagels
Grab a pack of bagels from the supermarket, add some tomato sauce and a sprinkle of your favorite shredded cheese. Pop them in the oven and toast at 375 degrees F for 3 to 5 minutes. For some extra flavor, try everything bagels instead of plain.
Healthy Snacks Idea #4: Peanut Butter and Apples
Peanut butter is actually healthy in the right quantity. Scoop two tablespoons into a small bowl and slice up an apple to enjoy as a sweet treat. If you prefer your TV snacks more on the savory side, then grab some celery, lightly dust with salt, and dip into the peanut butter for a delectable contrast.
Healthy Snacks Idea #5: Roasted Chickpeas
If you like nuts, then roasted chickpeas are a great reduced fat alternative. Chickpeas are flavorful, high-fiber beans with a subtle taste that is truly brought out with a light coating of olive oil and some seasoning (rosemary is used in a lot of recipes, but try a mixed blend for some variety!)
You can find a great recipe for your own roasted chickpeas here.
Healthier TV Snacks for Everyone
Whether it’s pizza bagels that double up as a snack and TV dinner for the whole family or a tantalizing fruit and cheese spread for two, healthier TV snacks aren’t nearly as elusive and difficult to make as you might think.
The best way to make healthier snack choices is to look for alternatives that have the same consistency as the junk food you love. If it’s crunch you’re after, turn to vegetables. If it’s the sugary goodness of candy, then consider fruits. When it comes to cooking, you can ditch the butter and margarine in favor of healthy oils like sunflower or olive.
You don’t have to completely kick junk food to the curb, either. Sometimes, we just need to evaluate our portions and make sure we’re actually eating the recommended serving size of our favorite snacks instead of finishing a box in one sitting.
We hope these five snacks will put you on a path toward healthier eating in front of the TV. Happy viewing!
About the Author
Katrina is on the content team at www.householdappliancejudge.com. She can be found around the web writing about health, nutrition, relationships, family and other lifestyle concerns. Katrina enjoys cooking, comedy and spending time with her adorable (but exhausting) young family.
[divider]
[one_third] [/one_third]
[two_third_last]
Take Charge of Your Health!
Changing your eating habits can be tough. But it doesn’t have to be if you take a little time to think it out and create a plan.
This Healthy Eating Worksheet will walk you through the process of creating a healthy eating plan. All you need to do is print it out, set aside some time to complete it, and then fill it out. Then you can create your plan, knowing that you have addressed potential obstacles and came up with some creative ways to handle them.
Olive oil is a traditional cooking commodity. It is known mostly in the Mediterranean diet world, but has since been used as a healthy cooking oil alternative, and has appeared in many restaurants and stocked the shelves in grocery stores. There is olive oil and extra virgin olive oil, which has a lower acidity and is said to have more flavor. Olive oil is used mainly for cooking but has also been used in beauty products such as scrubs, soaps, and cosmetics.
Guest Post by Sarah Jones
Benefits of Olive oil
Olive oil is known to be rich in monounsaturated fatty acids. Created by pressing whole olives, this oil is said to have some excellent benefits. These types of acids are healthy alternatives to trans fats and saturated fats. Olive oil and its components are meant to aid in the prevention of cardiovascular issues like stroke, high blood pressure, and high cholesterol. It is also said to help reduce inflammation and reduce problems associated with the lining of particular blood vessels.
Pricing
Olive oil is usually reasonably priced. It can be found in most supermarket stores. Oil that is an extra virgin or that is highly refined can be a bit more expensive, but the flavors of these types are said to be more robust. Europe has a vast region dedicated to growing olives to produce oil, and if crops are affected by disease or inclement weather, it can influence the pricing of the oil. Other oils can be substituted, but some will be higher priced, such as truffle oil. Olive oil is easy to find and is priced well for consumers.
Appearance
Olive oil is usually in a container that is glass or plastic. It should be a green color, and you should be able to see through it. Try to avoid oil that is very yellowish. Cloudiness in the oil is acceptable, as this might mean that it is unfiltered. The labels on the bottles should tell you this, and also if it is virgin or extra virgin olive oil.
Cooking with Olive Oil
The primary use of olive oil is for cooking purposes. People use oil to fry or to cook fish or vegetables. Some drizzle the oil over pieces of bread or on salads too. It is a popular butter-replacement choice and is also used in mashed and on baked potatoes. Olive oil can be added to certain sauces to create an excellent flavor. It can also serve as a healthy substitute for other ingredients. Stir Frying or pan-frying vegetables with olive oil is commonly done, and you can also use a little over eggs and toast or drizzle some over rice. It is used in many different recipes and can add moisture and flavor to make an incredible meal.
Quantity
Olive oil can be used in specific quantities to reap the maximum health benefits. If recipes call for more or less, then use the recommended amount to make your meal properly. The U.S. Food and Drug Administration suggests that two tablespoons per day are the recommended amount. It is a recommended quantity, not a requirement. You can get your two tablespoons by cooking with the oil, using it on your salad, in a smoothie, in soup, or any other way you need for your meals.
Olive oil should be used in moderation in your cooking and your meals. Too much of it may ruin not only the taste of your food but also may cause some issues, as it increases the amount of the oil that your body isn’t used to. Recipes may call for specific amounts of the oil, and that should be followed. Avoid drowning all your food items in it. A few tablespoons on your food or in your cooking can boost the flavor and deliver some excellent health benefits.
About the Author
Sarah writes for Simmer and Zest. She loves to cook, but she also likes to dig deeper and find out how to make the most out of one’s kitchen.
One of the reasons we crave chocolate is that when we eat it, serotonin, a neurotransmitter responsible for better sleep and moods, floods our brain. This helps reduce anxiety and increases our sense of well-being. But if you suspect your chocolate intake is a little too excessive, this same relaxing and rejuvenating brain bath can also be accomplished by drinking juices and smoothies.
By consuming smoothies and juices you will provide your body with an abundance of vitamins, minerals, and enzymes while at the same time satisfying your taste buds so, maybe then, you won’t need so much chocolate.
Juices and smoothies made with fresh, ripe fruits and vegetables are so satisfying and can be made in unlimited combinations. There is a smoothie or juice to please every member of the family. There is so much to learn and discover about this new way of life. Just get yourself a high-speed blender and a juicer and you’ll be ready to begin.
Juicing Is Easy
You don’t have to buy the most expensive juicer to make delicious and nutritious juices. Even the most basic model will work. And the clean-up is simple and fast. A lot easier than cleaning up after cooking! Here is one simple and spectacular juice that I love.
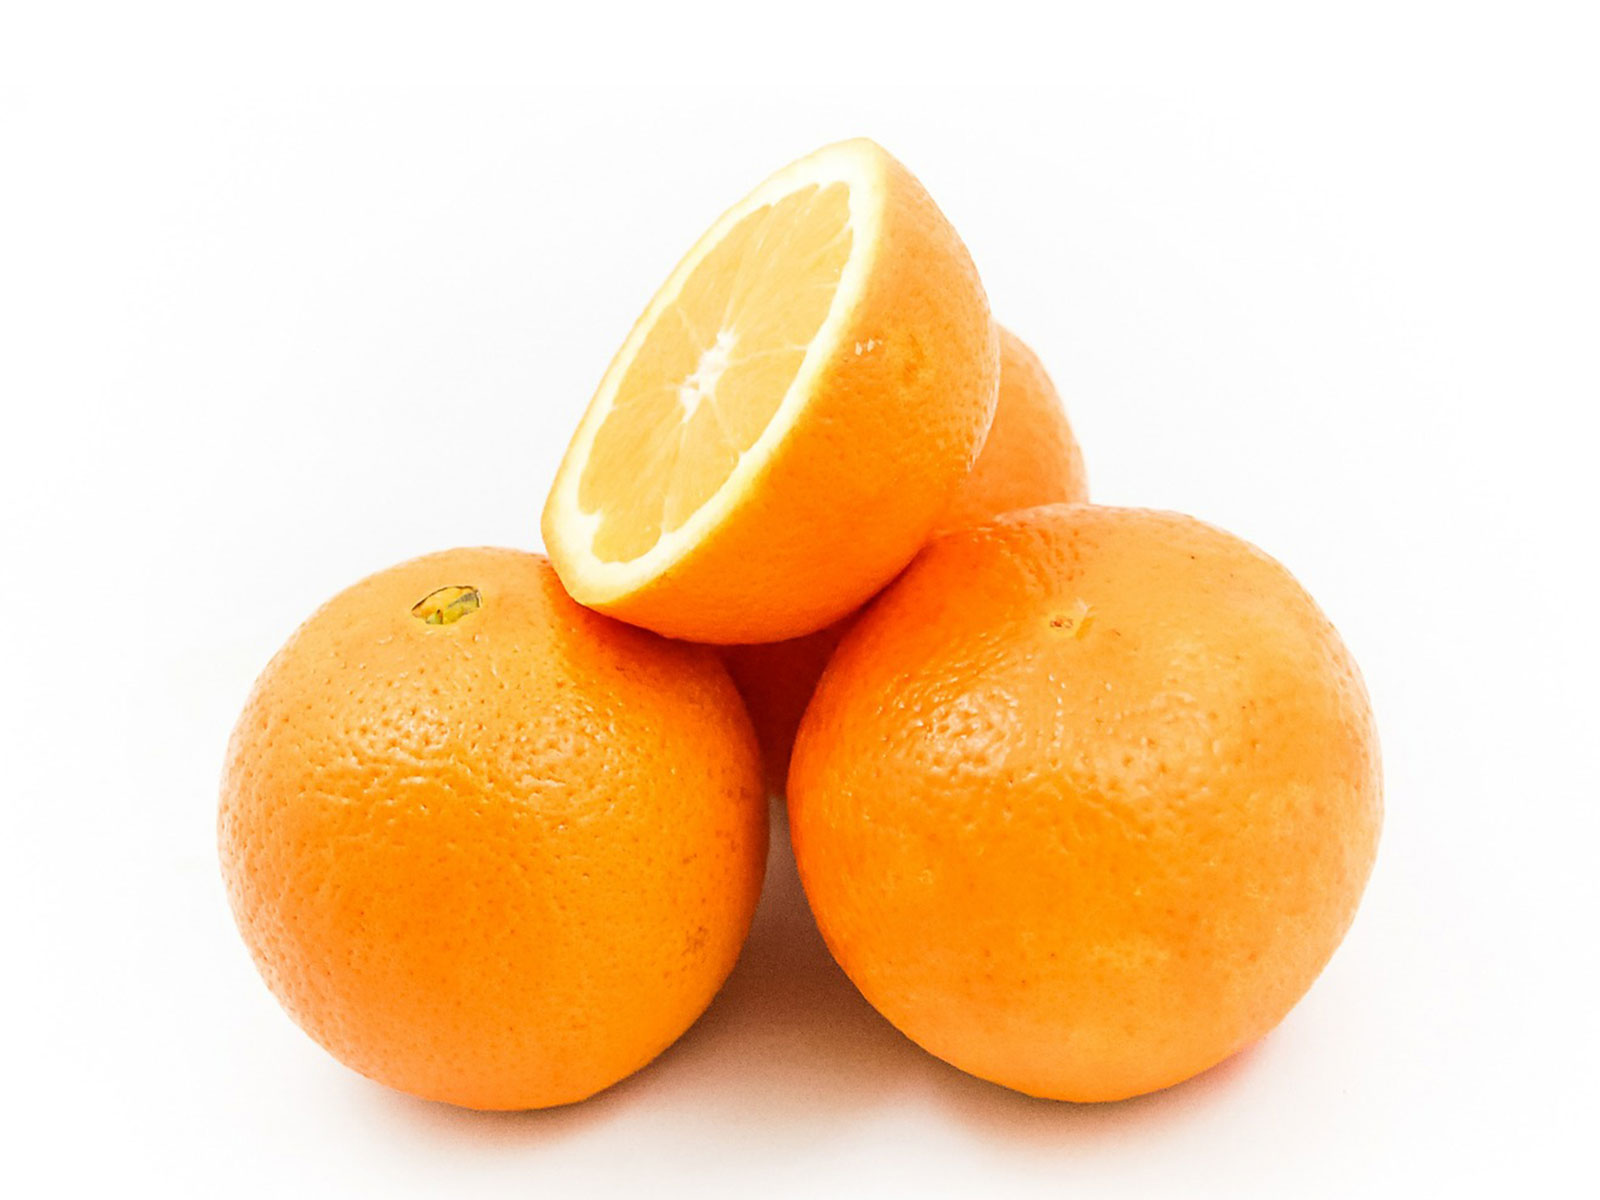
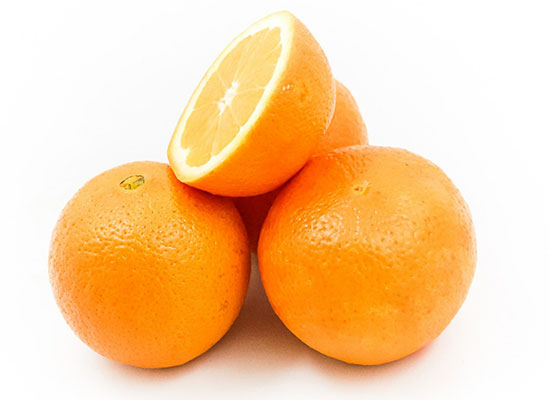
Mother Nature’S Orange Julius
Peel only the orange rind from navel oranges. Leave the pith (the white stuff around the orange) as it will make the juice delicious and frothy. Place the oranges in your juicer and within seconds you will have a glass of the most refreshing orange juice ever.
This next juice combination I learned from watching, “Fat, Sick and Nearly Dead” with Joe Cross. His website is a treasure trove of information about juicing and its benefits and contains hundreds of delicious recipes.
World Famous Green Juice
One bunch of Kale
One large stalk of celery (4-6 ribs)
One large cucumber (it’s okay to leave it unpeeled)
3-4 apples cut into quarters
One lemon peeled but with the pith left on
One chunk of fresh ginger (about the size of your thumb)
Juice together and drink. It is somewhat of an acquired taste so try it a few more times until you can feel the energy of the veggies zipping through your body and brain.
A high-speed blender is another fantastic kitchen appliance and a wise investment in your family’s health. Blending together different combinations of fruits and vegetables is a never-ending adventure. For my family, when it’s really hot outside, sometimes a smoothie is all the meal we need. You know the exact ingredients that will please your family so keep experimenting and have fun. Here are two of my favorite smoothies:
Sunshine Smoothie
Frozen bananas broken into small chunks
Frozen or fresh pineapple pieces
Frozen or fresh mango chunks
Add orange juice, coconut water or plain water until you get a creamy consistency.
Blend for about 30 seconds on high and enjoy!
Purple Pineapple Smoothie
One cup frozen pineapple chunks
One cup frozen blueberries
Cover with apple juice
Blend on high speed for 30 seconds.
(If you like it a little sweeter you can add a tablespoon or two of agave and blend quickly again.) Yum!
And Now… Chocolate!
Chocolate is one of the most famous foods on the planet. All around the world it is loved and coveted by millions of people. Having a craving for chocolate is practically universal. So let’s make a Chocolate Banana Smoothie!
Chocolate Banana Smoothie
Place in your high-speed blender:
Two frozen bananas broken into pieces
One teaspoon vanilla extract or vanilla powder
Four pitted dates or 2 T. maple syrup or 2 T. agave
3 T. unsweetened cocoa powder
Cover all ingredients with your favorite milk and blend until smooth.
Voila, a fabulous, satisfying, chocolate creation that your body will love. Whip it up and relax and read while drinking your smoothie. You deserve it! And in my opinion, life doesn’t get much better than this.
About the Author
Katrina is on the content team at www.householdappliancejudge.com. She can be found around the web writing about health, nutrition, relationships, family and other lifestyle concerns. Katrina enjoys cooking, comedy and spending time with her adorable (but exhausting) young family.
A pie is a pastry dough that is baked either in the oven or a baking pit. It may contain various fillings of sweets, veggies and meat. Pies are differentiated by the kind of crust that they have. A bottom crust or filled crust has a pastry lining at the bottom of the pan with fillings placed on top of it. The top portion is left open to bake and only serves to encase the upper ingredients by holding it together.
The top crust pie or cobbler has the fillings at the bottom of the pan, with the crust covering the filling before baking. The two-crust pie, on the other hand, has a pastry lining at the bottom and a pastry cover on top – before baking. Pastries normally use a flaky type of pie crust for that crunchy bite. The ingredients for flaky types can include crumbs, mashed potatoes, and baking powder and so on.
What is gluten?
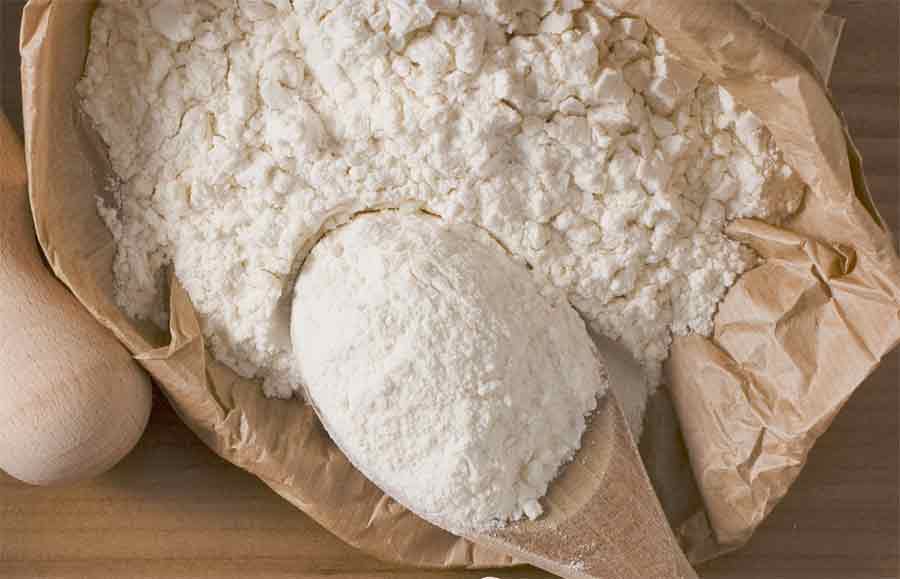
Gluten is a product that comes from wheat, barley, rye and other grains that when mixed with the dough makes the dough rise and become elastic. Gluten is a source of protein and is generally used as an additive in many baking recipes.
Gluten is used in baking dough for pizza, bagels and in most pastries. Breads are generally high in gluten with pastries having less amounts of it. Kneading and moisture can enhance gluten development that makes for chewier products.
The amount of the gluten in flour is normally measured by use of a farinograph. This is a baker instrument that measures the quality of the flour that is used for baking.
Health hazard of gluten
Gluten is an All-American food and food additive. It is found in pizzas, breads, pastries and most processed food. What people do not know is that a continuous intake of gluten can be harmful to the body.
Medical studies have shown that you do not have to have a full blown celiac disease and positive intestinal biopsy to have serious problems from eating gluten foods. It has been observed that people with celiac disease runs the risk of higher death rates from heart diseases and cancers.
In-depth studies made from 1969 to 2008 showed that – 39% increase death rate is encountered by those with celiac disease; 72% increase mortality rate with people suffering from gut inflammation related to gluten intake, and; a 35% increase risk of death of those with gluten sensitivity but no celiac disease.
The vast majority of people who have problems with gluten sensitivity are not even aware of it. They misdiagnose their ailments as due to something else, not gluten intake.
A new development now has arisen towards a healthier lifestyle that includes eating gluten-free food. One favorite snack in most homes is the number of variations in home-made pies. To make this favorite snack a healthy alternative, gluten-free pie crust are being bannered in the internet sites and online medical journals for its health efficacy.
How to make gluten-free pie crust
Using gluten-free pie crust can be done two ways. First, you can make your own by following a number of online recipes, and; second, is you can prepare a crust from a pre-mix. An example of the latter is the Gluten Free Pantry’s Perfect Pie Crust Mix. There are other varieties that you can buy from any groceries or Whole Food store in your state.
It is hard to taste any difference between the regular crust and the gluten-free crust. In most instances, they taste the same. But if you look closely, and savor the gluten-free crust, the reason is simple enough — it tastes better.
Gluten makes the dough rise and make it ‘doughy’ or soft and heavy. Pies should not look nor taste ‘doughy’. It should be tender and flaky, unlike breads and cakes. Pie crust has a fair amount of shortening and very little liquid. The ingredients are only mixed to combine them, hence less gluten for this product.
Uses of gluten-free pie crust
Gluten-free pie crust can be used for a variety of fillings. It can be used for quiche, tarts or for all types of pies.
Gingerbread cookies – the gluten-free pie crust can be made into gingerbread cookies during the Christmas holidays, graham crackers, and even the festive Gingerbread houses.
Pecan nut pie crust – a delicious pie crust most especially used for pumpkin pie and custard/pudding fillings.
Cookies – a source of enjoyment for the kiddies on the prowl are homemade cookies made from gluten-free dough. You can make the dough yourself, or can buy it from the nearest stores.
The gluten free pie crust is the new wave of eating pattern that is healthy and good for the body. It is a new concept wherein you think not of only of what taste good; but, what taste healthy and keeps you alive as well!
About the Author
The author, Consolacion S. Miravite, is a Certified Public Accountant, real estate broker, trader, accounting professor, lead farmer, freelance writer and blogger. She has written for various publications and agencies from around the world – United States Asia, Europe and Asia on topics that ranged from: Finance, Accounting, E-marketing, Internet, Computers, Product Reviews, Relationships, and Crafts among others.
Create Your Own Unique Pie!
Does pie making daunt you? Are you wary of deviating from any pie-recipe you find, for fear that you’ll ruin the flavor of the resulting pie?
It doesn’t have to be that way!
Pie-Palooza 2017 is brought to you by Your Perfect Pie, a cookbook that breaks down pies into easily made component parts so you can unleash your pie-making creativity. Available on Amazon in both print and Kindle formats. Grab your copy today and start creating your perfect pie!
CC BY-SA 3.0, https://commons.wikimedia.org/w/index.php?curid=205908
By Edith Freni
Imagine, if you will, that Turkey Day is fast approaching and you’ve been put in charge of pie. Most people would consider two options in this situation:
hit the local bakery and purchase a pie for too much money or
run to the supermarket where a pre-made, no-frills pie crust awaits, rock solid and freezer-burned, next to a bag of frozen strawberries.
For those of you who think that all pastry work is seriously labor intensive, that it involves a laundry list of ingredients and hours of thankless rolling, kneading and sweating, I offer sweet salvation. Forget the bake shop and the freezer section. This year, you’ll wow the crowd with a scratch pie, made with love and fresh from your own home kitchen.
Photo by Kellen via Wikimedia Commons, CC BY-SA 3.0
Not All Pastry Is Puff Pastry
Puff pastry is war. Pie dough is peacetime prosperity. Pie dough is free and easy. Pie dough is light and crispy. Pie dough is buttery and sweet. Pie dough is what you need to make pie and pie is what you need in order to make it through two plates of dry turkey meat and a mountain of peas and carrots. If there were no such thing as pumpkin pie, I would sleep through the holidays. If there were no such thing as blueberry pie, I would cease to consider Maine a worthwhile state. If there were no apple pie, I would refuse to acknowledge fall as a season.
Simply put, were there no pie, I might die. Praise be to the all mighty! There is pie, so I’m a’ livin’! I need pie. Pie is my friend. Pie needs a good solid crust to hold it up. Crust is pie’s friend. If crust and pie are friends and pie and I are friends, then crust and I are friends as well and we must learn to work together.
Not All Dough Needs the Knead
Pie dough makes pie crust. You make pie dough. You use your hands very sparingly or you don’t use your hands at all. You’re confused. “Edith,” you ask with brow furrowed “we’re talking about dough here right? Doesn’t dough need the knead?” Bread dough does, I answer because bread dough needs its gluten activated.
Gluten (or Glutenin) is one of the many proteins contained in wheat. It’s a spastic elastic substance that, when activated, helps to contain the gas bubbles created by a leavening agent such as yeast.
Activated gluten + yeast = the squishy, spongy texture and signature chew that you covet in freshly baked breads. Almost all flours on the market (and there are more than you think) contain gluten. Some have a lot of it — good for spongy, yeasty breads. Some have a little — good for cakes, pies, quick breads and people who suffer from Dermatitis Herpetiformis.
So why can’t you get touchy feely with pie dough? Because we’re working towards layers here, not sponge and more likely than not, you’ve got sweaty palms, especially if you’ve been in the kitchen all day. Overworking dough with hot paws will activate the glutens. With no leavening agent to puff it up, your dough will begin to shrink during cooking. As it shrinks, it hardens and as it hardens, it cracks.
When you remove your pie shell from the oven, you will be left with nothing more than a giant, tasteless cracker. Your goal is to create tiny, super flat layers that, when baked, will separate just enough to create flakes.
The way to get these layers is by “cutting” your fat into your flour. When you cut (as opposed to knead) you get what is basically a bowl full of tiny flour-coated pieces of fat. In the end, you’ll add liquid to bring it all together but ultimately, each one of those little pieces is a separate entity.
When you finally roll out your dough, these pockets get pressed out on top of each other, creating the desired layers. This process gives you what is known throughout all the world’s most elite baking circles, as “Medium Flake” pastry. You’ll often hear people refer to “Short Crust” pastry, as well, when talking pie.
The differences between the two are minimal and normally have to do with proportions and the type of fat used. Butter or lard will yield a shorter (a.k.a. richer and more tender) crust than vegetable shortening. I like a medium flake crust for juicy fruit pies, as they tend to be sturdier. But as with much in life and cooking, it all boils down to personal preference.
Bottom line: hands off! If you must touch the dough, use your fingertips, as they don’t get as hot as the rest of you. In fact, lightly fluffing the dry mixture with your fingers will aerate the flour, add a nice puff to the crust, and aid in separating the layers.
But under no circumstances are you to knead! You can purchase a nifty pastry cutter at any kitchen supply store or better yet, save the cash, dip into your silverware drawer and pull out two dinner knives. Hold one knife in each hand with the blades facing in towards the middle of the bowl and, keeping the blades parallel to each other, cut through the flour and fat over and over again until your mixture resembles coarse corn meal. Now it’s time to get wet.
Liquid Love
Some pastry dough recipes advise the use of cold milk but I have always preferred ice water. This is purely a taste thing. We all know how milk can start to absorb odors when it’s been in the fridge for a while.
Personally, the thought of my peach pie tasting vaguely like scallions and cilantro isn’t so appealing. Use water and you’ll never have this problem. Regardless of what liquid you use, remember that it should always be ice cold. This will help maintain the integrity of your cold fatty pockets (yum!) and keep that gluten lazy.
To incorporate the water, create a small well in the center of your dry mix and add it a tablespoon at a time, stirring with a fork until a soft ball of dough begins to form around the tines. Add just enough water to pull everything together. Quantity will vary but in general, about ¾ cup should be enough for a two-crust pie recipe.
The Big Chill
We’re about to hit a fork-in-the-road moment. Are you ready? Here goes: you don’t technically have to chill your dough. Just like you don’t technically have to avoid touching it. But you’re a scratch pie virgin so why not get it right the first time before you start to improvise?
Chilling the dough for at least two hours (and overnight, if you can) relaxes the gluten even more which will ensure tenderness and enhance flavor. However, if you’re short on a time, a rest of twenty to thirty minutes should do just fine.
Stop, Drop and Roll
A good rolling pin is a necessity for any well-outfitted kitchen. If you cook and bake with semi-regularity, you must have one. A nice old-fashioned wooden pin will run you anywhere from $3-$10. For a few extra bucks, you can get a stainless steel or marble pin that will help keep your dough cool while you roll it.
Make sure the pin has a nice heft. The heavier it is, the less pressure you’ll need to apply and the less likely you’ll be to roll the dough too thin. If you don’t have a pin and, for whatever reason, refuse to buy one, you can use an empty wine bottle or any other clean, easy-to-wield, long cylindrical object.
Your work surface should be ample; at least big enough to accommodate a circle of dough slightly larger than a pie plate. If you’re lucky enough to have an Italian marble-top island in the middle of a newly remodeled, modern stainless steel kitchen on the first floor of your $9 million, multi-level SoHo loft, you can use that. Otherwise, there are many options available. Good marble pastry boards can cost upwards of $50 but they’re beautiful and last forever.
Also, they stay cool and are naturally non-stick. Wooden boards are just as expensive and not as effective for working with fragile pastries since you’ll need to use a fair amount of flour on the board to keep your dough from adhering to it.
A fiberglass coated, silicone baking mat is another good option but, yet again, a pricey one. When all else fails, just use your kitchen counter top. So long as it’s spotlessly clean, there’s nothing really wrong with this method and I employ it myself.
Dust both your work surface, and your rolling pin with a small amount of flour. If the dough has been chilling for more than an hour, let it rest at room temperature for about 15 minutes or else you’ll have a heck of a time working with it.
Roll the larger half first, since it’s going to be lining the bottom of your pie plate. Roll from the center out, in every direction, making sure not to press over the edges. You may rotate the dough a few times and add a little more flour to the work surface if it begins to stick.
Do not ever “pull” at the dough, it will only pull back. Remember, you’re not making a pizza. The finished dough should be about 1/8″-1/4″ thick and 2 inches larger in diameter than the pie plate.
You do not need to grease a pie plate. There is more than enough fat in the dough to keep it from sticking. Fold your rolled dough in half, lift gently into the plate, unfold and pat into position. There should be a nice amount of overhang. Don’t cut it off as you’ll need it to build up your edge.
Place the pie plate back in the fridge and let the crust rest while you roll out the top half. When you roll out your dough, you give those glutens a wake-up call; by letting it rest in the cold for another couple of minutes, you will put them back to bed.
Roll out your top crust, fill the bottom and drape the top over the filling. Pinch the edges of the two crusts together and then fold the overhang back up, squeezing a little to secure as you rotate the plate. Poke a few holes in the top crust with a fork so that the steam will have some place to go and allow the pie to rest in the fridge for another 5-10 minutes before baking.
Depending upon the type of pie you’re making, you may need to blind bake your crust. All this means is that you will pre-bake your crust before you fill it. Pies made with cooked custards and fillings (lemon, chocolate, coconut, etc…) need to be fully cooked ahead of time.
Most pumpkin pie recipes will require a ten-minute browning of the crust but don’t need to be baked completely since the pumpkin custard requires additional cooking time. There are a few pitfalls with blind baking but they’re pretty easy to avoid.
To avoid puffing, shrinking and splitting (OH MY!), you can either cover your pastry with a sheet of parchment and fill with dried beans or use ceramic or metal beaded pie weights. You can purchase pie weights and parchment paper at most kitchen supply stores.
Be Gentle, Keep Cool, Leave It Alone
Making anything from scratch is a daunting yet thoroughly satisfying endeavor. Not only does it make you feel good about yourself, but the food you prepare will almost always taste far superior to what you once paid a machine to cook for you.
Follow the three golden rules of pie dough (they’re listed above) and after a little trial and error, you’ll be guaranteed golden, flaky crust for the rest of your pie making days.
About the Author
Edith Freni is a playwright, essayist, ex-amateur boxer and lover of all things edible. She invites you to visit her online at www.edithfreni.com.
Create Your Own Unique Pie!
Does pie making daunt you? Are you wary of deviating from any pie-recipe you find, for fear that you’ll ruin the flavor of the resulting pie?
It doesn’t have to be that way!
Pie-Palooza 2017 is brought to you by Your Perfect Pie, a cookbook that breaks down pies into easily made component parts so you can unleash your pie-making creativity. Available on Amazon in both print and Kindle formats. Grab your copy today and start creating your perfect pie!


 I am a holistic health expert from Siberia. Ayurveda, yoga and Himalayan shilajit are the main areas of my knowledge. Deeply intuitive I find that true healing surpasses the boundaries of the physical body and embraces the emotional, energetic and subtlest layers of our being. I help people to know how to be healthy and beautiful using only natural remedies. I believe that nature is the best source of human health. To know more, check my blog about
  [/one_third]
 You might think that buttery, calorie-loaded popcorn is one of the worst snacks, but it’s actually quite healthy when prepared properly. You don’t even need your own popper to prepare; just put three to four tablespoons in a brown paper bag and microwave for 2 to 3 minutes.
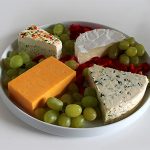 Sounds fancy, right? Fruit and cheese are great healthy snacks. You can slice up an apple and use snack cheeses that are already wrapped in serving size portions, or you can buy a block and cut up your own.
 Grab a pack of bagels from the supermarket, add some tomato sauce and a sprinkle of your favorite shredded cheese. Pop them in the oven and toast at 375 degrees F for 3 to 5 minutes. For some extra flavor, try everything bagels instead of plain.
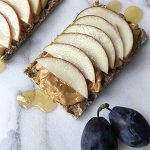 Peanut butter is actually healthy in the right quantity. Scoop two tablespoons into a small bowl and slice up an apple to enjoy as a sweet treat. If you prefer your TV snacks more on the savory side, then grab some celery, lightly dust with salt, and dip into the peanut butter for a delectable contrast.
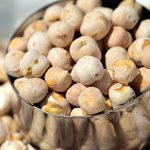 If you like nuts, then roasted chickpeas are a great reduced fat alternative. Chickpeas are flavorful, high-fiber beans with a subtle taste that is truly brought out with a light coating of olive oil and some seasoning (rosemary is used in a lot of recipes, but try a mixed blend for some variety!)
 Katrina is on the content team at
  [/one_third]

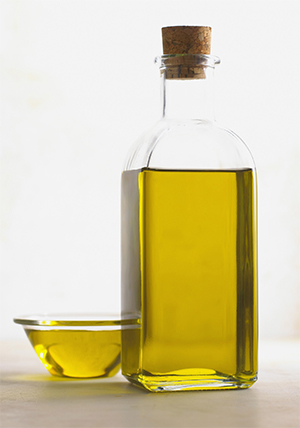 Olive oil is usually in a container that is glass or plastic. It should be a green color, and you should be able to see through it. Try to avoid oil that is very yellowish. Cloudiness in the oil is acceptable, as this might mean that it is unfiltered. The labels on the bottles should tell you this, and also if it is virgin or extra virgin olive oil.

 The author, Consolacion S. Miravite, is a Certified Public Accountant, real estate broker, trader, accounting professor, lead farmer, freelance writer and blogger. She has written for various publications and agencies from around the world – United States Asia, Europe and Asia on topics that ranged from: Finance, Accounting, E-marketing, Internet, Computers, Product Reviews, Relationships, and Crafts among others.
 Does pie making daunt you? Are you wary of deviating from any pie-recipe you find, for fear that you’ll ruin the flavor of the resulting pie?