Categories
Recipes

Apple Crumble

I have a soft spot for Apple Crumble (and Apple Crisp) because it is one of the recipes my teacher used in my first cooking class in high school. However, it can be high in sugar, carbs, and other ingredients that many people today are trying to avoid. So I offer you this treat.

One taste of this delicious dessert and you’ve won’t believe it is both gluten and refined sugar-free. The addition of fresh thyme adds a subtle savory note to the otherwise sweet flavor profile of this classic recipe.
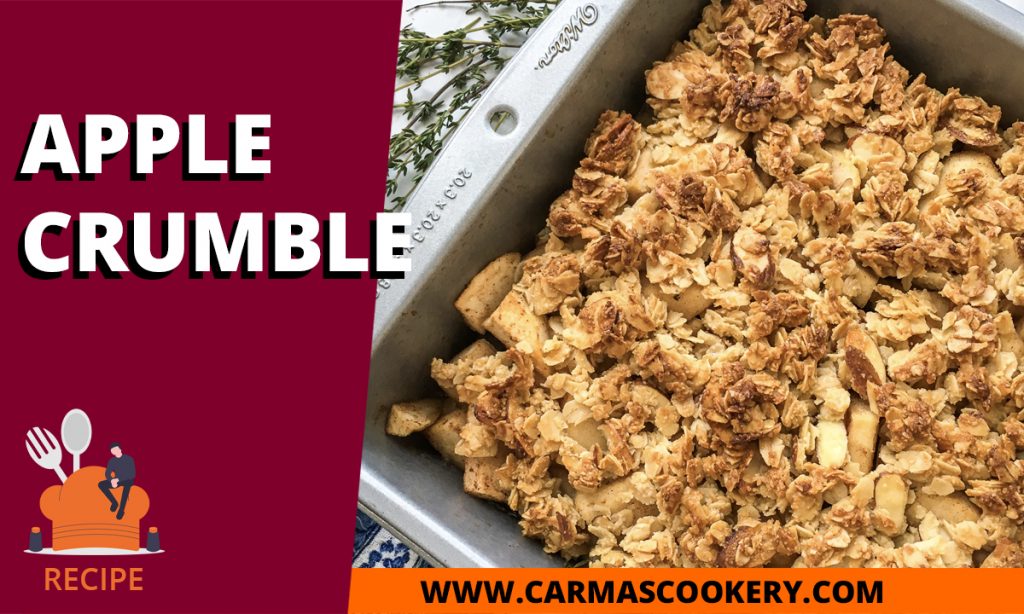
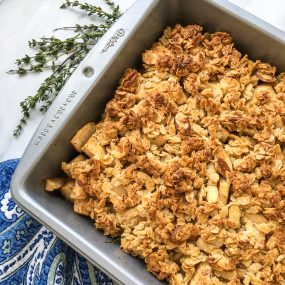
Apple Crumble

Apple Crisp
Print

Apple Crumble

A gluten- and sugar-free recipe.
Course Dessert
Cuisine American
Keyword apples, dessert
Prep Time 20 minutes
Cook Time 50 minutes
Servings 6

Ingredients

  • 6 large apples, cored, peeled, and sliced
  • 1 Tablespoon fresh lemon juice
  • 1/3 cup real maple syrup
  • 2 Tablespoon 100% apple juice, sugar-free
  • 1 teaspoon ground cinnamon
  • ½ teaspoon ground allspice
  • teaspoon fresh thyme leaves
  • ¼ teaspoon salt

Topping Ingredients:

  • 1 cup old-fashioned rolled oats
  • 1/3 cup almond flour
  • 1/3 cup almonds, sliced
  • 1/3 cup honey, preferably local
  • 3 Tablespoon unsalted butter, melted

To Serve: (Optional)

  • Vanilla bean ice cream or freshly whipped cream

Instructions

  • Place top oven rack in the center position and pre-heat oven to 350°F. Grease an 8” x 8” baking dish and set it aside.
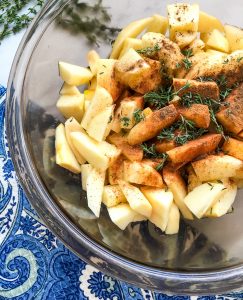
  • In a large non-reactive bowl, toss apples with fresh lemon juice.
  • Add maple syrup, apple juice, cinnamon, allspice, thyme leaves, and salt. Toss to combine and set aside.
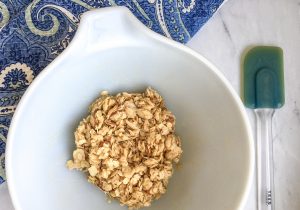
  • In a separate bowl, combine topping ingredients and stir until oats are thoroughly coated and all ingredients are well combined. Set aside.
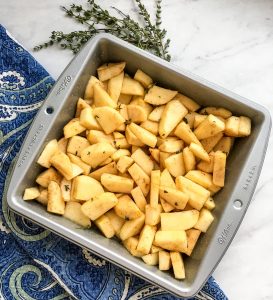
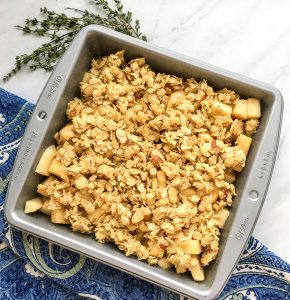
  • Pour apple mixture into the prepared baking dish and spread into an even layer.
  • Spread the topping evenly across the top in a uniform layer, as well.
    Apple Crisp ready to bake
  • Place into the preheated oven and bake for 30 minutes. If the top layer is nicely browned, cover the dish loosely with aluminum foil to prevent over-browning.
  • Continue baking for another 15-20 minutes or until the apple crisp is nice and bubbling. Remove from the oven and set aside to cool for 5-10 minutes.
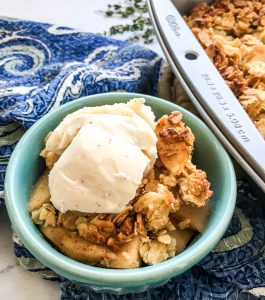
  • Serve warm with some vanilla bean iced cream or freshly whipped cream, if desired.
    Apple Crisp with Ice Cream on top

Tip: Choose firm apples, such as Granny Smith or Pink Lady, for this recipe. These varieties will hold up well to the heat of baking without turning to mush. Read my apple tips on the page for Cinnamon Baked Apples.

What is the difference between an Apple Crumble and an Apple Crisp?

If you’re a Brit, Aussie, or Kiwi, then you are probably asking this question because in the UK, Australia, and New Zealand, the term “Apple Crumble” refers to both. However, here in the United States, as well as in Canada, we make a distinction between the two desserts.

An Apple Crisp, also called an Apple Streusel, is made with a streusel topping. Streusel is made by cutting together a fat, usually butter, some flour, sugar, and more often than not, some cinnamon. The topping is crumbly and sweet. If you use a leavened flour, such as Bisquick (which is my go-to), then it puffs up a little, as well.

An Apple Crumble, on the other hand, has a topping made from rolled oats and brown sugar. In this recipe, I use honey instead — thus removing the refined sugar.

Interestingly enough, if you try to look up the history of the Apple Crumble, you find a lot of information about the Apple Streusel, which was invented in Britain around World War II. Other related dishes include:

  • Apple Cobbler, which has a biscuit topping
  • Apple Brown Betty, which has a buttered bread topping
  • Apple Pandowdy, which has a pastry topping

All are related to the Apple Pie.

From what I could gather in my research — and I’ll have to dig deeper at a later time — is that most of these recipes were created out of something akin to necessity. The cook didn’t have the ingredients to make an apple pie, so they invented something that worked with what they did have. That is how much kitchen creativity happens — taking a look at the ingredients on hand and pulling them together in new ways.

Creative Cooking Tips Banner

Wondering how you can unleash your kitchen creativity on this recipe while preserving its gluten-free and processed-sugar-free qualities. Here are a couple of ideas:

  • Try molasses instead of honey. Molasses is made from brown sugar, so you’ll get a bit of the recipe’s original qualities. However, it will be less sweet than honey or brown sugar.
  • Try a different gluten-free flour. You can substitute almond flour with oat flour, buckwheat flour, cashew flour, or sunflower seed flour. You can also experiment with coconut flour, but it will change the flavor profile significantly enough that you’ll need to play around with other ingredients, as well.
  • Substitute the allspice for cloves. They have very similar flavor profiles.
  • Use another natural syrup instead of maple syrup. Molasses is a good choice. You can also try out honey or agave nectar.
Categories
Product Reviews

Pyrex Easy Grab 4-Piece Value Pack [Product Review]

Pyrex Easy Grab 4-Piece Value Pack [Product Review]

Pyrex Easy Grab Dishes are great for solving one of the classic issues home cooks have during the holidays, and throughout the year: Storing left-overs after supper is done. If the dish you baked something in doesn’t a lid, then you either have to awkwardly cover it with aluminum foil or plastic wrap, or find a plastic container with a lid and transfer the food into that.

And, if you need to transport that cooked dish for a holiday dinner or work potluck? Good luck!

Aluminum foil often falls off, allowing the food to slosh out onto your car seat. And plastic wrap comes off if it doesn’t stick well to your dish or too much stress is put on it if you have to brake quickly.

General Description of Pyrex Easy Grab 4-Piece Value Pack

This 4-piece set comes with a 3-quart oblong baking dish, a 2-quart oblong baking dish, and matching red plastic covers. They can be used in the oven, microwave, fridge, and freezer, and they are dishwasher-safe.

The 3-quart dish is 9″ x 13″, which is a standard size for baking a sheet cake. The 2-quart dish is 7.5″ x 12″, and good for making casseroles.

What Works for Me

These Pyrex dishes not only provide you with a glass dish for cooking or baking your meal, but they have lids to make it a little easier to transport it. No longer do you need to try and create a makeshift cover with plastic or aluminum foil. A better option is to use these pans to cook the food and cover it with the lids that go with them.

The Pyrex dishes are very popular even just for how well they cook or bake your food. The glass is completely food-safe and since it is non-porous, it won’t hold onto any odors or stains after it has been cleaned. It also lasts longer in its current state than if you were to use reusable plastic containers. The inside of the dish has contours that make it easy to keep clean by wiping them down and making sure no food is caught in the corners or edges. I received one as a gift a few years back and I love it!

What Doesn’t Work for Me

While the dishes themselves are very high quality, the flexible lids might give you some problems. The main drawback to these dishes is that the lid might be a little hard to fit properly. This usually just takes a couple of tries before you get it fully on the dish, but you also need to be super careful so your dish doesn’t spill. Some lids may bend if stored improperly, so the best thing to do is store the containers together in the cupboard where the lids won’t get bent. Or, you can store the lid snapped onto its dish, which is what I do.

My Pyrex Easy Grab 4-Piece Value Pack Recommendation

Aside from the slight issue with the lids, I highly recommend this set. They are great for when you need to transport food and, because they are stackable, they can help you find room in your fridge for all the holiday leftovers!

Rating for Pyrex Easy Grab 4-Piece Value Pack

[one_fifth] thumbs up [/one_fifth]

[one_fifth] thumbs up [/one_fifth]

[one_fifth] thumbs up [/one_fifth]

[one_fifth] thumbs up [/one_fifth]

[one_fifth_last] thumbs down [/one_fifth_last]

Get yours at Amazon today!

NOTE: I did not receive a free set of these dishes in exchange for an honest review. Regardless, if you’ve read past product reviews, you’ll know that I don’t pull my punches when I believe they are warranted. I also try to provide balanced information so you can make your own decision to buy or not buy the product, even if you disagree with my opinion.

Categories
Cookbook Reviews

Cookbook Review: “Geek Sweets” by Jenny Burgesse

I’m a geek who loves to bake. So when Jenny Burgesse’s Geek Sweets: An Adventurer’s Guide to the World of Baking Wizardry my inner child jumped for joy. This book is filled with not recipes and part ideas for those who love science fiction, fantasy and adventure.

Cookbook Review: "Geek Sweets" by Jenny Burgesse

Summary of Geek Sweets

From Marvel Comics to Doctor Who, from Cthulhu to zombies, from unicorns to Mayans, you’ll find a recipe for a cookie, cupcake or cake pop that will have your inner (or outer) geek squealing for joy. Regardless of what level your baking skills are, there is something here for you, as well.

Geek Sweets divides the recipes into skill levels:

  1. Squire: These recipes are for beginners and are the easiest to follow and assemble.
  2. Knight: These recipes require a bit more skill and time.
  3. Dragon Slayer: These recipes are a for diehard bakers with a lot of time on their hands.

In addition, the book includes information about the tools and basic skills you will need, as well as some basic recipes that will be used as a basis for the fantastical creations later in the book. Sprinkled throughout are also party ideas called “Side Quests.”

What Worked for Me

Every time I pick up Geek Sweets I can practically feel my inner child shaking with excitement. What cool thing will I discover this time I open the book?

The photographs are stunning. There are images of the final results, as well as steps along the way for many of the recipes.

The diversity of geekiness is also well done. You’ll find recipes inspired by a number of fandoms, including Minecraft, Dungeons & Dragons, The Legend of Zelda, Harry Potter, Doctor Who, H.P. Lovecraft, Willy Wonka and more.

I also really like the way she divided the recipes by skill level. That way you can build up your skills starting with a Snozberry Cake Pop (Willy Wonka), graduate to Gallifreyan Galaxy Black Bottom Cupcakes (Doctor Who), and finally try your hand at Frozen in Carbon-Bite Chocolate Bars (Star Wars).

And you don’t have to create your templates from scratch. You can download them from the author’s website.

What Didn’t Work for Me

My inner geek is screaming, “Nooooooo! Don’t do this. Nothing is wrong with this book!” And, my outer geek kind of has to agree. Perhaps it would have been nice to have the geek source inspiration more clearly identified. That way you’d know if this was a fandom you were part of or a new one you might want to explore.

What I’d Love to See in the Second Edition

I think it would be cool to expand this book. More recipes. More party ideas. More cool stuff.

Recommendation

I really enjoy perusing this book. I look forward to trying my hand at many of these creations. It seems clear to me that Burgesse had some fun writing this book. I think you’ll have fun perusing and using it, as well.

Rating for Geek Sweets

[one_fifth] thumbs up [/one_fifth]

[one_fifth] thumbs up [/one_fifth]

[one_fifth] thumbs up [/one_fifth]

[one_fifth] thumbs up [/one_fifth]

[one_fifth_last] thumbs up [/one_fifth_last]

[one_half]

Specs

Full Title: Geek Sweets: An Adventurer’s Guide to the World of Baking Wizardry
Author: Jenny Burgesse
Format: Hardcover, 261 pages
Publisher: Mango
Language: English
ISBN-10: 1633536165
ISBN-13: 978-1633536166 [/one_half]
[one_half_last] Geek Sweets by Jenny Burgesse cover [/one_half_last]

Pick up your copy on Amazon.com here.

NOTE: I received a free copy of this book in exchange for an honest review. If you’ve read past book reviews, you’ll know that I don’t pull my punches when I believe they are warranted. I also try to provide balanced information so you can make your own decision to read or not read the book, even if you disagree with my opinion.

Categories
Creative Cookery Product Reviews Tools of the Trade

Review: Handy Baking Club

Do you like getting cook baking stuff in the mail? Me too! So when I was asked to post a video review of the Handy Baking Club in return for a free sample, I said, “Totally!”

What: Handy Baking Club – Star Wars embossing rolling pin and The Baking Times Newsletter, Dec. 2018

Where: To be announced?

Mentioned in the video:

Product link on Amazon: Embossing rolling pin Star Wars. Wooden embossing rolling pin with Star Wars

Books about the chemistry of cooking:


Categories
Creative Cookery Product Reviews Taste Tests Video Podcast

October 2017 Foodstirs Kit – Little Monsters Cupcakes

Carma’s Cookery Foodstirs Series, Part 2

October 2017 Kit – Little Monsters Cupcakes

My second Foodstirs Kit was perfect for Halloween … but I made them much later. These Little Monsters Cupcakes are fun, creative, adorable and tasty!

Foodstirs October 2017 Kit - Little Monsters Cupcakes

Extra Ingredients You’ll Need

The kit comes with all the non-perishable ingredients you’ll need to make the cupcakes. What you’ll need to add to the list are these perishable ingredients:

  • Butter
  • Eggs
  • Milk
  • Yogurt

Unboxing and Baking Video

What I Liked About Foodstirs Little Monsters Cupcakes Kit

First, even when I was impatient and screwed up, the kit turned out adorable.

Second, they tasted fabulous! I could barely bring myself to share them!

As with the last kit, the instructions were easy to follow and simple to implement.

I had a lot of fun assembling the monsters. They were creative and well-designed.

What I Didn’t Like About Foodstirs Little Monsters Cupcakes Kit

I wish I had been more patient and let the cupcakes cool off before putting on the frosting. Also, the frosting is very soft at room temperature, so I would advise trying a little less liquid when whipping it up.

Overall Thoughts on Foodstirs Little Monsters Cupcakes Kit

Since I started this Foodstirs project, I received four kits and have only done three of them. The third, I didn’t even think to photograph or video record, so I won’t be able to share it with you. Out of the three, this kit was my favorite. They were fun, delicious and so very cute!

Who Is This Kit Suitable for?

Foodstirs makes kits that are suitable for parents to do with their children. I think kids would really get a kick out of this kit.

Score: 5 out of 5

[one_fifth] thumbs up [/one_fifth]

[one_fifth] thumbs up [/one_fifth]

[one_fifth] thumbs up [/one_fifth]

[one_fifth] thumbs up [/one_fifth]

[one_fifth_last] thumbs up [/one_fifth_last]

Categories
Creative Cookery Product Reviews Taste Tests Video Podcast

August 2017 Foodstirs Kit – Campfire S’mores Brownie Cupcakes

Carma’s Cookery Foodstirs Series, Part 1

August 2017 Kit – Campfire S’mores Brownie Cupcakes

I’ve had my eyes on Foodstirs for awhile for three reasons:

  1. One of the founders is Sarah Michelle Gellar, Buffy from the TV show Buffy the Vampire Slayer
  2. The kits are very creative, which I believe helps home cooks unleash their kitchen creativity easily and safely
  3. The kits use organic ingredients

I purchased a three-month subscription. Today’s post is for the first kit I received, which were Campfire S’mores Brownie Cupcakes. I made them for a house-warming party I hosted and they were a hit.

Foodstirs August 2017 Kit - Campfire S'mores Brownie Cupcakes

Extra Ingredients You’ll Need

The kit comes with all the non-perishable ingredients you’ll need to make the brownies. What you’ll need to add to the list are these perishable ingredients:

  • Butter
  • Eggs
  • Oil
  • Yogurt

Unboxing Video + Baking and Display Images

What I Liked About Foodstirs Campfire S’mores Brownie Cupcakes Kit

The kit comes with pretty much everything you’ll need, including a frosting dispenser and cupcake liners. The frosting mix is da bomb. I pretty much could just eat that (and I did with the leftovers!). The brownies were tasty, as well.

What I Didn’t Like About Foodstirs Campfire S’mores Brownie Cupcakes Kit

The kit made eight cupcakes, which turned out to be just the right number for my party. However, under normal circumstances, I probably would have wanted to make more.

I’m not sure if it because the mix is organic, but I found the brownies to be a bit heavier than I like them. I like my brownies to be a little more cake-like in density.

Overall Thoughts on Foodstirs Campfire S’mores Brownie Cupcakes Kit

This was a fun kit to make and resulted in a tasty treat that my company loved. Although the assembly was a bit trickier than it looked, so I probably wouldn’t buy another kit. That said, it certainly was fun the first time!

Who Is This Kit Suitable for?

I think that this kit would be good for parents to make with their kids, as well as adults who want to present a different kind of treat at a potluck, but don’t have a lot of time to get creative on their own.

Score: 4 out of 5

[one_fifth] thumbs up [/one_fifth]

[one_fifth] thumbs up [/one_fifth]

[one_fifth] thumbs up [/one_fifth]

[one_fifth] thumbs up [/one_fifth]

[one_fifth_last] thumbs down [/one_fifth_last]

Categories
Product Reviews

Product Review: Lasten Silicone Baking Mat

With Thanksgiving fast approaching, and my plan to make three different types of pie for the menu, I was immediately intrigued by the idea of the Lasten® Silicone Baking Mat with Measurements. It promised to not only be a guide to my pie crust making but also be a non-stick surface for my other types of baking.

Product Review: Lasten® Silicone Baking Mat

The main reason this product appealed to me, however, was the concentric, measured circles and measurements along the side. How many times have I struggled to know how much to roll out a dough? Using a ruler never quite worked that well. This product looked like the perfect solution. And from what I can see, it is!

What Worked for Me About the Lasten® Silicone Baking Mat

There are two mats in the package. One small one that measures a little more than 10 inches square. And a larger rectangular one that measures a little over 21 by 13 inches. These are perfect sizes for most baking projects. I think the non-stick surface will be good when kneading bread dough, as well.

When I received the mat, it was folded up in a plastic bag inside a box from Amazon. Unfolding it, I found that each of them to mats was packaged inside addition plastic bags of their own. When I tried to remove one, it stuck to the bag, something I remember from the first silicone baking mats I’ve purchased.

The thin, sticky surface of the back promised to keep the mat in place as you kneed and roll out your doughs. So much better than lining your surface with flour or wax paper!

What Didn’t Work for Me About the Lasten® Silicone Baking Mat

The larger sized mat, although perfect for pie crust up to 12 inches in diameter, it a bit big and ungainly for actual baking.

Conclusion

If you’ve been looking for a durable surface on which to work for your baking projects — if you’re tired of using floured wooden cutting boards or Formica counter tops, this is an excellent option! And at only $14.99, it is a good deal, as well. The only caution is to keep the plastic bags for storage, or you might find the mat sticking to everything in your cupboard!

Rating

I give this mat four out of five stars because although it was pretty much what I was looking for, I would have liked to have the larget mat be just a tad smaller so I could actually use it to line my pans.

[one_fifth] thumbs up [/one_fifth][one_fifth] thumbs up [/one_fifth][one_fifth] thumbs up [/one_fifth][one_fifth] thumbs up [/one_fifth][one_fifth_last] thumbs down [/one_fifth_last]

View the Lasten® Silicone Baking Mat Up Close

Get Yours on Amazon!


NOTE: Reviews are based on usefulness, portability, durability, value, and “cool factor.” Some review products are sent to me free of charge or at a discount and with no incentive to offer a favorable review. I offer my unbiased opinions, positive and negative. If you have any questions or comments concerning my reviews, or would like to suggest a product for review, please email me at editor@carmascookery.com.

The owner of this website has made a commitment to accessibility and inclusion, please report any problems that you encounter using the contact form on this website. This site uses the WP ADA Compliance Check plugin to enhance accessibility.