By Edith Freni
Imagine, if you will, that Turkey Day is fast approaching and you’ve been put in charge of pie. Most people would consider two options in this situation:
- hit the local bakery and purchase a pie for too much money or
- run to the supermarket where a pre-made, no-frills pie crust awaits, rock solid and freezer-burned, next to a bag of frozen strawberries.
For those of you who think that all pastry work is seriously labor intensive, that it involves a laundry list of ingredients and hours of thankless rolling, kneading and sweating, I offer sweet salvation. Forget the bake shop and the freezer section. This year, you’ll wow the crowd with a scratch pie, made with love and fresh from your own home kitchen.

Not All Pastry Is Puff Pastry
Puff pastry is war. Pie dough is peacetime prosperity. Pie dough is free and easy. Pie dough is light and crispy. Pie dough is buttery and sweet. Pie dough is what you need to make pie and pie is what you need in order to make it through two plates of dry turkey meat and a mountain of peas and carrots. If there were no such thing as pumpkin pie, I would sleep through the holidays. If there were no such thing as blueberry pie, I would cease to consider Maine a worthwhile state. If there were no apple pie, I would refuse to acknowledge fall as a season.
Simply put, were there no pie, I might die. Praise be to the all mighty! There is pie, so I’m a’ livin’! I need pie. Pie is my friend. Pie needs a good solid crust to hold it up. Crust is pie’s friend. If crust and pie are friends and pie and I are friends, then crust and I are friends as well and we must learn to work together.
Not All Dough Needs the Knead
Pie dough makes pie crust. You make pie dough. You use your hands very sparingly or you don’t use your hands at all. You’re confused. “Edith,” you ask with brow furrowed “we’re talking about dough here right? Doesn’t dough need the knead?” Bread dough does, I answer because bread dough needs its gluten activated.
Gluten (or Glutenin) is one of the many proteins contained in wheat. It’s a spastic elastic substance that, when activated, helps to contain the gas bubbles created by a leavening agent such as yeast.
Activated gluten + yeast = the squishy, spongy texture and signature chew that you covet in freshly baked breads. Almost all flours on the market (and there are more than you think) contain gluten. Some have a lot of it — good for spongy, yeasty breads. Some have a little — good for cakes, pies, quick breads and people who suffer from Dermatitis Herpetiformis.
So why can’t you get touchy feely with pie dough? Because we’re working towards layers here, not sponge and more likely than not, you’ve got sweaty palms, especially if you’ve been in the kitchen all day. Overworking dough with hot paws will activate the glutens. With no leavening agent to puff it up, your dough will begin to shrink during cooking. As it shrinks, it hardens and as it hardens, it cracks.
When you remove your pie shell from the oven, you will be left with nothing more than a giant, tasteless cracker. Your goal is to create tiny, super flat layers that, when baked, will separate just enough to create flakes.
The way to get these layers is by “cutting” your fat into your flour. When you cut (as opposed to knead) you get what is basically a bowl full of tiny flour-coated pieces of fat. In the end, you’ll add liquid to bring it all together but ultimately, each one of those little pieces is a separate entity.
When you finally roll out your dough, these pockets get pressed out on top of each other, creating the desired layers. This process gives you what is known throughout all the world’s most elite baking circles, as “Medium Flake” pastry. You’ll often hear people refer to “Short Crust” pastry, as well, when talking pie.
The differences between the two are minimal and normally have to do with proportions and the type of fat used. Butter or lard will yield a shorter (a.k.a. richer and more tender) crust than vegetable shortening. I like a medium flake crust for juicy fruit pies, as they tend to be sturdier. But as with much in life and cooking, it all boils down to personal preference.
Bottom line: hands off! If you must touch the dough, use your fingertips, as they don’t get as hot as the rest of you. In fact, lightly fluffing the dry mixture with your fingers will aerate the flour, add a nice puff to the crust, and aid in separating the layers.
But under no circumstances are you to knead! You can purchase a nifty pastry cutter at any kitchen supply store or better yet, save the cash, dip into your silverware drawer and pull out two dinner knives. Hold one knife in each hand with the blades facing in towards the middle of the bowl and, keeping the blades parallel to each other, cut through the flour and fat over and over again until your mixture resembles coarse corn meal. Now it’s time to get wet.
Liquid Love
Some pastry dough recipes advise the use of cold milk but I have always preferred ice water. This is purely a taste thing. We all know how milk can start to absorb odors when it’s been in the fridge for a while.
Personally, the thought of my peach pie tasting vaguely like scallions and cilantro isn’t so appealing. Use water and you’ll never have this problem. Regardless of what liquid you use, remember that it should always be ice cold. This will help maintain the integrity of your cold fatty pockets (yum!) and keep that gluten lazy.
To incorporate the water, create a small well in the center of your dry mix and add it a tablespoon at a time, stirring with a fork until a soft ball of dough begins to form around the tines. Add just enough water to pull everything together. Quantity will vary but in general, about ¾ cup should be enough for a two-crust pie recipe.
The Big Chill
We’re about to hit a fork-in-the-road moment. Are you ready? Here goes: you don’t technically have to chill your dough. Just like you don’t technically have to avoid touching it. But you’re a scratch pie virgin so why not get it right the first time before you start to improvise?
Chilling the dough for at least two hours (and overnight, if you can) relaxes the gluten even more which will ensure tenderness and enhance flavor. However, if you’re short on a time, a rest of twenty to thirty minutes should do just fine.
Stop, Drop and Roll
A good rolling pin is a necessity for any well-outfitted kitchen. If you cook and bake with semi-regularity, you must have one. A nice old-fashioned wooden pin will run you anywhere from $3-$10. For a few extra bucks, you can get a stainless steel or marble pin that will help keep your dough cool while you roll it.
Make sure the pin has a nice heft. The heavier it is, the less pressure you’ll need to apply and the less likely you’ll be to roll the dough too thin. If you don’t have a pin and, for whatever reason, refuse to buy one, you can use an empty wine bottle or any other clean, easy-to-wield, long cylindrical object.
Your work surface should be ample; at least big enough to accommodate a circle of dough slightly larger than a pie plate. If you’re lucky enough to have an Italian marble-top island in the middle of a newly remodeled, modern stainless steel kitchen on the first floor of your $9 million, multi-level SoHo loft, you can use that. Otherwise, there are many options available. Good marble pastry boards can cost upwards of $50 but they’re beautiful and last forever.
Also, they stay cool and are naturally non-stick. Wooden boards are just as expensive and not as effective for working with fragile pastries since you’ll need to use a fair amount of flour on the board to keep your dough from adhering to it.
A fiberglass coated, silicone baking mat is another good option but, yet again, a pricey one. When all else fails, just use your kitchen counter top. So long as it’s spotlessly clean, there’s nothing really wrong with this method and I employ it myself.
Dust both your work surface, and your rolling pin with a small amount of flour. If the dough has been chilling for more than an hour, let it rest at room temperature for about 15 minutes or else you’ll have a heck of a time working with it.
Roll the larger half first, since it’s going to be lining the bottom of your pie plate. Roll from the center out, in every direction, making sure not to press over the edges. You may rotate the dough a few times and add a little more flour to the work surface if it begins to stick.
Do not ever “pull” at the dough, it will only pull back. Remember, you’re not making a pizza. The finished dough should be about 1/8″-1/4″ thick and 2 inches larger in diameter than the pie plate.
You do not need to grease a pie plate. There is more than enough fat in the dough to keep it from sticking. Fold your rolled dough in half, lift gently into the plate, unfold and pat into position. There should be a nice amount of overhang. Don’t cut it off as you’ll need it to build up your edge.
Place the pie plate back in the fridge and let the crust rest while you roll out the top half. When you roll out your dough, you give those glutens a wake-up call; by letting it rest in the cold for another couple of minutes, you will put them back to bed.
Roll out your top crust, fill the bottom and drape the top over the filling. Pinch the edges of the two crusts together and then fold the overhang back up, squeezing a little to secure as you rotate the plate. Poke a few holes in the top crust with a fork so that the steam will have some place to go and allow the pie to rest in the fridge for another 5-10 minutes before baking.
Depending upon the type of pie you’re making, you may need to blind bake your crust. All this means is that you will pre-bake your crust before you fill it. Pies made with cooked custards and fillings (lemon, chocolate, coconut, etc…) need to be fully cooked ahead of time.
Most pumpkin pie recipes will require a ten-minute browning of the crust but don’t need to be baked completely since the pumpkin custard requires additional cooking time. There are a few pitfalls with blind baking but they’re pretty easy to avoid.
To avoid puffing, shrinking and splitting (OH MY!), you can either cover your pastry with a sheet of parchment and fill with dried beans or use ceramic or metal beaded pie weights. You can purchase pie weights and parchment paper at most kitchen supply stores.
Be Gentle, Keep Cool, Leave It Alone
Making anything from scratch is a daunting yet thoroughly satisfying endeavor. Not only does it make you feel good about yourself, but the food you prepare will almost always taste far superior to what you once paid a machine to cook for you.
Follow the three golden rules of pie dough (they’re listed above) and after a little trial and error, you’ll be guaranteed golden, flaky crust for the rest of your pie making days.

About the Author
Edith Freni is a playwright, essayist, ex-amateur boxer and lover of all things edible. She invites you to visit her online at www.edithfreni.com.
Create Your Own Unique Pie!
 Does pie making daunt you? Are you wary of deviating from any pie-recipe you find, for fear that you’ll ruin the flavor of the resulting pie?
It doesn’t have to be that way!
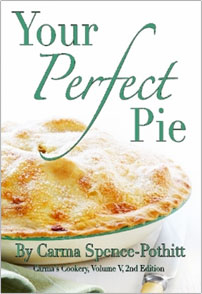
Pie-Palooza 2017 is brought to you by Your Perfect Pie, a cookbook that breaks down pies into easily made component parts so you can unleash your pie-making creativity. Available on Amazon in both print and Kindle formats. Grab your copy today and start creating your perfect pie!

Miss previous posts? Find links to them here.