Easter is almost here and, if you’re reading this, I’m willing to bet that you’re already getting ready for the big Sunday family meal. Maybe you’re cooking for a few friends, or you’re having your extended family over for a nice ham dinner. Perhaps you’ve been asked to bring a dish or two to the church potluck dinner. Whatever the case may be, there’s no need to stress about getting everything cooked and keeping it hot and ready. There’s an easy way to cook up delicious sides without all the stress – in your slow cooker.
One of the big advantages of using your slow cooker is that you end up with a dish that’s very portable and it’s easy to keep warm. Just keep it plugged in until your guests arrive or when you get to your dinner destination. It also leaves your oven free to bake the ham and maybe even a pie or two for dessert.
What You Can Make in a Slow Cooker
There are all sorts of delicious side dishes you can make with this handy kitchen appliance. If you like potatoes with your ham, try making a batch of creamy mashed potatoes in there, or how about some cheesy scalloped potatoes. Macaroni and cheese is always a big hit with the kids. You can even repurpose your crockpot as a rice cooker and whip up a yummy flavored rice dish for the dinner table.
Let’s not forget about the vegetables. You can cook up all sorts of delicious vegetable dishes and casserole style sides right in your slow cooker. Root vegetables are particularly suitable for long and slow cooking. Try fixing your glazed carrots or a mix of potatoes, carrots, turnips and onions seasoned with garlic and rosemary mixed with a little olive oil and cooked on low for 8 hours or until all the vegetables are tender.
Cauliflower and broccoli in cheese sauce is always a big hit. Brussels sprouts or asparagus slowly steamed in the slow cooker can be incredibly delicious.
And remember casseroles. Most of your holiday favorite recipes can easily be adapted to be made in a slow cooker. You can either search for a crockpot specific version of your family’s favorite casseroles or follow the tip below.
How to Adapt Casserole Recipes
Cook the casserole on high for 4 hours for every hour you would bake it in the oven. Precook your meat before adding it and add most vegetables raw, at the beginning of the cooking process. Spring vegetables like peas, summer squash, zucchini, etc. only need about 2 hours to cook, so add them later. Reserve toppings for the last 30 to 45 minutes.
Cooking your favorite holiday side dishes in the slow cooker is easy-peasy lemon squeezy. Give it a try this Easter and see if you can’t free up some valuable oven space in the process.
Planning an Easter Meal at Home?
Make it a relaxing, easy event with the tips, suggestions and recipes included in Easy Easter at Home, Carma’s Cookery’s latest report. Take a sneak peak at the Table of Contents, then grab a copy of your own!
Introduction
Planning Ahead: Easter Activities & Decorations
Hosting Easter Without the Stress
Breakfast, Brunch, Lunch or Dinner?
Share The Joy – You Don’t Have To Do Everything Yourself
It’s Not Just About the Easter Bunny – A Short History of Easter
Easter falls on Sunday, April 16 this year. And you may already be planning for your Easter festivities — at least I hope you are! Have you planned what to eat for Easter breakfast?
Easter mornings are a special time. Maybe you head out with your family for a sunrise service at your local church. Or maybe you wake up to the pitter-patter of little feet ready to go Easter egg hunting. In either case, the last thing you want to do is spend an hour in the kitchen cooking up a big breakfast.
Instead, you want to relax and enjoy a yummy meal with your loved ones for breakfast. But you don’t necessarily want to go out to a restaurant in order to do that. There’s an easy way to do this. Put your slow cooker to work.
Keep Easter Breakfast Simple with Baked Slow Cooker Oatmeal
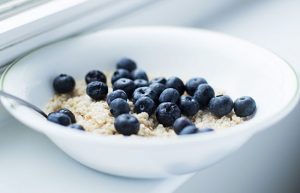
Oatmeal is always a breakfast favorite. It’s quick and easy enough to make in the slow cooker for weekend breakfasts throughout the year, but you can also make it special for Easter (or any other important day) with special add-ins and toppings like chocolate chips, nuts, dried fruits, whipped cream and the like.
Start with the basic recipe. Be sure to use rolled oats in this recipe, for the finished oatmeal will turn out much better than if you use quick cooking oats.
Ingredients
2 cups dry oats
2 cups milk
2 cups water
sugar, honey or the sweetener of your choice to taste
Directions
Mix oats, milk, and water in the slow cooker.
Add your sweetener and mix well.
Cook on low overnight (for about 8 hours).
Top with your favorite flavors and serve. Topping suggestions include blueberries, apple sauce, cinnamon, walnuts or pecans. Yogurt is also good. For a special Easter treat, you could set out small bowls with various fresh and dried fruit, nuts, chocolate chips and anything else that sounds tasty in oatmeal, and let everyone make their own unique blend.
Get Ready for a Busy Day with a Hearty Breakfast Casserole
If you know you’ll have an early Easter dinner with the whole family, it may make sense to skip lunch and opt for a big hearty breakfast or brunch instead. Here’s an easy way to have your big breakfast cooking while you sleep.
Ingredients
1 lb bacon
1 small onion
1 dozen eggs
salt and pepper to taste
32 oz. of shredded hash browns
2 cups shredded cheese
Directions
The night before, fry the bacon. Allow it to cool a bit and chop it up. Set aside.
Dice the onion. Set aside.
Whisk eggs in a large bowl. Add salt and pepper to taste.
Spray the slow cooker with non-stick cooking spray and layer 1/3 of the hash browns in the bottom of the crock. Top with 1/3 of the bacon and 1/2 cup of cheese. Repeat these layers two more times (omitting the cheese on the last layer). Pour the egg mixture over everything and top with the last cup of cheese.
Cook on low for 10 to 12 hours and enjoy when you are ready for breakfast or lunch.
Both of these ideas also work well if you’re serving brunch to your Easter guests.
Planning an Easter Meal at Home?
Make it a relaxing, easy event with the tips, suggestions and recipes included in Easy Easter at Home, Carma’s Cookery’s latest report. Take a sneak peak at the Table of Contents, then grab a copy of your own!
Introduction
Planning Ahead: Easter Activities & Decorations
Hosting Easter Without the Stress
Breakfast, Brunch, Lunch or Dinner?
Share The Joy – You Don’t Have To Do Everything Yourself
It’s Not Just About the Easter Bunny – A Short History of Easter
The following post was partially excerpted from my book, Your Perfect Pie.
To many, pies seem daunting. There are so many places for the pie maker to screw up. But this is just a facade — once you know your time limitations, your personal skill level and a few tips and tricks, pies can be quite simple and easy to make.
Most recipes treat pies like a single entity like you can’t use a different crust or topping. However, this is simply not the case. Pies are modular and provide pie makers with a variety of options to express their individuality and creativity. This book will walk you through my modular approach to pie making and provide you with some recipes to try out your newfound tool for pie-making creativity!
The Four Basic Steps of My Pie Philosophy
There are four basic questions you need to ask yourself before setting out to make your unique and perfect pie. They are:
[one_half] 1. What kind of pie do you want to make?
Will it be a sweet dessert pie? A savory main dish pie? Another type of pie? For which meal and purpose will you use this pie? Breakfast? Lunch? Dinner? Snack? [/one_half]
[one_half_last] [/one_half_last]
[one_half] 2. What kind of filling do you want?
Will it require baking? Or will it be a no-bake type of filling? Will you serve it warm, chilled or frozen? Do you have time to prepare it? Or do you need to pull it together quickly? [/one_half]
[one_half_last] [/one_half_last]
[one_half] 3. What kind of crust do you want?
The answer to question #1 will help determine your answer to this question. Some crusts lend themselves better to desserts than savory dishes and visa versa. Also, you’ll want to keep in mind how the flavor of your crust (or lack thereof) will affect the overall flavor of the pie. [/one_half]
[one_half_last] [/one_half_last]
[one_half] 4. How will you top and garnish your pie?
Again, the answers to the previous questions will narrow down your options at this point. For example, you’re probably not going to want to top your beef pie with gingersnap streusel. And, of course, there is nothing that says you have to top or garnish your pie at all! [/one_half]
[one_half_last] [/one_half_last]
Create Your Own Unique Pie!
Does pie making daunt you? Are you wary of deviating from any pie-recipe you find, for fear that you’ll ruin the flavor of the resulting pie?
It doesn’t have to be that way!
Pie-Palooza 2017 is brought to you by Your Perfect Pie, a cookbook that breaks down pies into easily made component parts so you can unleash your pie-making creativity. Available on Amazon in both print and Kindle formats. Grab your copy today and start creating your perfect pie!
CC BY-SA 3.0, https://commons.wikimedia.org/w/index.php?curid=205908
By Edith Freni
Imagine, if you will, that Turkey Day is fast approaching and you’ve been put in charge of pie. Most people would consider two options in this situation:
hit the local bakery and purchase a pie for too much money or
run to the supermarket where a pre-made, no-frills pie crust awaits, rock solid and freezer-burned, next to a bag of frozen strawberries.
For those of you who think that all pastry work is seriously labor intensive, that it involves a laundry list of ingredients and hours of thankless rolling, kneading and sweating, I offer sweet salvation. Forget the bake shop and the freezer section. This year, you’ll wow the crowd with a scratch pie, made with love and fresh from your own home kitchen.
Photo by Kellen via Wikimedia Commons, CC BY-SA 3.0
Not All Pastry Is Puff Pastry
Puff pastry is war. Pie dough is peacetime prosperity. Pie dough is free and easy. Pie dough is light and crispy. Pie dough is buttery and sweet. Pie dough is what you need to make pie and pie is what you need in order to make it through two plates of dry turkey meat and a mountain of peas and carrots. If there were no such thing as pumpkin pie, I would sleep through the holidays. If there were no such thing as blueberry pie, I would cease to consider Maine a worthwhile state. If there were no apple pie, I would refuse to acknowledge fall as a season.
Simply put, were there no pie, I might die. Praise be to the all mighty! There is pie, so I’m a’ livin’! I need pie. Pie is my friend. Pie needs a good solid crust to hold it up. Crust is pie’s friend. If crust and pie are friends and pie and I are friends, then crust and I are friends as well and we must learn to work together.
Not All Dough Needs the Knead
Pie dough makes pie crust. You make pie dough. You use your hands very sparingly or you don’t use your hands at all. You’re confused. “Edith,” you ask with brow furrowed “we’re talking about dough here right? Doesn’t dough need the knead?” Bread dough does, I answer because bread dough needs its gluten activated.
Gluten (or Glutenin) is one of the many proteins contained in wheat. It’s a spastic elastic substance that, when activated, helps to contain the gas bubbles created by a leavening agent such as yeast.
Activated gluten + yeast = the squishy, spongy texture and signature chew that you covet in freshly baked breads. Almost all flours on the market (and there are more than you think) contain gluten. Some have a lot of it — good for spongy, yeasty breads. Some have a little — good for cakes, pies, quick breads and people who suffer from Dermatitis Herpetiformis.
So why can’t you get touchy feely with pie dough? Because we’re working towards layers here, not sponge and more likely than not, you’ve got sweaty palms, especially if you’ve been in the kitchen all day. Overworking dough with hot paws will activate the glutens. With no leavening agent to puff it up, your dough will begin to shrink during cooking. As it shrinks, it hardens and as it hardens, it cracks.
When you remove your pie shell from the oven, you will be left with nothing more than a giant, tasteless cracker. Your goal is to create tiny, super flat layers that, when baked, will separate just enough to create flakes.
The way to get these layers is by “cutting” your fat into your flour. When you cut (as opposed to knead) you get what is basically a bowl full of tiny flour-coated pieces of fat. In the end, you’ll add liquid to bring it all together but ultimately, each one of those little pieces is a separate entity.
When you finally roll out your dough, these pockets get pressed out on top of each other, creating the desired layers. This process gives you what is known throughout all the world’s most elite baking circles, as “Medium Flake” pastry. You’ll often hear people refer to “Short Crust” pastry, as well, when talking pie.
The differences between the two are minimal and normally have to do with proportions and the type of fat used. Butter or lard will yield a shorter (a.k.a. richer and more tender) crust than vegetable shortening. I like a medium flake crust for juicy fruit pies, as they tend to be sturdier. But as with much in life and cooking, it all boils down to personal preference.
Bottom line: hands off! If you must touch the dough, use your fingertips, as they don’t get as hot as the rest of you. In fact, lightly fluffing the dry mixture with your fingers will aerate the flour, add a nice puff to the crust, and aid in separating the layers.
But under no circumstances are you to knead! You can purchase a nifty pastry cutter at any kitchen supply store or better yet, save the cash, dip into your silverware drawer and pull out two dinner knives. Hold one knife in each hand with the blades facing in towards the middle of the bowl and, keeping the blades parallel to each other, cut through the flour and fat over and over again until your mixture resembles coarse corn meal. Now it’s time to get wet.
Liquid Love
Some pastry dough recipes advise the use of cold milk but I have always preferred ice water. This is purely a taste thing. We all know how milk can start to absorb odors when it’s been in the fridge for a while.
Personally, the thought of my peach pie tasting vaguely like scallions and cilantro isn’t so appealing. Use water and you’ll never have this problem. Regardless of what liquid you use, remember that it should always be ice cold. This will help maintain the integrity of your cold fatty pockets (yum!) and keep that gluten lazy.
To incorporate the water, create a small well in the center of your dry mix and add it a tablespoon at a time, stirring with a fork until a soft ball of dough begins to form around the tines. Add just enough water to pull everything together. Quantity will vary but in general, about ¾ cup should be enough for a two-crust pie recipe.
The Big Chill
We’re about to hit a fork-in-the-road moment. Are you ready? Here goes: you don’t technically have to chill your dough. Just like you don’t technically have to avoid touching it. But you’re a scratch pie virgin so why not get it right the first time before you start to improvise?
Chilling the dough for at least two hours (and overnight, if you can) relaxes the gluten even more which will ensure tenderness and enhance flavor. However, if you’re short on a time, a rest of twenty to thirty minutes should do just fine.
Stop, Drop and Roll
A good rolling pin is a necessity for any well-outfitted kitchen. If you cook and bake with semi-regularity, you must have one. A nice old-fashioned wooden pin will run you anywhere from $3-$10. For a few extra bucks, you can get a stainless steel or marble pin that will help keep your dough cool while you roll it.
Make sure the pin has a nice heft. The heavier it is, the less pressure you’ll need to apply and the less likely you’ll be to roll the dough too thin. If you don’t have a pin and, for whatever reason, refuse to buy one, you can use an empty wine bottle or any other clean, easy-to-wield, long cylindrical object.
Your work surface should be ample; at least big enough to accommodate a circle of dough slightly larger than a pie plate. If you’re lucky enough to have an Italian marble-top island in the middle of a newly remodeled, modern stainless steel kitchen on the first floor of your $9 million, multi-level SoHo loft, you can use that. Otherwise, there are many options available. Good marble pastry boards can cost upwards of $50 but they’re beautiful and last forever.
Also, they stay cool and are naturally non-stick. Wooden boards are just as expensive and not as effective for working with fragile pastries since you’ll need to use a fair amount of flour on the board to keep your dough from adhering to it.
A fiberglass coated, silicone baking mat is another good option but, yet again, a pricey one. When all else fails, just use your kitchen counter top. So long as it’s spotlessly clean, there’s nothing really wrong with this method and I employ it myself.
Dust both your work surface, and your rolling pin with a small amount of flour. If the dough has been chilling for more than an hour, let it rest at room temperature for about 15 minutes or else you’ll have a heck of a time working with it.
Roll the larger half first, since it’s going to be lining the bottom of your pie plate. Roll from the center out, in every direction, making sure not to press over the edges. You may rotate the dough a few times and add a little more flour to the work surface if it begins to stick.
Do not ever “pull” at the dough, it will only pull back. Remember, you’re not making a pizza. The finished dough should be about 1/8″-1/4″ thick and 2 inches larger in diameter than the pie plate.
You do not need to grease a pie plate. There is more than enough fat in the dough to keep it from sticking. Fold your rolled dough in half, lift gently into the plate, unfold and pat into position. There should be a nice amount of overhang. Don’t cut it off as you’ll need it to build up your edge.
Place the pie plate back in the fridge and let the crust rest while you roll out the top half. When you roll out your dough, you give those glutens a wake-up call; by letting it rest in the cold for another couple of minutes, you will put them back to bed.
Roll out your top crust, fill the bottom and drape the top over the filling. Pinch the edges of the two crusts together and then fold the overhang back up, squeezing a little to secure as you rotate the plate. Poke a few holes in the top crust with a fork so that the steam will have some place to go and allow the pie to rest in the fridge for another 5-10 minutes before baking.
Depending upon the type of pie you’re making, you may need to blind bake your crust. All this means is that you will pre-bake your crust before you fill it. Pies made with cooked custards and fillings (lemon, chocolate, coconut, etc…) need to be fully cooked ahead of time.
Most pumpkin pie recipes will require a ten-minute browning of the crust but don’t need to be baked completely since the pumpkin custard requires additional cooking time. There are a few pitfalls with blind baking but they’re pretty easy to avoid.
To avoid puffing, shrinking and splitting (OH MY!), you can either cover your pastry with a sheet of parchment and fill with dried beans or use ceramic or metal beaded pie weights. You can purchase pie weights and parchment paper at most kitchen supply stores.
Be Gentle, Keep Cool, Leave It Alone
Making anything from scratch is a daunting yet thoroughly satisfying endeavor. Not only does it make you feel good about yourself, but the food you prepare will almost always taste far superior to what you once paid a machine to cook for you.
Follow the three golden rules of pie dough (they’re listed above) and after a little trial and error, you’ll be guaranteed golden, flaky crust for the rest of your pie making days.
About the Author
Edith Freni is a playwright, essayist, ex-amateur boxer and lover of all things edible. She invites you to visit her online at www.edithfreni.com.
Create Your Own Unique Pie!
Does pie making daunt you? Are you wary of deviating from any pie-recipe you find, for fear that you’ll ruin the flavor of the resulting pie?
It doesn’t have to be that way!
Pie-Palooza 2017 is brought to you by Your Perfect Pie, a cookbook that breaks down pies into easily made component parts so you can unleash your pie-making creativity. Available on Amazon in both print and Kindle formats. Grab your copy today and start creating your perfect pie!
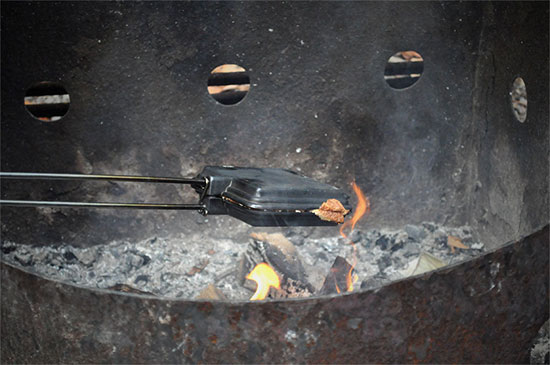
So last time I introduced you to the pie iron, and gave you a simple but yummy recipe for a basic fruit pie. This time I’ll give you some ways to really enhance that recipe, share some tips and tricks, and give you my absolute favorite dessert recipe. Let’s get cooking!
So you’ve played around with different fruit fillings, trying cherry, apple, blueberry, blackberry, lemon, strawberry and others, and they’re great. But have you tried swapping out the bread??? A good cinnamon swirl bread pairs great with apple or cherry filling. Try a sweeter Italian bread to pair with lemon or strawberry. Each time you use a different bread, the whole dessert pie tastes different. The combinations are nearly endless!
I’m sure you’re wondering just how to cook your pie the best. While it sounds simple, there’s really an art to cooking your pies right without turning it into a black charcoal mess. This is something that many people don’t do, or don’t do frequently enough. And don’t worry, you won’t ruin your pie or somehow destroy the cooking process. I’m referring to checking your pie while you cook! My secret here is that I don’t latch my pie iron when I cook. I bet you’ve seen the little hook attached to one of the rods of your pie iron, and you’ve probably used it too. But I’m here to tell you, it’s something to avoid.
You’ve seen cooking shows where the chefs are tasting their food as they go? The best chefs will tell you that you need to check your product if you are going to know when it’s at the right time to serve. Your pies are no different. After a few minutes over the fire, take your pie iron cooker out of the fire and pop it open. You are visually checking your bread to see how the color is coming along. Be sure to check both sides too, because one side might be getting done faster than the other. This is the way the pie iron pros end up with the best looking (and tasting) pies cooked over the fire.
Here’s another tip for you. When you go to purchase a pie iron, I always advise people to buy the cast iron version, not the aluminum. Why? Well, there are several reasons, but one of the main reasons is the fact that when comparing the two metals, aluminum has a lower melting point than iron. I’ve seen pictures of an aluminum pie maker that got too hot, and the metal actually warped! The pie iron maker really couldn’t be used after that because it wouldn’t close properly. You won’t have that problem with cast iron. Additionally, aluminum also transfers heat much faster than cast iron, so you could easily end up with more burnt pies using aluminum.
Okay, as my last parting gift, I give you my absolute favorite dessert: a chocolate-peanut butter pie! This is astonishingly easy, yet so good you won’t be able to stop yourself from making a second (or third). Here’s what you need:
Bread
Chocolate bar
Peanut butter
Butter
And here are the 4 cooking steps:
Add a slice of butter to one-half, then cover with a slice of bread
Add a half bar of chocolate and a tablespoon of peanut butter to the bread
Add a slice of bread on top of the other slice, then put a slice of butter on top of that bread
Close up the pie iron with the other half, then cook over the fire until golden brown
Just typing this up makes my mouth water! Yes, it’s really that good of a dessert. So, with these recipes and helpful tips, you’ll be sure to have the best-tasting pies in the neighborhood.
Enter to Win a copy of Pie Iron Recipes!
Did you enjoy this post? Are you itching to start cooking with a pie iron? Would you like to receive a copy of Darren’s book to get you started? For free? Darren Kirby has graciously offered to give one copy of his book away to a lucky reader. All you need to do to enter is sign up for Darren’s email list. Everyone who signs up between now and the end of March 2017 will be entered into a drawing to get a copy of Pie Iron Recipes in paperback.
Different. Eccentric. Odd. Loud. Irreverent. Fun. While none of these words have been used to describe the author, he nevertheless attempts to entertain people in his own unique way. A student of people, of ideas, of the world, he hopes to entertain for a living through his writing. Fortunately, his wonderful wife and slightly unusual cat both support his efforts.
Darren has been writing professionally for more than nine years, has published 15 titles of fiction and non-fiction, taught a self-publishing class at a state university, and has recently consulted on a new book about Prince’s early life. His book Pie Iron Recipes is one of the most popular books on the topic.
Create Your Own Unique Pie!
Does pie making daunt you? Are you wary of deviating from any pie-recipe you find, for fear that you’ll ruin the flavor of the resulting pie?
It doesn’t have to be that way!
Pie-Palooza 2017 is brought to you by Your Perfect Pie, a cookbook that breaks down pies into easily made component parts so you can unleash your pie-making creativity. Available on Amazon in both print and Kindle formats. Grab your copy today and start creating your perfect pie!
By little blue hen (Flickr: unbaked graham cracker pie crust) [CC BY 2.0 (http://creativecommons.org/licenses/by/2.0)], via Wikimedia Commons
Photo by little blue hen (Flickr: unbaked graham cracker pie crust) [CC BY 2.0], via Wikimedia CommonsOne of the easiest pie crusts to make is the crumb crust. The most common crumb crust is made with plain graham crackers. But you don’t need to stop there.
You can make a crumb crust from any crisp food, from cookies to crackers to cereal. Ask yourself what would pair well with the filling you have in mind?
Salted caramel is a food trend right now. So you could try making a caramel pudding pie with either a pretzel or saltine cracker crust.
Here are some items that you could use to create your own crumb crust:
flavored graham crackers
ginger snap cookies
chocolate wafer cookies
Cornflakes
Cheerios
Honey Nut Cheerios
Nilla wafers
butter cookies
shortbread cookies
crispy oatmeal cookies
saltine crackers
pretzels
Wheat Thins
Basically, if you can turn it into crumbs, you can transform it into a crumb crust for your pie (or cheesecake, for that matter).
Regardless of what type of crumbs you use, the recipe is basically the same:
Crumb Crust Ingredients & Directions
1-1/2 cups fine crumbs
1/3 cup butter (softened or melted)
Combine crumbs and butter. Press into a pie pan. Bake at 375 degrees for 8 to 10 minutes. Let cool.
Voila! You’re done and ready to pour in your favorite filling.
Tips for Creating Crumbs
You can actually buy ready-made crumbs. I’ve found them for graham crackers, chocolate cookies and even Nutter Butters. However, I would advocate for making your own crumbs. I’ve found that they just taste fresher.
The way I make crumbs is I break up the cookies by hand into pieces and put the pieces into a ZipLock bag. Then I pound them with a rolling pin to break them up further. Finally, I roll the rolling pin on the bag, back and forth, until the crumbs are fine.
Yes, this is a bit time-consuming and you’ll get an upper body workout thrown in for good measure, but it really pays off in the flavor.
More Creative Crumb Ideas
You can also make crumb crusts with nuts. Grind walnuts, pecans, peanuts, almonds or any other nut into fine crumbs, and use them as the base of your crust.
If you grind the nuts into a meal, you can simply combine them with butter per the recipe above and go from there.
However, if you’d like a slightly different take, let the nut crumbs be less fine, and mix them in with some cookie crumbs.
Crumb Crusts Fit Into Multiple Diet Plans
The beauty of crumb crusts is that you can easily adapt them to specialty diets. Are you gluten free? Use gluten free crumbs! Are you diabetic? Use low sugar, high protein crumbs!
Create Your Own Unique Pie!
Does pie making daunt you? Are you wary of deviating from any pie-recipe you find, for fear that you’ll ruin the flavor of the resulting pie?
It doesn’t have to be that way!
Pie-Palooza 2017 is brought to you by Your Perfect Pie, a cookbook that breaks down pies into easily made component parts so you can unleash your pie-making creativity. Available on Amazon in both print and Kindle formats. Grab your copy today and start creating your perfect pie!
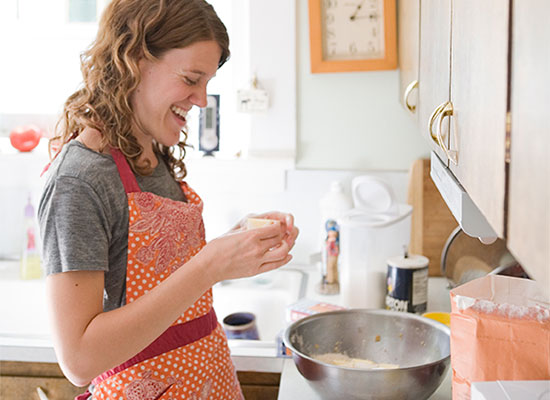
Guest writer Teeny Morris making pie crust in her kitchen. Source: Teeny Morris
One of my most vivid childhood memories is of perching on a tall kitchen stool next to my mom, wielding a miniature rolling pin in an entirely sincere attempt to imitate her fluid crust-rolling movements. My mom’s knack for making a good pie crust seemed truly magical and makes the idea of anything not homemade seem a bit silly. She would roll out the crust with ease, letting me help by using my little fingers to crimp the edges and would always press the leftover dough into the tiniest of tins, sprinkle with cinnamon sugar, and bake off for snacking later. My mom is the reason I never felt any trepidation when endeavoring to make my own dough or roll out a homemade pie crust.
In pie, everything starts with the crust. It is the foundation, the base, and can make all the difference between a mediocre, slightly soggy, or surprisingly chewy slice of pie and one with a light and flaky crust that’s still sturdy enough to envelop a decadent filling. When you start with a good pie crust, everything else seems to fall into place. Had I not grown up baking alongside my mom, I imagine I would have had a healthy dose of fear when it came time to attempt my first pie crust. Instead, I just did it, and then kept on doing it until I got good at it. It took time and patience, and I threw away plenty of overworked dough, but in the end, I learned how to make a crust I could proudly call my own.
Pie Crust Pride
Having spent the last six years or so in pursuit of pie, I’ve met countless bakers with their own individual ways of doing things, whether it was using a very specific type of flour; vinegar instead of ice water; all butter, all shortening, or some combination of the two. No matter what ingredients or methods they chose, they all shared an unwavering pride in their crusts. Which is the way it should be: there is something undeniably rewarding about mixing together a batch of crust from scratch. Source: Teeny Morris
At least, it’s undeniably rewarding until it doesn’t work; dealing with temperamental dough is just the worst. After spending a year apprenticing at different pie shops across the country, I moved with my husband to Washington, D.C., and during my first few weeks of living there, every batch of dough I made was incredibly difficult to roll out. Each one fell apart before I could even get it into the pie plate, and soon I was banging my head against my new cupboards in frustration. My husband gently suggested I change a single variable at a time and drew up a pie crust chart to help me figure out what the problem was. I tried combining flours. I tried using different mixing methods. I tried different water temperatures. It turns out that because my D.C. kitchen was smaller than my previous one in Chicago, it tended to retain any and all excess heat and humidity in the air, making for some very melty crust dough. The solution was to start refrigerating my shortening and letting my dough rest in the fridge overnight. With those few changes, my crusts began to roll out beautifully.
Pie Crust Making Tips
I was surprised that such a small detail, like the few degrees difference of my tiny kitchen, could make such a huge difference in my dough. But I learned a valuable lesson about the importance of trial and error and how rewarding the end result could be if I stuck with it. Making a homemade crust is something I got better at and more confident about over time, and I’m sure the same will be true of you. To give you a head start, here are a few things that I learned that will help you turn out a perfect crust every time:
1. Start with ingredients that you love.
I got weak in the knees for the slightly nutty flavor of whole wheat flour, however because of its gluten content it can be hard to work with so I like to tame it with a little all-purpose flour. My mom loves flaky layers that only shortening can provide, so she skips the butter and goes straight for the crisco. Source: Teeny Morris
2. Give yourself enough time.
I find that when I rush, I end up adding too much flour or too little fat and in the end am left with a stubbornly unworkable lump of dough. Most crust recipes call for a chilled resting period for your completed dough as well, and I’ve found that this step is essential. Once I’ve made my dough I let it sit in the refrigerator overnight before attempting to roll it out. The longer the dough rests, the easier it becomes to work with. If you try to roll out a crust when it’s too warm, it will fall apart or stick and you’ll end up getting frustrated. Baking should be fun, so take any potential frustration out of the process and make your pie dough a day ahead of time!
3. Chilly Ingredients.
Cold ingredients make the dough easier to work with, but they also don’t have to be absolutely frigid to work. It’s a balance when you’re working with pastry. I don’t like to fist-fight with frozen fats in order to obtain those perfect pea-sized pieces, but cold fats maintain their shape better, which leads to those flaky layers we all adore. So, I like to split the difference and refrigerate my fats rather than freeze them so they’re not stubbornly stiff when I go to cut them into the flour.
4. Don’t overwork your dough.
Pie dough is rather squishy when you mix it up and I’m all for using your hands to work everything together, but resist the temptation to knead the dough. It’s not that kind of dough, so the more you touch it, squish it, squash it, and roll it around the stronger the gluten binds together and the tougher your pie crust will be.
5. Know when to throw in the towel.
Sometimes you just need to dump the whole mess and start fresh. One of the most valuable lessons my mom ever taught me was that if you’ve reached a breaking point because your dough is still too sticky or overly crumbly and you’re considering brandishing a rolling pin at the next person who walks into the kitchen, put the pin down, take a deep breath, and know that it’s ok to scrap it and begin again.
About the Author: Teeny Morris
Teeny has been a professional baker for the last six years, with three of those years spent exclusively owning and operating her own business, Teeny Pies! She began selling pies at farmer’s markets in D.C. and has just moved to Cincinnati to continue to grow the business and open a storefront. She is an expert in the field of pie and pastries, and is well known for her cookbook, Teeny’s Tour of Pie, published in 2014 by Workman Publishing Company and named one of the best cookbooks of 2014 by Food and Wine. She loves all things pie and can be found online at teenypies.com.
Create Your Own Unique Pie!
Does pie making daunt you? Are you wary of deviating from any pie-recipe you find, for fear that you’ll ruin the flavor of the resulting pie?
It doesn’t have to be that way!
Pie-Palooza 2017 is brought to you by Your Perfect Pie, a cookbook that breaks down pies into easily made component parts so you can unleash your pie-making creativity. Available on Amazon in both print and Kindle formats. Grab your copy today and start creating your perfect pie!

 Let’s not forget about the vegetables. You can cook up all sorts of delicious vegetable dishes and casserole style sides right in your slow cooker. Root vegetables are particularly suitable for long and slow cooking. Try fixing your glazed carrots or a mix of potatoes, carrots, turnips and onions seasoned with garlic and rosemary mixed with a little olive oil and cooked on low for 8 hours or until all the vegetables are tender.
  Make it a relaxing, easy event with the tips, suggestions and recipes included in Easy Easter at Home, Carma’s Cookery’s latest report. Take a sneak peak at the Table of Contents, then grab a copy of your own!
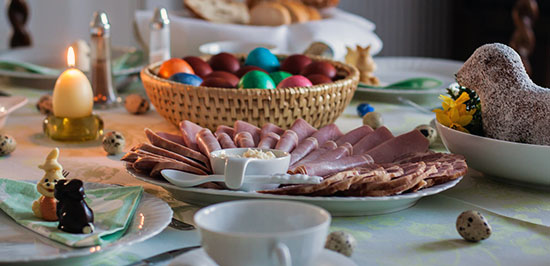
 Start with the basic recipe. Be sure to use rolled oats in this recipe, for the finished oatmeal will turn out much better than if you use quick cooking oats.
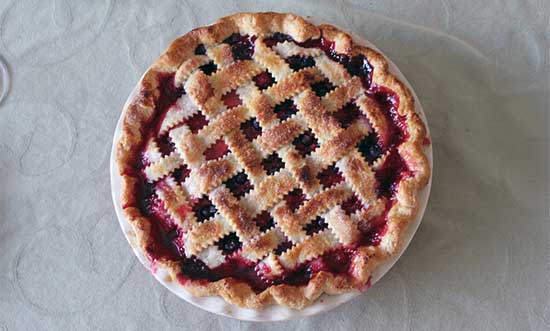
 [/one_half_last]
 [/one_half_last]
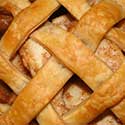 [/one_half_last]
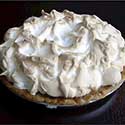 [/one_half_last]
 Does pie making daunt you? Are you wary of deviating from any pie-recipe you find, for fear that you’ll ruin the flavor of the resulting pie?


 Different. Eccentric. Odd. Loud. Irreverent. Fun. While none of these words have been used to describe the author, he nevertheless attempts to entertain people in his own unique way. A student of people, of ideas, of the world, he hopes to entertain for a living through his writing. Fortunately, his wonderful wife and slightly unusual cat both support his efforts.
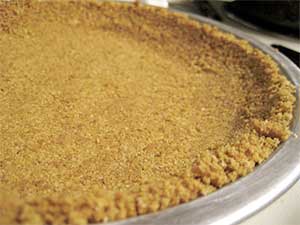
 Teeny has been a professional baker for the last six years, with three of those years spent exclusively owning and operating her own business, Teeny Pies! She began selling pies at farmer’s markets in D.C. and has just moved to Cincinnati to continue to grow the business and open a storefront. She is an expert in the field of pie and pastries, and is well known for her cookbook, Teeny’s Tour of Pie, published in 2014 by Workman Publishing Company and named one of the best cookbooks of 2014 by Food and Wine. She loves all things pie and can be found online at