Categories
Recipes

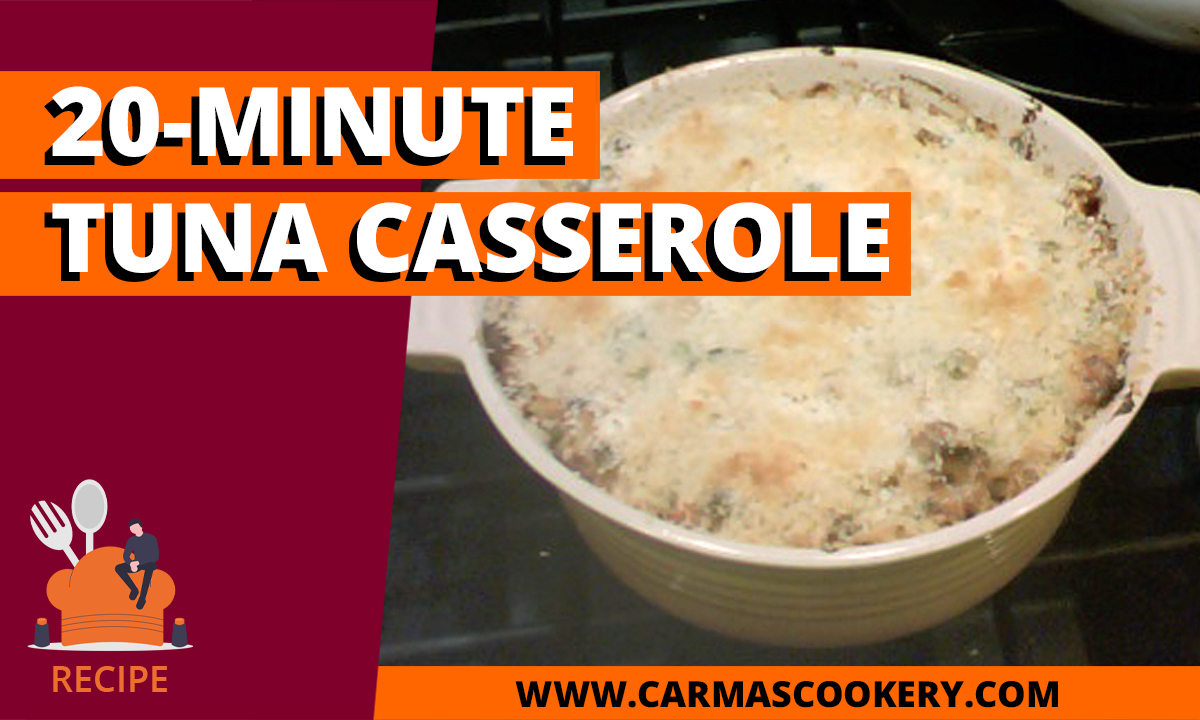
20-Minute Tuna Casserole

I first learned how to make tuna casserole in 7th-grade cooking class. I still have — and use — that recipe, although I’ve modified it, many times. This recipe is just another variation, and it makes a great option for a Friday meal during Lent.
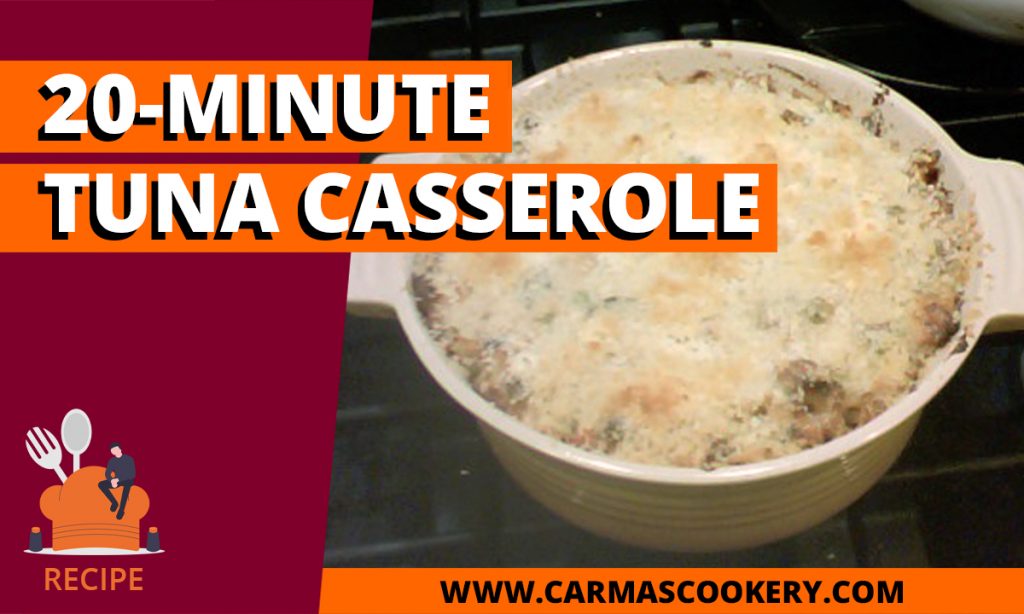
20 Minute Tuna Casserole
B.D.’s world, CC BY-SA 2.0, via Wikimedia Commons
20 Minute Tuna Casserole
Print

20 Minute Tuna Casserole

Course Main Course
Cuisine American
Keyword casserole, hotdish
Prep Time 30 minutes
Cook Time 20 minutes
Total Time 50 minutes
Servings 4

Ingredients

  • 8 ounces of rotini pasta
  • 2 cans of cream of mushroom soup
  • 12 ounces of white albacore tuna in water
  • 3 cups of shredded white cheddar cheese
  • 1 cup of bread crumbs

Instructions

  • Preheat the oven to 325 degrees.
  • Prepare pasta according to the box directions.
  • While the pasta boiling, mix together in a medium bowl the soup, tuna, and 2 cups of cheese.
  • Drain pasta and pour into a 9" x 13" baking dish.
  • Add the tuna mixture and blend with the pasta.
  • Cover with the rest of the cheese and top with the breadcrumbs.
  • Slide into the oven and bake for 20 minutes.

Notes

Image Source: B.D.'s world, CC BY-SA 2.0, via Wikimedia Commons

A Tip for Great Tuna Casserole

When you go to the tuna aisle in your locale grocery store, there will be lots of options. If want your tuna casserole to turn out tasty, you only have one option: Albacore packed in water. Tuna packed in oil just doesn’t taste right, no matter what kind of tuna it is. And anything but Albacore just doesn’t taste as good. In addition, when you get the solid pack, you get a more meaty tuna, which works better for a casserole. At least that’s my humble opinion. (And I’m sticking to it.)

Creative Cooking Tips Banner

If there ever was a recipe that begged for creativity, it was tuna casserole. There are so many ways you can change up the flavor, the texture, even the oo-la-la factor of this humble hot-dish. Here are some ideas:

Pasta: There are so many varieties of pasta and noodles you can use for tuna casserole and each one lends a different texture, and sometimes even flavor to the dish. This recipe called for rotini, but I’ve also used egg noodles, egg-less noodles, Farfalle (bow-tie), ditalini, elbow, penne, radiator, rotelle, and small shells. You want pasta that can hold its own after being cooked twice (boiled then baked), and won’t overpower the other flavors in the dish.

Cream of Whatever Soup: When I first learned this dish, my teacher used Cream of Celery. Then someone told me if you used Cream of Chicken (which you can’t use during lent), the casserole tastes less fishy (which worked!). Cream of Mushroom is a classic standby. But there are other Cream soups that you can try, as well, such as:

  • Cream of Broccoli
  • Cream of Asparagus
  • Cream of Potato
  • Cream of Tomoto

Tuna: Of course, you don’t have to use tune in this dish, either. You can substitute in any other shredded meat, such as chicken, pork, or beef.

Cheese: Like strong cheese? Experiment with sharp cheddar. Prefer mild cheese? Use Monterey Jack. Or you can go more exotic and try out Havarti, Gouda, or any other cheese or cheese mix you find in your local grocery deli.

Bread crumbs: You’re not stuck with bread crumbs either. Try out panko. Or use French’s Original Crispy Fried Onions! Smash your favorite crackers and use those crumbs.

As you can see, ingredient swapping is the heart of Kitchen Creativity!

Categories
Recipes

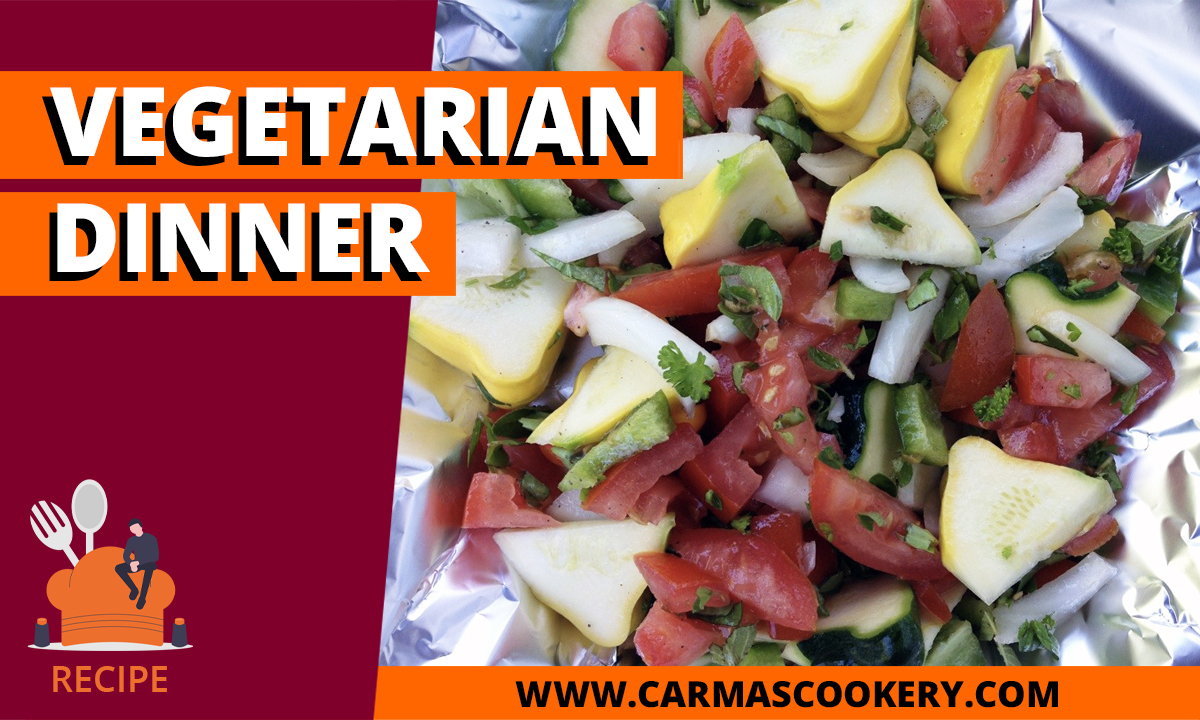
Vegetarian Dinner

If you’re looking for a meatless meal that satisfies, look no further. This isn’t exactly a recipe but is meant to inspire you for our next vegetarian dish — perfect for the Lenten season if you’re not into yet another fish fry.

Vegetarian Dinner
In this photo, the vegetables are pattypans, peppers, onions and tomatoes.
Vegetarian Dinner
Print

Vegetarian Dinner

A meatless meal that is easily customizable to your tastes.
Course Main Course
Cuisine American
Keyword vegetarian
Prep Time 15 minutes
Cook Time 40 minutes
Servings 2 to 4

Equipment

  • Aluminum foil

Ingredients

  • Fresh vegetables
  • Fresh herbs
  • 1 Tablespoon olive oil

Instructions

  • Preheat oven to 350 degrees F. Line baking pan with aluminum foil.
  • Clean and chop vegetables into bite-sized pieces. Place in a large bowl.
  • Finely chop herbs and add them to the bowl with the vegetables.
  • Drizzle with olive oil and toss to mix
  • Pour out onto the prepared baking dish.
  • Bake for 40 minutes, turning vegetables over at the 20-minute mark. Root vegetables will take a little longer to bake than non-root vegetables.

Notes

Tip: If you use root vegetables, you might want to make those pieces smaller than the non-root vegetable, or pre-cook them part-way before tossing them with the olive oil. That way they won't be undercooked or the non-root vegetable overcooked.

Creative Cooking Tips Banner

The beauty of this recipe is that it can be made as a side dish or a main dish, it all depends on the quantity served and the vegetables used. If you want to use this recipe for a main dish, I suggest selecting high-protein vegetables to include in the mix. Here are some suggestions:

  • Soybean Sprouts: 9.2 grams protein per cup
  • Brussels sprouts: 5.64 grams protein per cup (boiled from frozen)
  • Spinach: 5.3 grams protein per cup cooked
  • Portabello mushrooms: 4 grams protein per cup
  • Broccoli: 3.7 grams protein per cup
  • Shiitake mushrooms: 3.5 grams protein per cup

Another way to increase the protein of the meal is what you serve the vegetables with. These highly favorable veggies can taste great when served over these high protein vegetarian options:

  • Quinoa: 8.14 grams of protein per cup when cooked
  • Wild rice: 6.54 grams protein per cup when cooked

Mixin’s can also add some additional protein, such as:

  • Pistachios: 5.97 grams protein per ounce when dry roasted
  • Almonds: 5.94 grams protein per ounce when dry roasted

The herbs you choose all make a big difference in how this dish turns out. Here are some suggestions:

  • Basil
  • Parsley
  • Oregano
  • Thyme
  • Sage
  • Rosemary
  • Garlic

Other vegetables that will roast well in this dish include:

  • Any root vegetable, such as carrots, potatoes, and onions
  • Squash – both winter and summery, although summer squash requires a much shorter cooking time
  • Asparagus, artichoke, and green beans

However you choose to mix and match your flavors, proteins, herbs, and other add-ins, this “recipe” will probably never be the same twice, which will make it your go-to vegetarian choice, especially when you have fresh produce on hand.

Categories
Recipes

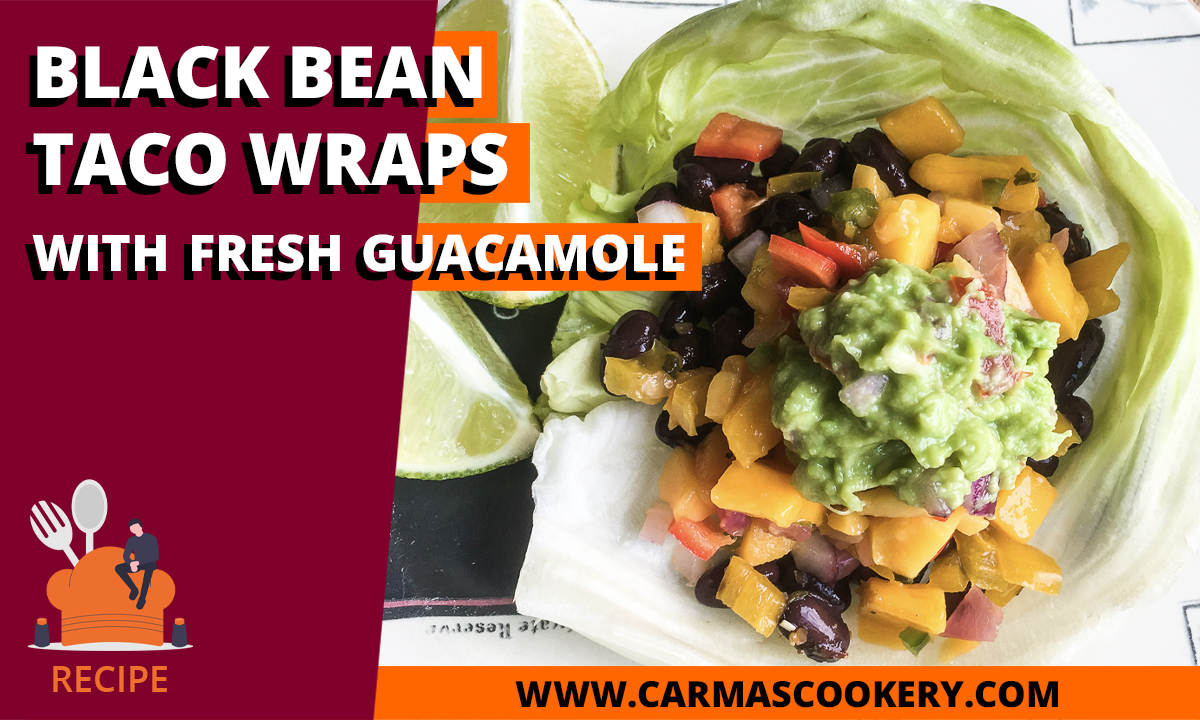
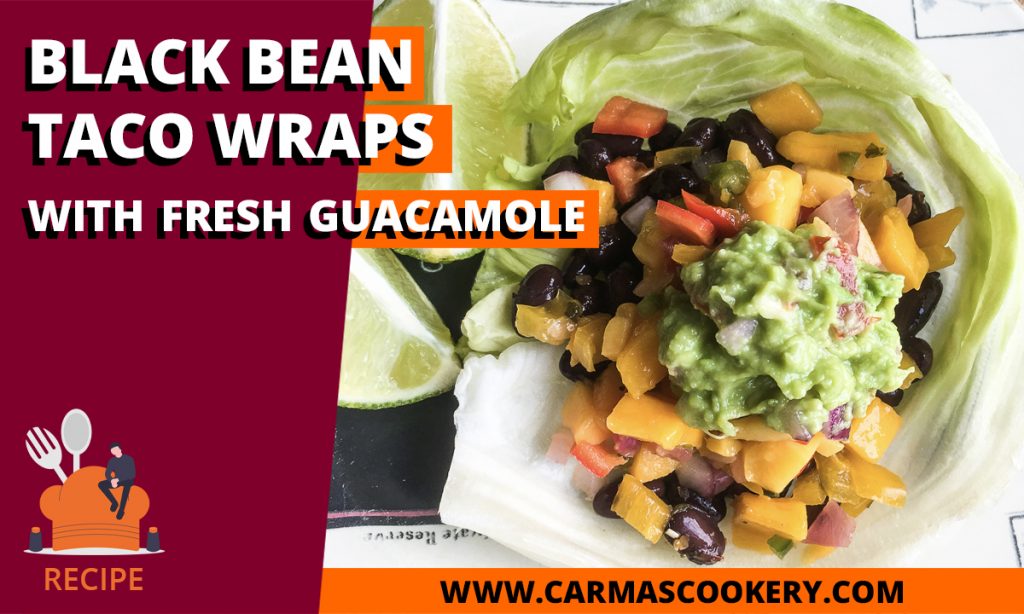
Black Bean Taco Wraps with Fresh Guacamole

These vegetarian black bean taco wraps are perfect for Meatless Mondays or anytime you want to get a plant-based meal on the table in around 20 minutes.

Black Bean Taco Wraps with Fresh Guacamole

Black Bean Taco Wraps with Fresh Guacamole
Print

Black Bean Taco Wraps with Fresh Guacamole

Course Main Course
Cuisine Mexican
Keyword vegetarian
Prep Time 15 minutes
Cook Time 5 minutes
Total Time 20 minutes
Servings 4

Ingredients

  • 2 Tablespoons extra virgin olive oil
  • 1 15-oz. can black beans, drained and rinsed
  • 2 Tablespoons water
  • 1 teaspoon ground cumin
  • ½ teaspoon smoked paprika
  • ¼ teaspoon dried Mexican oregano
  • Sea salt and black pepper, to taste

Guacamole Ingredients:

  • 2 large ripe avocados pitted
  • 1 medium tomato seeded and diced
  • 3 Tablespoons fresh lime juice
  • 2 Tablespoons fresh cilantro minced
  • Sea salt and black pepper to taste

To Serve:

  • Iceberg butter, or Romaine lettuce leaves for wrapping

Instructions

  • In a skillet, heat olive oil over medium heat. Add beans, water, cumin, smoked paprika, and Mexican oregano. Season with salt and black pepper, to taste, and stir to combine.
  • Cook, stirring occasionally until the beans are warmed through and the spices become fragrant around 4-5 minutes.
  • Remove from heat and set aside.

Guacamole

  • While the beans are cooking, in a small glass or another non-reactive bowl, mash the avocado.
  • Add tomato, lime juice, and fresh cilantro. Season with salt and black pepper, to taste, and stir to combine. Set aside.

To Serve

  • Transfer warm beans to a bowl. Sprinkle with additional spices, if desired.
  • Serve immediately with large lettuce leaves for wrapping, along with fresh guacamole.

Why black bean taco?

Pinto beans are the beans traditionally used in Mexican cuisine, so why do you see so many recipes substituting black beans instead?

In general, a pinto and a black bean are about the same when it comes to nutrition. However, pinto beans contain a bit more carbs and have a higher fat content, probably because they also have a higher starch content. Therefore, for many this makes them more attractive.

As far as flavor is concerned, black beans have a nutty quality that makes them less versatile than the blander, more creamy flavored pinto beans.

Creative Cooking Tips Banner - Get creative with black bean taco wraps

The recipe I provide above is intentionally basic for two reasons:

  1. I can’t handle spicy food.
  2. It gives you plenty of leeway to make this recipe your own!

Here are some suggestions to spice up this recipe with creativity or heat or both.

  • Add ½ teaspoon chili powder and a ¼ teaspoon cayenne pepper — more or less to taste — to the beans as you warm them in the skillet.
  • Finely dice ½ of a medium jalapeño and add it to the guacamole for some kick.
  • Serve the taco wraps with your favorite salsa.
  • Instead of tomato and lime in guacamole, add garlic powder, onion powder, and mustard. I know it sounds weird, but I love it.
  • Garnish with shredded green and red cabbage. Toss in some shredded carrots for added color.
  • Serve with tortilla chips and shredded cheese.
  • Get really exotic and mix up the beans. Either switch out the beans entirely for something else or use a medley of different types of beans. Black beans go well with pinto and garbanzo beans, but you can always try out black-eyed peas, navy beans, and kidney beans.
Categories
Recipes

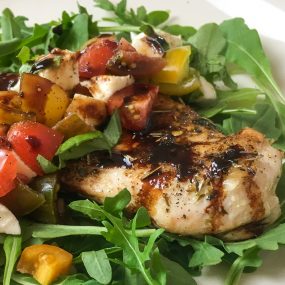
Mozzarella Chicken Breasts with Balsamic Glaze

This savory stovetop chicken recipe features the delicious flavors of a traditional Caprese salad. Sweet grape tomatoes, fresh Mozzarella, basil, and a rich balsamic glaze elevate otherwise basic chicken breasts to a whole new level. You’ll want to work this one into your regular weeknight dinner rotation because you can get it from the refrigerator to the table in just twenty minutes!

Mozzarella Chicken Breasts with Balsamic Glaze

Mozzarella Chicken Breasts with Balsamic Glaze
Print

Mozzarella Chicken Breasts with Balsamic Glaze

Course Main Course
Cuisine Italian
Keyword chicken
Prep Time 10 minutes
Cook Time 10 minutes
Servings 4

Ingredients

  • 2 Tablespoon extra virgin olive oil
  • 2 bonelessskinless chicken breasts, butterflied and pounded thin
  • 1 teaspoon Italian seasoning
  • ½ teaspoon garlic powder
  • Sea salt and black pepper, to taste
  • ½ cup balsamic vinegar
  • 2 teaspoons pure maple syrup
  • 1 cup grape tomatoes, quartered
  • ½ small red onion finely diced
  • 8 oz. Ciliegine fresh Mozzarella, quartered
  • ¼ cup fresh basil leaves, thinly sliced

Instructions

  • Heat olive oil in a large skillet over medium heat.
  • Season the prepared chicken breasts with Italian seasoning and garlic powder on both sides and add to the hot skillet.
  • Season with salt and black pepper, to taste.
  • Cook until the chicken is cooked through, approximately 3-4 minutes per side.
  • While the chicken is cooking, combine the balsamic vinegar and maple syrup in a small saucepan and set over medium heat.
  • Simmer until the mixture thickens and is reduced by half, stirring frequently for approximately 5-6 minutes.
  • In a medium bowl, combine grape tomatoes, red onion, fresh Mozzarella, and basil. Season with salt and black pepper, to taste, and stir to combine.
  • When the chicken is done cooking, turn off the heat and move the skillet to a cool burner.
  • While still in the skillet, top each chicken breast with the tomato and mozzarella mixture and cover for a couple of minutes or just until the tomatoes are warmed through.
  • To serve, transfer the chicken to a serving platter or individual plates. Top each breast with the tomato mixture and a drizzle of balsamic glaze.

Tip: For easier cleanup, place the chicken breasts between two sheets of plastic wrap before pounding with a meat mallet or rolling pin.

Choosing the Best Balsamic Vinegar for Your Balsamic Glaze

What is balsamic vinegar and why is it used so often to flavor foods? It is a very dark, concentrated, and intensely flavored vinegar from Italy, made from freshly crushed grape juice, including all the skins, seeds, and stems (a combination called grape must). The best tasting balsamic vinegar is aged in wooden barrels, much like wine is.

That said, balsamic vinegar is not to be confused with red wine vinegar. They are not the same and can not be switched out in this recipe. Balsamic is darker, sweeter, and thicker than red wine vinegar, which is why it makes a better glaze.

When you go to the grocery store to buy your balsamic, you will find that there is some variety. The price will give you some clue to the quality but pay more attention to the name. What you want is Aceto Balsamico Tradizionale di Modena (or Reggio Emilia). Write that down on a piece of paper, stick it in your wallet and take it with you to the store. You don’t want to get confused and accidentally purchase the lower quality kinds of vinegar with similar names Aceto Balsamico di Modena IGP and aceto balsamico.

Creative Cooking Tips Banner

Kitchen Creativity is so often about making substitutions that make sense for your tastes, your locality, or just for the fun of it. Here are some substitution ideas for this recipe.

  • Instead of using maple syrup, use honey. This will make the glaze sweeter.
  • Want a darker, less sweet glaze? Try using molasses instead of maple syrup. It will give it a bittersweetness.
  • Live in Wisconsin, Minnesota, or someplace else that you can find cheese curds, try those instead of the Mozzarella.
  • Get colorful and use yellow grape tomatoes. They are sweeter than the red ones.
  • Up the Italian ante and toss in some kalamata or green, garlic-stuffed olives.
Categories
Recipes

Sesame Garlic Wings with an Instant Pot

If you liked the Instant Pot® Barbecue Chicken Wings, you’re going to love these Sesame Garlic Wings! I love the combination of sweetness from the honey and kick from the fresh ginger, mingled with the always yumminess of garlic.

Sesame Garlic Wings with an Instant Pot

Sesame Garlic Wings
Print

Sesame Garlic Wings with an Instant Pot

Course Appetizer
Cuisine Chinese
Keyword Asian Cuisine, barbecue, bbq, wings
Prep Time 10 minutes
Cook Time 16 minutes
Natural Release Time 10 minutes
Total Time 36 minutes
Servings 4

Equipment

  • Instant Pot®

Ingredients

  • 4-4½ lbs. chicken wings
  • Salt and black pepper to taste
  • 1 cup water
  • White sesame seeds for garnish

Sesame Garlic Sauce Ingredients:

  • ¼ cup soy sauce
  • 2 Tablespoons sesame oil
  • 3 Tablespoons honey preferably fresh and local
  • 1 Tablespoon unsalted butter
  • 2 teaspoons fresh ginger very finely minced
  • 1 teaspoon garlic powder

Instructions

Cook the Wings

  • Season wings lightly with salt and black pepper.
  • Place the metal trivet inside Instant Pot® and add one cup of water.
  • Arrange seasoned wings on top of the trivet before securing the cover in place. Switch the vent to “Sealing” and set the “Manual” setting to 8 minutes.

Sesame Garlic Sauce

  • In a small saucepan over medium heat, stir together the soy sauce, sesame oil, honey, butter, ginger, and garlic powder. Cook, stirring frequently until butter is melted and the mixture is thoroughly combined. Remove from heat and set aside.

Assembly

  • When cook time on Instant Pot® is complete, allow pressure to naturally release for 10 minutes, then do a quick release for any remaining steam.
  • Remove lid and transfer wings to a large bowl. Set aside and cool slightly.
  • Meanwhile, position the top oven rack in the top position and pre-heat the broiler to high.
  • Line a large, rimmed baking sheet with aluminum foil and place a wire cooling rack on top. Set aside.
  • Pour 1/3 of the sesame garlic sauce on top of the wings and toss to coat.
  • Transfer the wings to the wire rack on the prepared baking sheet and place under the broiler for 3-4 minutes or until the wings start to get crispy and develop some color.
  • Turn the wings and repeat on the remaining side.
  • Remove from the oven and toss the wings with half of the remaining sesame garlic sauce.
  • Sprinkle with white sesame seeds and serve immediately with the remaining sauce on the side.

Working with Fresh Ginger

Giger root can be tough to work with, but there are a few ways you can make it easier.

  1. Freeze it. Frozen ginger root is much easier to work with, and both cuts and shreds a bit easier than fresh. However, it doesn’t keep in the freezer long, so if you don’t use it a lot, this isn’t a great option.
  2. Store it in the ground. This one sounds weird at first, but when I tried it, it really worked. I purchased a ginger root at the grocery store, and a nice pot, and some potting soil at a garden store. And then I buried the root in the pot and kept the pot on my kitchen counter. When I needed some ginger, I dug it up, cut off what I needed, and then re-buried it. This kept the root fresher longer. In fact, it even started to grow!
  3. Buy pre-frozen and grated ginger. Dorot makes a fresh frozen crushed ginger product that is very easy to use. I’ve reviewed it on the blog before.

Why the sesame garlic combo?

Sesame garlic noodles. Spinach with sesame and garlic. Why does sesame go with garlic so well? I did some digging and here’s what I found out:

First, sesame has a stronger affinity with soy sauce, ginger, sesame oil, honey, scallions, and rice vinegar than it does with garlic. Good thing many of those are in this recipe, eh?

Why … no one would tell me!

So I got logical.

The flavor profile of the sesame seed is mild, sweet, and nutty. The flavor profile of garlic is pungent with slight sulfurous notes. Interestingly enough, I discovered that sweet and pungent are two of the five tastes identified in ancient Chinese tradition, the others being bitter, salty, and sour. Each taste maps to an element and sweet maps to earth, which pungent maps to metal. Where does one find metal? In the earth!

So there you have it! Sesame garlic go together because earth and metal go together! How’s that for a scientific answer to your question.

Creative Cooking Tips Banner

I’ve got a different idea for unleashing your kitchen creativity today: A Honey Experiment. Go to your local Farmer’s Market and buy several different kinds of local honey, from the light to dark varieties. Then make these wings with each kind and see if you can taste the difference!

Categories
Recipes

Vegan Vegetable Soup, Instant Pot Edition

This delicious and easy vegan vegetable soup recipe can be adapted in countless ways to incorporate whichever fresh vegetables and herbs you have available or prefer. Be sure to add a splash of fresh lime juice just before serving to brighten the flavors!

Vegan Vegetable Soup, Instant Pot Edition

Vegan Vegetable Soup, Instant Pot Edition
Print

Vegan Vegetable Soup

Course Main Course
Cuisine American
Keyword soup, vegan, vegetarian
Prep Time 15 minutes
Cook Time 8 minutes
Natural release 10 minutes
Total Time 33 minutes
Servings 6

Equipment

  • Instant Pot®

Ingredients

  • 1 Tablespoon extra virgin olive oil
  • 4 large stalks celery, chopped
  • 4 large carrots, sliced
  • 1 medium red onion, chopped
  • 1 teaspoon garlic powder,
  • Sea salt and black pepper, to taste
  • 6 cups vegetable broth, preferably organic
  • 1 lb. red potatoes quartered
  • 2 whole bay leaves
  • 1 pint cherry or grape tomatoes, chopped
  • 2 cup baby kale, roughly chopped
  • 2 Tablespoons fresh lime juice

Instructions

  • Add olive oil to the Instant Pot® and select the “Sauté” function. Add garlic, celery, carrots, red onion, and garlic powder. Season with salt and black pepper, to taste. Stir to combine.
  • Sauté, stirring occasionally, until fragrant and vegetables start to turn golden brown, approximately 4-5 minutes.
  • Add broth and stir to combine, scraping any brown bits off the bottom of the pot in the process. Turn the unit off.
  • Add potatoes, bay leaves, and chopped tomatoes to the pot.
  • Put the lid on and lock it into place. Switch the vent to “Sealing” and set the “Manual” setting to 3 minutes.
  • When the cooking time is complete, allow pressure to release naturally for 10 minutes, then manually release any remaining pressure.
  • Remove the lid and discard the bay leaves.
  • Stir in the baby kale and lime juice, and season with additional salt and black pepper, if desired. Stir to combine and serve immediately.

Note: Although this recipe uses an Instant Pot to cut down the cooking time, you can make this recipe the traditional, long-form style using a saute pan for the saute portion of the cooking and a Dutch oven or large pot for the rest of the cooking time.

What is the difference between Vegetable, Vegetarian, and Vegan Soup?

Here’s a simple answer:

  • A vegetable soup can use beef, chicken, or a combination of both broths as a base.
  • A vegetarian vegetable soup can’t, but it can have egg or dairy products in it.
  • A vegan vegetable soup cannot have any animal products in it whatsoever.

Creative Cooking Tips Banner

How do you make a soup your own? You play with the main ingredients, the flavor ingredients, and the serving style. Here’s what I mean:

Main Ingredients
The main ingredients in this soup are celery, carrots, onion, red potatoes, cherry tomatoes. That is three root vegetables, one starchy root vegetable, and one acidic vegetable. If you want to maintain a similar balance, but give the soup a different twist, you want to keep that same basic formula. Here are sub substitution ideas:

  • fennel, parsnips, red onion, purple potatoes, and Roma tomatoes
  • shallots, purple carrots, Vidalia onions, yams, and yellow grape tomatoes
  • leeks, turnips, white onions, sweet potatoes, and grape tomoatoes

Flavor Ingredients
This recipe is fairly conservative with the flavor ingredients, using only garlic powder, sea salt, black pepper, and bay leaves. So rather than substituting, I recommend adding. What fresh herbs are in season when you make this soup? Maybe you can add some of those in? Some of my favorite soup herbs include:

  • Basil
  • Rosemary
  • Thyme
  • Sage

Serving Style
A basic serving style is to pour the soup in a bowl and there you go. But you don’t always have to do it that way. There are ways to serve soup that can enhance the flavor, as well. Here are some ideas:

  • Serve with crackers. There are vegan crackers available.
  • Serve in a bread bowl. Find — or bake your own — vegan round bread loaf, slice off the center, cut out the middle, pour in the soup — delish!
  • Serve Spanish style. This is something I learned from my family. It works especially well with chicken soup but can work with other soups, as well. Cut bread (in this case, vegan bread) into cubes. Place the cubes at the bottom of the soup bowl. Sprinkle with dried mint leave (fresh doesn’t work well). Pour the soup over and eat.
Categories
Recipes

Instant Pot® Barbecue Chicken Wings

Nothing beats the convenience of an Instant Pot® for quick, easy, and healthier chicken wings. Once cooked, a quick trip under the broiler is all you need to get that nice crispy finish.

Instant Pot® Barbecue Chicken Wings

Instant Pot® Barbecue Chicken Wings
Print

Instant Pot® Barbecue Chicken Wings

Course Appetizer
Cuisine American
Keyword chicken
Prep Time 10 minutes
Cook Time 16 minutes
Natural Release 10 minutes
Total Time 36 minutes
Servings 6

Equipment

  • Instant Pot®

Ingredients

  • 4-4½ lbs. chicken wings
  • 1 teaspoon garlic powder, divided
  • Salt and black pepper, to taste
  • 1 cup water

Barbecue Wing Sauce Ingredients

  • 1 cup barbecue sauce
  • ½ cup unsalted butter, melted
  • ½ teaspoon garlic powder

Instructions

  • Sprinkle wings with garlic powder and season with salt and black pepper, to taste.
  • Place a metal trivet inside the Instant Pot® and add one cup of water.
  • Arrange seasoned wings on top of the trivet before securing the cover in place. Switch the vent to “Sealing” and adjust the “Manual” setting to 8 minutes.
  • While the wings cook, in a medium bowl, whisk the barbecue sauce, melted butter, and remaining garlic powder until thoroughly combined. Set aside.
  • When done cooking, allow the pressure to naturally release for 10 minutes, then do a quick release for any remaining steam. Carefully remove the lid and transfer the wings to a large bowl. Set aside until just cool enough to handle.
  • Meanwhile, position the top oven rack in the top position and pre-heat the broiler to high.
  • Line a large, rimmed baking sheet with aluminum foil and place a wire cooling rack on top. Set aside.
  • Pour 1/3 of the barbecue sauce on top of the wings and toss to coat.
  • Transfer the wings to the wire rack on the prepared baking sheet and place under the broiler for 3-4 minutes or until the wings start to get crispy and develop some color.
  • Turn the wings and repeat this process.
  • Remove the baking sheet from the oven and toss the wings with half of the remaining barbecue sauce.
  • Serve immediately with the remaining sauce on the side for dipping.

Notes

This recipe is written for fresh or thawed wings. If using frozen wings, add 3-4 minutes to the active cook time.

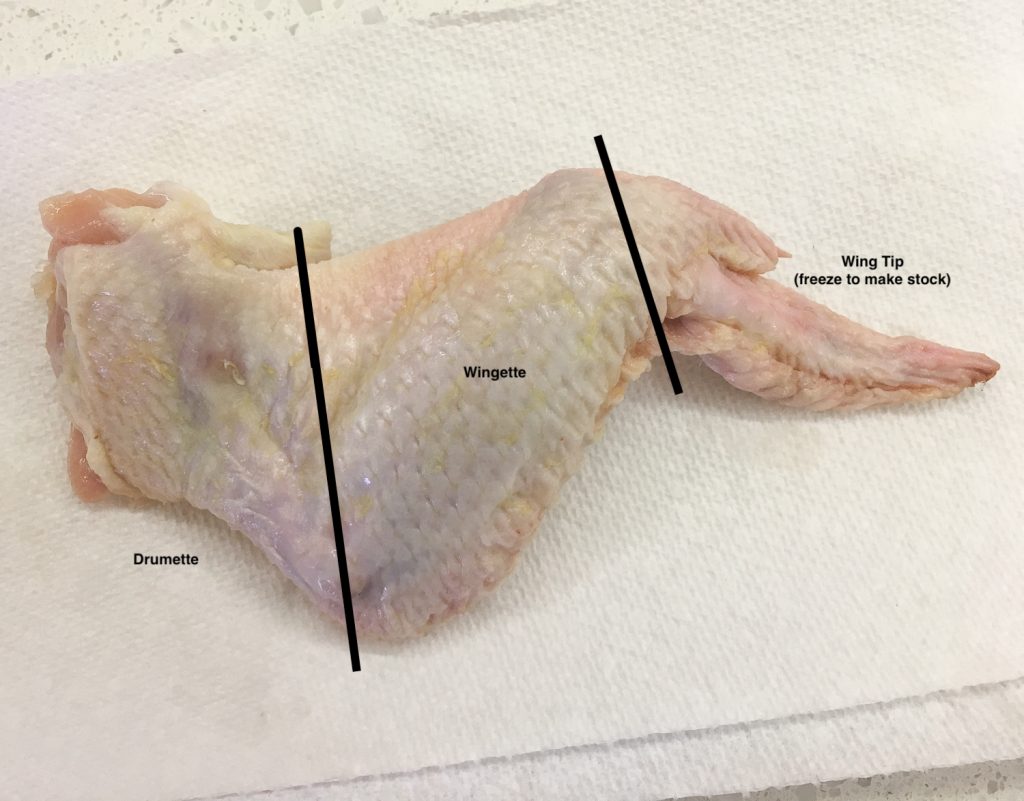
You can save time by purchasing already-trimmed wings. However, you can save some money by trimming them yourself. See the photo below for the approximate location of where to cut each whole wing. They are a little easier to trim AFTER they’ve been cooked. Immediately freeze the tips to make chicken stock later.

Where to cut for chicken wings

What’s the flap about chicken wings?

Do buffalos have wings? Of course not! But, when you cut up a chicken wing to look like a mini-drumstick and mini-thigh, then slather it with Buffalo sauce (named from the City, not the animal), you’ll have Buffalo Wings.

Of course, you don’t have to slather them with Buffalo sauce. You can use any kind of sauce you like. In this recipe, I suggested barbecue sauce, but honey mustard sauce would work just as well.

In fact, you can fry, grill, smoke, or bake the chicken wings before tossing them with a sauce, rub or glaze. This is where your kitchen creativity comes in.

The ubiquitous chicken wing bar snack was a happy accident, according to History Daily. A bar owner mistakenly ordered chicken wings, when she meant to order chicken necks. This was in 1964, and back then the wings were considered the throw-away portion of the chicken. Her husband convinced her to accept her error, and so necessity became the mother of kitchen innovation! She had so many of the darn things, she didn’t know what to do. So, one night she cooked them, tossed them in hot sauce and served them with celery stalks and bleu cheese dressing to her son and his friends. They loved them and the famous Buffalo Wings were born.

If you have wondered about the connection with football, check out this post from the National Chicken Council.

Creative Cooking Tips Banner

As I suggested above, you can easily make chicken wings with your own signature flair. Here are the basic steps:

  1. Choose your cooking method. Will you fry, grill, smoke, or bake your wings?
  2. Choose your flavor enhancer. Will your wings be slathered in a sauce? Messy, but yummy! Will they be rubbed down with herbs and spices? Less mess, but also tasty. Will you glaze them? Very similar to a sauce, but less messy. And one more idea to choose from: Will you marinate them?

That’s it. However, you can see that given those options, there are probably hundreds of combinations available to you.

The owner of this website has made a commitment to accessibility and inclusion, please report any problems that you encounter using the contact form on this website. This site uses the WP ADA Compliance Check plugin to enhance accessibility.