Categories
Recipes

Herb Mustard Sirloin Steak

Herb Mustard Sirloin Steak

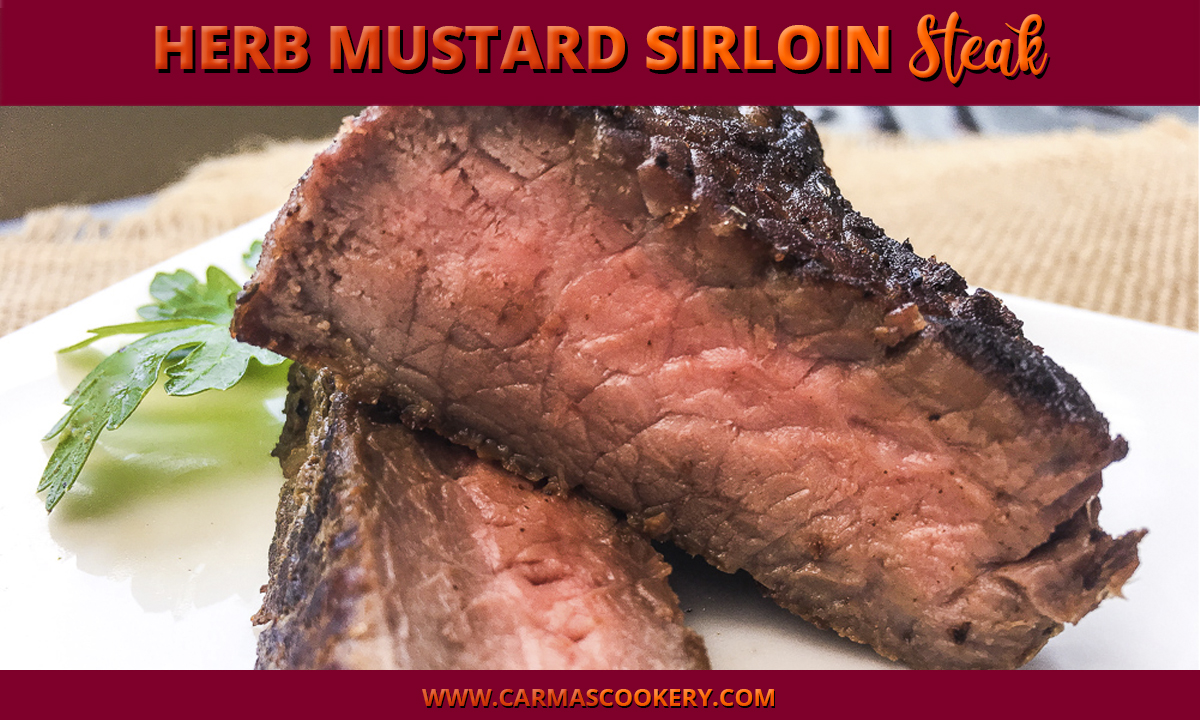
Here is a delicious sirloin steak recipe that doesn’t require a lot of fuss. Just a few simple ingredients and less than 30 minutes are all it takes to whip up a flavor-packed main course your entire family will love!

Herb Mustard Sirloin Steak
Print

Herb Mustard Sirloin Steak

Note: The actual cooking time for this recipe will vary depending on the thickness of the meat, the starting internal temperature, and the desired level of doneness.
Course Main Course
Cuisine American
Keyword beef
Prep Time 5 minutes
Cook Time 20 minutes
Servings 4

Ingredients

  • 2 Tablespoons extra virgin olive oil
  • 2 Tablespoons Dijon mustard
  • 2 teaspoons Italian seasoning
  • ½ teaspoon garlic powder
  • lbs sirloin steak
  • sea salt, to taste
  • pepper, to taste

Instructions

  • In a large skillet, heat olive oil over medium-high heat.
  • In a small bowl, combine the mustard with the Italian seasoning and garlic powder.
  • Generously coat the steak with the herbed mustard on all sides. Season with salt and black pepper, to taste.
  • Swirl hot skillet to evenly distribute olive oil. Add steak and sear on all sides, including edges, approximately 1-2 minutes per side.
  • Reduce heat to medium and cook on one side for approximately 5-7 minutes.
  • Turn steak and cook for another 3-5 minutes, or until steak reaches desired level of doneness.
  • Remove from heat and let rest for 5 minutes.
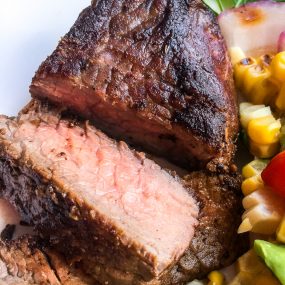
  • To serve, slice the steak against the grain and serve with your choice of side dishes.

Temperature Tips for Beef

You can find a temperature chart for beef here.

If you want to be precise, use an Instant Read Meat Thermometer to determine when the internal temperature is 5°F below the desired result. (The temperature will continue to rise while the meat rests.)

FAQs

Do you have questions about sirloin steak? You’re not alone. Here are some common questions and their answers.

What is sirloin steak?

The sirloin steak is cut from the sirloin. This is the subprimal posterior to the short loin, where the T-bone, porterhouse, and club steaks are cut. The sirloin is divided into several types of steak, including top sirloin, which is the most prized cut.

US Beef Cuts showing location of sirloin steak

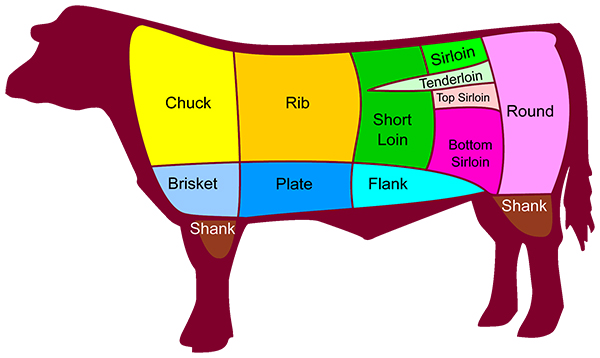
Is there a difference between sirloin steak and top sirloin?

Yes. The difference is that the top sirloin cut comes from the top of the sirloin section of the carcass. Sirloin steaks come from any other part.

Is a sirloin steak considered a good cut?

Sirloin steak is a moderate cut. The top sirloin is the best cut from this area of the carcass. These thick cuts of beef are perfect for grilling, broiling, sautéeing, or pan-frying.

Is sirloin steak a tender or tough cut of beef?

It depends. The sirloin area is large, so some cuts can be tender and juicy, while other cuts can be tough. That said, sirloin often provides the home cook with a relatively tender texture at an affordable price.

Carma's Cookery Creative Cooking Tips

Because this recipe is so simple, you can easily add and substitute ingredients to customize it to your taste. Here are some ideas.

  • Switch up the herbs. This doesn’t have to be an Italian herbed steak. You can give an Indian flare by instead using a mixture of onion powder, garlic powder, ginger and cumin. Or perhaps you like something a little more spicy? Try a mixture of ground mustard, smoked paprika and a touch of caiyenne. You can find a variety of seasoning ideas here.
  • Don’t like Dijon? Try one of the many other types of mustard on the market. Or skip it all together, and simply use the herbs as a dry rub.
  • Change the cooking method. Instead of cooking the steak after you’ve browned all the sides, pop it in your slow cooker to finish cooking. Be sure to add a little bit of liquid, perhaps some red wine or beef broth, to ensure it stays moist and tender. Cook on low for 4 to 6 hours, until the internal temperature reaches your desired doneness.
Categories
Recipes

Pumpkin Mousse with Maple Whipped Cream

You don’t have to have pumpkin pie for the holidays. There are numerous ways to enjoy pumpkin! Here is a pumpkin mousse that is both gluten-free and refined-sugar-free… but I like to eat it with gingersnaps!

Pumpkin Mousse with Maple Whipped Cream

Creamy Pumpkin Mousse with Maple Whipped Cream
Print

Creamy Pumpkin Mousse with Maple Whipped Cream

Course Dessert
Cuisine American
Keyword mousse, pumpkin
Prep Time 10 minutes
Servings 6

Equipment

  • Hand Mixer

Ingredients

  • 1 pint heavy whipping cream
  • 6 Tbsp real maple syrup, divided
  • 2 cups pumpkin puree
  • 8 oz cream cheese, softened, cubed
  • 2 Tbsp pumpkin pie spice
  • 1 tsp real vanilla extract
  • cup half and half

Optional Ingredients

  • 12 pecan halves
  • Cinnamon, for dusting
  • 12 Gingersnap cookies

Instructions

  • In a large bowl, beat the heavy whipping cream with a hand mixer until it doubles in size.
  • Add 2 Tablespoons of the maple syrup and continue beating until light and fluffy. Cover and place in the refrigerator until ready to use.
  • In another large bowl, beat the pumpkin purée, cream cheese, pumpkin pie spice, vanilla extract, half&half, and remaining maple syrup with a hand mixer until thoroughly blended.
  • Taste and adjust seasonings, as desired, and transfer to individual dessert bowls. Cover and place in the refrigerator to chill for at least 1 hour.
  • To serve, remove from refrigerator and top with maple whipped cream, pecans, gingersnaps, and a sprinkle of ground cinnamon, as desired.

Carma's Cookery Creative Cooking Tips

There are several ways you can customize this pumpkin mousse to be your own. But first, some notes about the ingredients.

  • Maple Syrup: Don’t use imitation maple syrup. It doesn’t have the complexity of flavor to do this dessert justice.
  • Pumpkin purée: You can either use canned (I recommend Libby’s), but you can also make your own (recipe below).
  • Pumpkin pie spice: You can purchase pre-mixed pumpkin pie spice or make your own (recipe below). The beauty of making your own is that you can play with the flavor profile by changing the ratios of the various ingredients.
  • Ginger Snap cookies: Store-purchased or home-made work equally well.

And now for customization ideas:

  • Don’t like maple syrup? Try making cinnamon whipped cream or just plain whipped cream.
  • Turn this into another type of mousse. Substitute yam or butternut squash purée for the pumpkin purée. If you want to get really creative, you could experiment with kidney bean purée, carrot purée, or even beet purée for a shocking color change.
  • Change out the cheese. You can use any type of soft, firm cheese for this recipe. Perhaps goat cheese would work? Or even a vegan cream cheese.
  • Try a different spice mix. You can play around with the flavor profile of your pumpkin pie spice using the recipe below as your starting point, or even experiment with other spices such as cardamom, anise, or culinary lavender.
  • You can also experiment with the extract. You don’t have to use vanilla all the time. There are plenty of other extracts that might go well, such as lemon, maple, or cinnamon.

How to make pumpkin purée

Making your own pumpkin purée gives your recipes, such as this Pumpkin Mousse, a fresher flavor.

Ingredients:

Directions:

  1. Preheat oven to 350 degrees F. Lightly oil a roasting pan.
  2. Using a large knife, remove the stem and cut the pumpkin into quarters.
  3. Scoop out the stringy fibers and seeds.
  4. Cut quarters into 2- to 3-inch pieces.
  5. Place the pumpkin pieces into the prepared roasting pan skin side down.
  6. Add water and cover lightly with aluminum foil.
  7. Bake until tender, about 1 1/4 hours.
  8. Uncover and cool.
  9. Remove pumpkin skin and purée the pumpkin in a food processor. Make sure it doesn’t have any chunks. You want it to be silky smooth for a recipe like Pumpkin Mousse.
  10. Place the pumpkin purée in a cheesecloth-lined wire sieve set over a bowl. Fold up the edges of the cheesecloth to cover the purée. Place a saucer on the purée and weigh it down with a 1 pound can to force out the excess liquid.
  11. Let stand until the purée is the consistency of canned pumpkin, about 1 hour.
  12. The pumpkin purée can be frozen in an airtight container for up to 1 month.

How to make pumpkin pie spice

Ingredients:

  • 1/2 teaspoon cinnamon
  • 1/4 teaspoon ginger
  • 1/8 teaspoon nutmeg
  • 1/8 teaspoon allspice or cloves

Directions:

  1. In a ramekin or very small bowl, combine the ingredients.
  2. This mixture makes one teaspoon of pumpkin pie spice.
  3. If you want to have pumpkin pie spice on hand, you can scale the recipe up by multiplying each ingredient’s amount by 4. Store in an airtight container.
Categories
Recipes

Turkey Stuffed Mushrooms

Looking for something a little fancier to serve your guests than cheese and crackers? Warm appetizers, such as these Turkey Stuffed Mushrooms are a great way to level up. And there are several ways you can give them your creative flair.

Turkey Stuffed Mushrooms

This recipe can be doubled up for larger parties.

Spicy Turkey Stuffed Mushrooms
Print

Turkey Stuffed Mushrooms

Stuffed mushrooms make a great appetizer at a party.
Course Appetizer
Cuisine American
Keyword mushrooms, poultry, warm appetizers
Prep Time 10 minutes
Cook Time 25 minutes
Servings 4

Ingredients

  • 3 Tablespoons extravirgin olive oil, divided
  • 1 lb. bulkturkey sausage
  • 4 oz. goatcheese, roomtemp, cut into small chunks
  • 16 oz. mediumPortobello mushrooms, rinsed,stems removed, and patted dry
  • Seasalt and black pepper , to taste (optional)

Instructions

  • Preheatoven to 350°F and lightly grease a large roasting pan with one tablespoon oliveoil. Set aside.
  • Heat remaining olive oil in a large skillet over medium heat.
  • Cook turkey sausage until no longer pink, approximately 6-8 minutes, breaking up the sausage into small pieces while cooking.
  • Add goat cheese to skillet and cover for 1-2 minutes.
  • Remove cover and stir until cheese is completely melted and combined with the turkey. Remove from heat and set aside.
  • Fill each mushroom cap with some of the turkey mixture.
  • Drizzle the mushrooms with remaining olive oil and season with salt and black pepper,as desired.
  • Place pan in the pre-heated oven and roast until the mushrooms are slightly browned around the edges, approximately 10-12 minutes. Remove from oven and serve immediately.

Carma's Cookery Creative Cooking Tips

Suggested Twists for Turkey Stuffed Mushrooms

The recipe above is pretty basic — and tasty — as is. Why not get a little creative and make this recipe your own?

Spice It Up

  • Before you add the turkey to the skillet, cook a seeded and diced Poblano pepper until it softens and develops a bit of color, approximately 3-4 minutes.

Play Meat Matchmaker

  • You don’t have to limit yourself to turkey sausage. Any kind of sausage will do. If it doesn’t come in bulk, you can simply remove the casings.
  • You don’t have to limit yourself to sausage, either. Any kind of ground meat will work. Just be sure to add in some seasonings for flavor.

Get Cheesy

  • Experiment with other types of soft cheeses. Instead of goat cheese, try out cream cheese, mascarpone, or Port wine cheese spread.
  • You can even top with cheese. Before you put your stuffed mushrooms in the oven, put a little shredded Parmesan, Romano, or Cheddar on top.

Have Fun with Fungus

  • There are a variety of mushrooms, big and small that could work with this recipe. Explore your produce section and experiment with them. Shitake or white button mushrooms are commonly found at most grocery stores.

[divider]

[one_third] Healthy Eating Worksheet [/one_third]
[two_third_last]

Take Charge of Your Health!

Changing your eating habits can be tough. But it doesn’t have to be if you take a little time to think it out and create a plan.

This Healthy Eating Worksheet will walk you through the process of creating a healthy eating plan. All you need to do is print it out, set aside some time to complete it, and then fill it out. Then you can create your plan, knowing that you have addressed potential obstacles and came up with some creative ways to handle them.

Download Now [/two_third_last]

Categories
Recipes

Chocolate Hazelnut Truffles

Looking for a delicious snack to satisfy your sweet tooth? Look no further than these decadent chocolate hazelnut truffles. The best part? Dates and a touch of maple syrup add just enough sweetness without adding any refined sugar.

Chocolate Hazelnut Truffles

Chocolate Hazelnut Truffles
Print

Chocolate Hazelnut Truffles

Quick and easy truffles with no added refined sugar.
Course Dessert
Cuisine French
Keyword chocolate, truffles
Prep Time 25 minutes
Cook Time 0 minutes

Equipment

  • Food Processor

Ingredients

  • ½ cup raw hazelnuts
  • 12 Medjool dates, pitted
  • 2 Tablespoons cocoa powder, unsweetened
  • 2 Tablespoons coconut flour
  • 1 Tablespoon coconut oil, melted
  • 1 ½ Tablespoon pure maple syrup
  • 1 teaspoon pure vanilla extract
  • ¼ teaspoon coarse salt

Optional Coatings

  • ¼ cup hazelnuts or almonds, ground
  • ¼ cup coconut flakes, finely shredded
  • 2 Tablespoons unsweetened cocoa powder

Instructions

Pre-Preparation

  • In a small bowl filled with warm water, place pitted dates. Set aside to soak for 10-15 minutes.
  • Line a rimmed baking sheet with wax paper and set aside.
  • Pour each selected coating, if using, onto a separate shallow, rimmed plate and set aside.

Preparation

  • Add hazelnuts to a food processor and process until finely ground.
  • Remove the softened dates from bowl and drain off any excess water. Add dates and cocoa powder to food processor and blend until smooth, approximately 3-4 minutes. Scrape the sides, as necessary, to ensure mixture is thoroughly combined.
    Tip: Add a few drops of water at a time, if necessary, to achieve a smooth consistency, but don’t add too much.
  • Add coconut flour, coconut oil, maple syrup, vanilla extract, and salt to the mixture and process until combined.
  • Remove the dough from the food processor and divide into 15-18 equal-sized portions. Roll each section of dough into a ball before rolling in the selected coatings.
  • Once coated, place on prepared baking tray and place in the refrigerator to chill for several minutes before serving.

Carma's Cookery Creative Cooking Tips

These truffles are great as is, but why not have fun with them any way? Here are some ideas.

  • Give them a Halloween twist by using orange, black and purple colored sugar as your coatings. Or, if you’re patient enough, turn theem into little Jack-o-Lanterns by coating then in orange icing and use a stencil to create the face using black sugar crystals or icing.
  • Dress them up for Thanksgiving by turning them into turkeys! Add a tail and head made of paper and the truffle becomes the body of the turkey.
  • Dress them up for December holidays by using colored sugar crystals appropriate for the holiday you celebrate.
  • Experiment with flavors by using almonds, peanuts or pistachios insead of hazelnuts.

By unleashing a little creativity, you can take this simple truffle recipe and make it your own.

Categories
Recipes

Strawberry Fennel Salad with Homemade Vinaigrette

Need a quick and refreshing side dish to add a pop of color and fresh flavor to your dinner table? Look no further than this super quick and easy strawberry fennel salad. The fennel offers a satisfying crunch, while the sweet strawberries balance the natural saltiness of the Feta cheese. It comes together in just 15 minutes, so it’s perfect for those busy weeknight meals.

Strawberry Fennel Salad with Homemade Vinaigrette

Strawberry Fennel Salad with Homemade Vinaigrette
Print

Strawberry Fennel Salad with Homemade Vinaigrette

Quickand easy strawberry fennel salad, perfect for those busy weeknightmeals.
Course Salad
Cuisine American
Keyword fennel, strawberry
Prep Time 15 minutes
Cook Time 0 minutes
Servings 3 servings

Ingredients

Vinaigrette

  • 1/4 cup extra virgin olive oil
  • 2 Tablespoons ricewine vinegar
  • 1 Tablespoon Dijon mustard
  • 1/2 teaspoon Italian seasoning
  • sea salt and black pepper, to taste

Salad

  • 2 cups baby spinach, rinsed and patted dry
  • 2 cups baby arugula, rinsed and patted dry
  • 1 medium fennel bulb, trimmed and thinly sliced
  • 1 cup strawberries, sliced
  • 4 oz. Feta cheese, crumbled
  • springs fresh basil optional for garnish

Instructions

  • In a small glass or non-reactive bowl, whisk together the vinaigrette ingredients. Taste and adjust seasonings to suit your preferences.
  • Arrange the spinach and arugula on a serving platter and top with sliced fennel, strawberries, and Feta cheese.
  • Serve immediately with chilled salad plates and dressing on the side.

Notes

If preferred, toss the spinach and arugula with the salad dressing prior to arranging on the platter.

Carma's Cookery Creative Cooking Tips

Feel free to experiment with the salad dressing. I bet this salad would taste great with a poppy seed dressing!

You can also experiment with the greens. Try some of these combinations to see if they suit you better:

  • Baby spinach alone
  • Mixed baby greens
  • Baby spinach, butter lettuce and romaine

For this salad, you do want to use a strongly flavored green such as spinach so that it balances the fennel and strawberry, but feel free to mix and match the rest.

[divider]

[one_third] Healthy Eating Worksheet [/one_third]
[two_third_last]

Take Charge of Your Health!

Changing your eating habits can be tough. But it doesn’t have to be if you take a little time to think it out and create a plan.

This Healthy Eating Worksheet will walk you through the process of creating a healthy eating plan. All you need to do is print it out, set aside some time to complete it, and then fill it out. Then you can create your plan, knowing that you have addressed potential obstacles and came up with some creative ways to handle them.

Download Now [/two_third_last]

Categories
Recipes

Grilled Steak Fajitas

Is your grilling getting boring? Summer barbecues don’t have to stick to the traditional steak, chicken, and corn on the cob. You can get creative as with this recipe for Grilled Steak Fajitas.

grilled steak fajitas

This recipe was submitted by BBQGuys’ Grillmaster Randy Watson.

grilled steak fajitas
Print

Grilled Steak Fajitas

Course Main Course
Cuisine Mexican
Keyword beef
Servings 4 servings
Author Randy Watson, BBQGuys’ Grillmaster

Ingredients

  • 2 teaspoons chili powder
  • 1 teaspoon paprika
  • 1 teaspoon cumin
  • 1 teaspoon kosher salt
  • ½ teaspoon onion powder
  • 1 teaspoon garlic powder (optional)
  • ¼ teaspoon cayenne
  • 1 Tablespoon olive oil
  • 3 limes, juice
  • 2 garlic cloves, minced
  • 1 deseeded jalapeno, sliced
  • ¼ cup cilantro, rough-chopped
  • 2 pounds flank steak
  • 1 red bell pepper, sliced
  • 1 green bell pepper, sliced
  • 1 yellos bell pepper, sliced
  • 1 large yellow onion, sliced
  • 1 Tablespoon olive oil
  • Salt and black pepper, to taste

Instructions

  • First off, we’re blending our fajita seasoning for two reasons: it’s just plain fun to do, and the rich aromas will get your anticipation churning. Mix together chili powder, paprika, cumin, kosher salt, onion powder, garlic powder, and cayenne in a small bowl. If you’re using the marinade, you should skip the garlic here — your flank steak is already going to spend a lot of time getting to know it, and that’s a strong spice to double down on.
  • Keeping our seasoning rub sticking to the meat is our next priority. Coat your flank steak with olive oil, then rub it down generously on all sides with seasoning. When you’re done, sheathe the meat with a gallon sized zip-tight bag and set aside. Don’t you worry — we’re not leaving it alone for long.
  • In a medium mixing bowl, combine lime juice, garlic cloves, jalapeno, and cilantro and give them a good stir. Afterwards, pour them into the very same bag, seal it up (while pushing out as much air as you can), and shake the bag vigorously for a few short minutes while massaging the meat.
  • Time to let the party mingle in the refrigerator. You’ll want those juices chilling with your flank steak and making best friends for at least 4 hours (overnight is preferable, but we understand eagerness getting the better of you). No air gaps in the bag will make them that much closer.
  • Ready to grill? Great! Pull your marinated meat from the fridge; while you fire up the cooktop, you’ll want to let the flank steak move towards room temperature. Go ahead and blend your vegetables together; mix them with oil, salt, and pepper. You’ll be looking for a good searing temperature around 400-500 degrees Fahrenheit (Grill master’s note: My preference here? The higher, the better).
  • While the grill’s still preheating, set a skillet on the cooking grates. We suggest using a shallow cast iron skillet for this — our grill master is fond of them for their ease in reaching maximum caramelization, especially in this recipe. Meanwhile, now’s the time to let that meat free. Take it out of the bag and remove the jalapeno before grilling.
  • Once your grill hits temperature, move the flank steak onto your skillet and listen to that sweet, hissing sizzle (music to our ears)! Grill with the lid up — if you’re aiming for medium rare to medium doneness, we heartily recommend 3-4 minutes on each side. Adjust your timing as needed.
  • Using oven mitts, remove the skillet from the hot grill and shift your cooked flank steak to a cutting board or plate. Brush off your skillet; while letting the meat rest for about 10 minutes, you’ll use this time (and your skillet, which should still be piping hot and ready for action) to grill up your vegetables.
  • Speaking of those veggies, give them the heat for 5-7 minutes. You’ll want to stir often to avoid charring them. Once they’ve have become translucent, remove your vegetables from the grill (but not the skillet; for now, let them sit tight and soaking up heat).
  • Slice your flanked steak against the grain and on a bias. Don’t those vegetables look just plain lonely in that skillet? They miss their new friend! Move your sliced meat to the still-sizzling skillet — you’re done! Serve up with corn or flour tortillas and your favorite toppings.
Categories
Recipes

Black Forest Sheet Cake

Earlier this month, I made a birthday cake for my father-in-law. He said he liked chocolate cake and since he is of German descent, I thought I’d make a Black Forest cake. However, due to our recent move to Minnesota and the current job climate, I had to borrow someone’s kitchen and their equipment. Therefore, I created this simple recipe for a Black Forest Sheet Cake.

black forest sheet cake

I wasn’t sure how it would turn out, but my research suggested that others had done something similar to what I had in mind. The result was really quite good and the folks celebrating around the table loved it. In fact, everyone had seconds! Give it a try. It is easy to make and quite tasty.

black forest sheet cake
Print

Black Forest Sheet Cake

If you have limited time and equipment, this is a great way to make a tasty and somewhat "fancy" cake.
Course Dessert
Cuisine American, German
Keyword Black Forest cake, sheet cake
Cook Time 35 minutes
Preparation and assembly 45 minutes
Total Time 1 hour 20 minutes
Servings 15 slices

Equipment

  • Electric Mixer
  • 13" x 9" cake pan

Ingredients

  • 1 box Triple chocolate cake mix
  • water, as stated on the box
  • oil, as stated on the box
  • eggs, as stated on the box
  • 2 cans cherry pie filling
  • 2 cups heavy whipping cream
  • teaspoon vanilla
  • 1 jar marichino cherries, drained

Instructions

  • Preheat oven to temporature recommended on the cake mix box.
  • Follow instructions on the cake mix box to make the cake.
  • Remove cake from the oven. Using the handle end of a wooden spoon, poke holes at regular intervals in the cake.
  • In a microwave safe bowl, pour both cans of cherry pie mix in. Warm in microwave until the gel in liquid, approximately 2 to 5 minutes. Immediately pour on top of warm cake. Use wooden spoon to spread cherries around evenly and encourage the liquid to seep into the holes you poked.
  • Let cool completely, approximately 2 to 3 hours.
  • In a large bowl, whip the whipping cream until soft peaks form. Add vanilla. Continue whipping until stiff peaks form.
  • Spread on top of cooled cake.
  • Drain maraschino cherries. Decorate the top of the cake with three rows of five cherries. The cherries will be at the center of each slice. Refrigerate until ready to serve. Refrigerate left overs -- if you ahve any!

Carma's Cookery Creative Cooking Tips

You can easily turn this Black Forest Sheet Cake into a variety of other cakes of your own. Here are some suggestions for different toppings and combinations.

  • I used Betty Crocker Super Moist Cake Mix, Triple Chocolate Fudge cake mix, but you could use any brand or variety of cake mix. Devil’s food or even an ordinary chocolate cake could work well.
  • You don’t have to start from a cake mix, you could make a chocolate cake from scratch.
  • Try a different combination of cake mix and pie filling. Here are some suggestions:
    • Yellow cake with apple pie filling.
    • White cake with peach pie filling.
    • Red velvet cake with raspberry pie filling.
    • Lemon cake with lemon pie filling.
    • Strawberry cake mix with key lime pie filling.
    • Carrot cake mix with cheese cake pie filling.
  • Try different toppings. You could easily use Cool Whip or Dream Whip instead of whipped cream. You could layer on pudding to make it extra-moist. If you’re using apple pie filling, why not try a streusel topping?
  • Use chocolate covered cherries instead of maraschino cherries for decoration.
The owner of this website has made a commitment to accessibility and inclusion, please report any problems that you encounter using the contact form on this website. This site uses the WP ADA Compliance Check plugin to enhance accessibility.