Categories
Flavor Blending

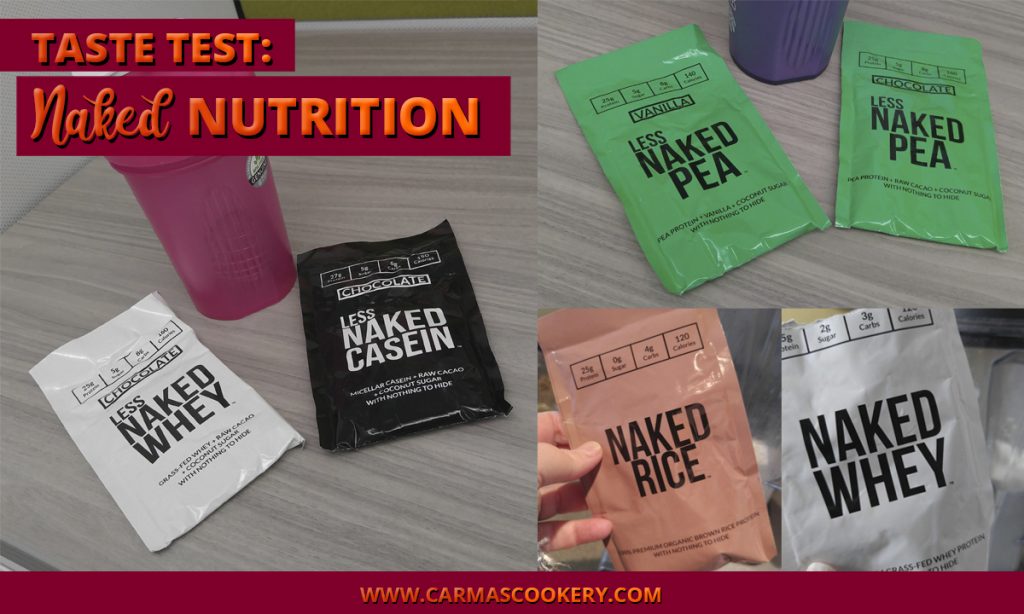
Taste Test: Naked Nutrition

So many protein powders to choose from, and so many of them not as natural as they seem. Enter Naked Nutrition, a company that sells all-natural protein powders that use only the purest raw ingredients, such as whey protein from grass-fed cows.

I received samples of their line up to try out and this was my experience.

Taste Test - Naked Nutrition

How I Tested Naked Nutrition Protein Powders

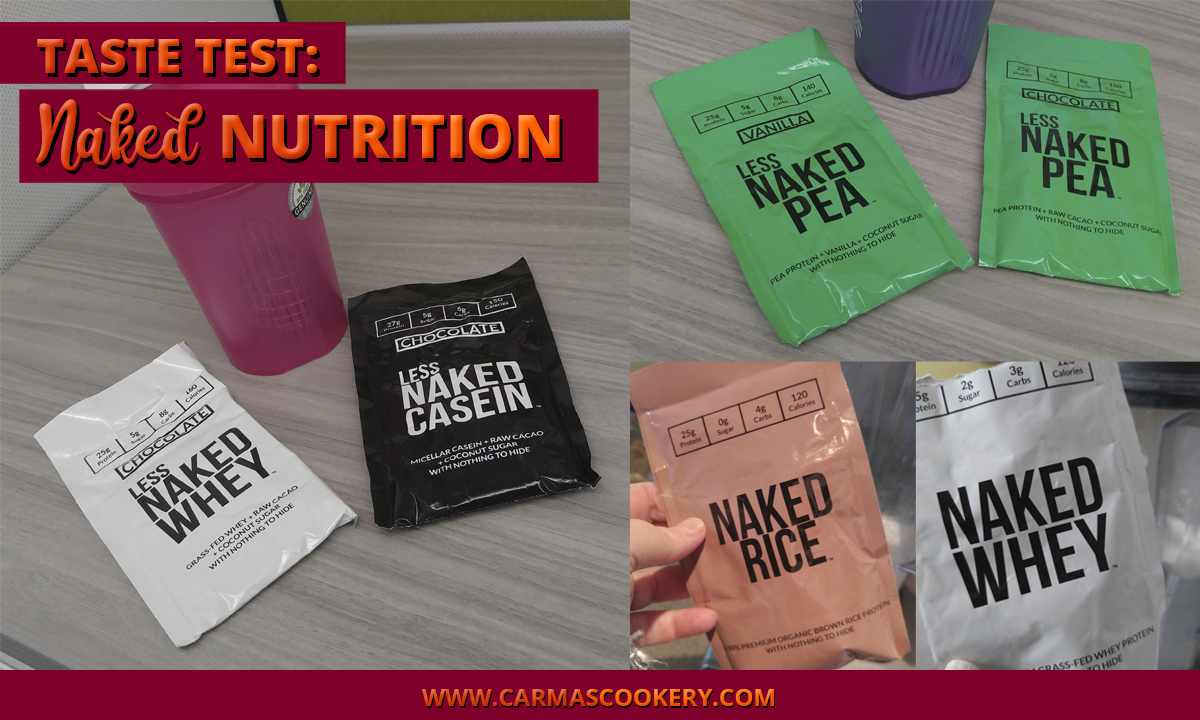
I received samples of:

[one_half] [list_font icon=”arrow-circle-right” list_item_1=”Less Naked Casein Chocolate” list_item_2=”Less Naked Whey Chocolate” list_item_3=”Less Naked Casein Vanilla” list_item_4=”Less Naked Whey Vanilla” list_item_5=”Less Naked Pea Vanilla”] [/one_half]
[one_half_last] [list_font icon=”arrow-circle-right” list_item_1=”Less Naked Pea Chocolate” list_item_2=”Naked Goat” list_item_3=”Naked Rice” list_item_4=”Naked Pea” list_item_5=”Naked Whey”] [/one_half_last]

I tested all the “Less” varieties with a shaker bottle and water, then a shaker bottle with milk. The remaining powders I tested using a blender with milk and half a frozen banana.

My Experience with Naked Nutrition

I tested these proteins over several days so that I could give each one my full attention.

[three_fourth]

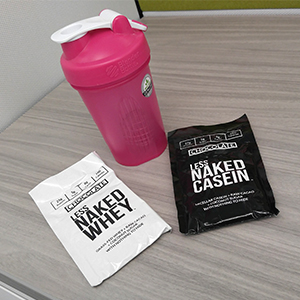
Day 1: Less Naked Casein Chocolate & Less Naked Whey Chocolate

Method: Shaker bottle and water
Experience: Tasted very powdery. Not terrible, but not tasty either. Whey tasted better than Casein [/three_fourth]
[one_fourth_last] Day 1 - Less Naked Casein Chocolate & Less Naked Whey Chocolate from Naked Nutrition [/one_fourth_last]

[three_fourth]

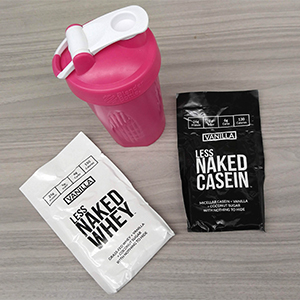
Day 2: Less Naked Casein Vanilla & Less Naked Whey Vanilla

Method: Shaker bottle and milk
Experience: Still a little powdery, but definitely better than with water.
This time I liked the Casein better. [/three_fourth]
[one_fourth_last] Day 2 - Less Naked Casein Vanilla & Less Naked Whey Vanilla [/one_fourth_last]

[three_fourth]

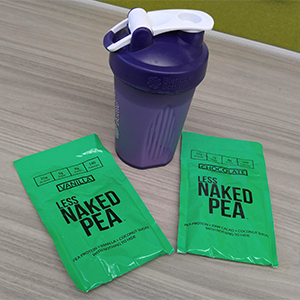
Day 3: Less Naked Pea, both Vanilla and Chocolate

Method: Shaker bottle and milk
Experience: Chocolate — powdery and you could totally taste the pea.
Vanilla — tasted better than chocolate, but still powdery and tasting of pea. [/three_fourth]
[one_fourth_last] Day 3 - Less Naked Pea, both Vanilla and Chocolate [/one_fourth_last]

NOTE: At this point, I decided these proteins are not shaker bottle friendly and switched to a blender.

[three_fourth]

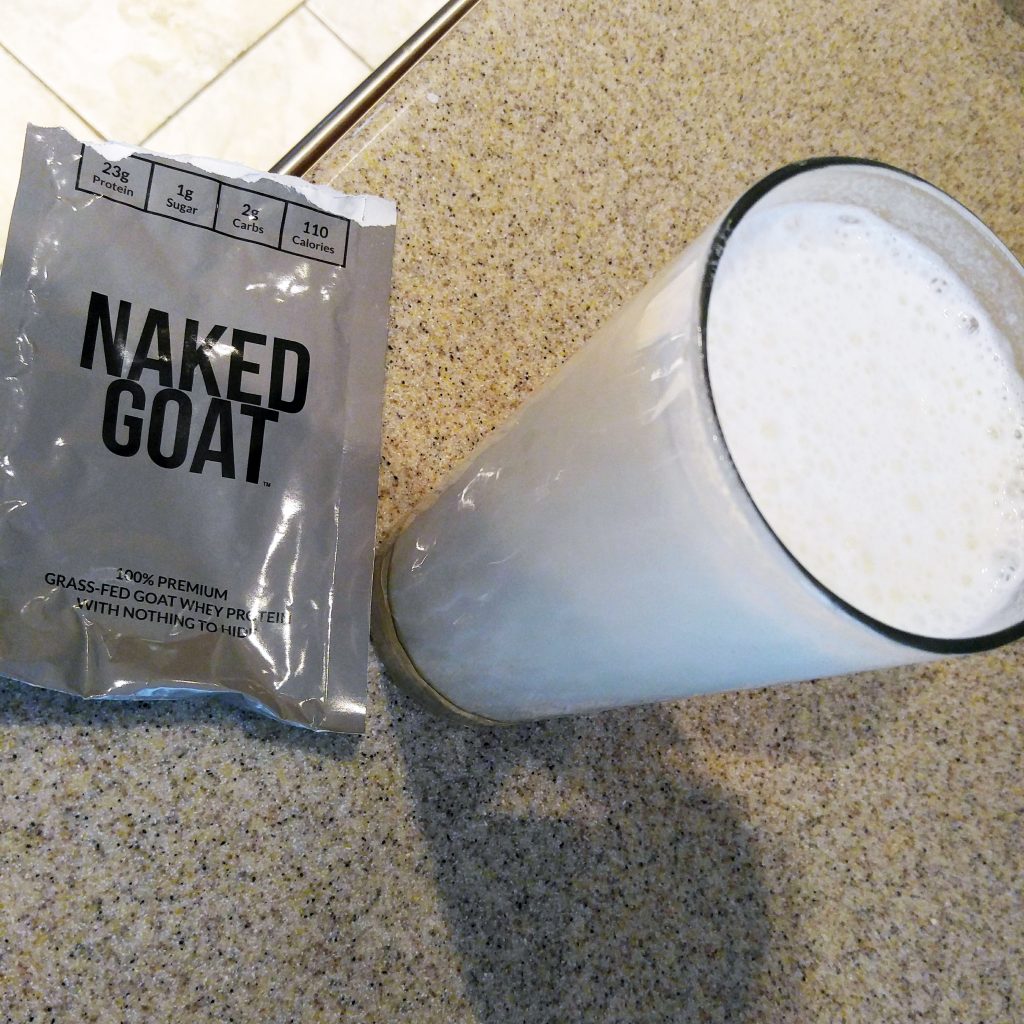
Day 4: Naked Goat

Method: Blender, milk, half a frozen ripe banana
Experience: Just fine, with a tiny tartness that is common with goat milk. [/three_fourth]
[one_fourth_last] Day 4 - Naked Goat from Naked Nutrition [/one_fourth_last]

[three_fourth]

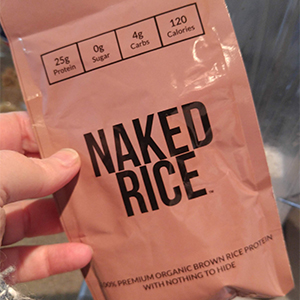
Day 5: Naked Rice

Method: Blender, milk, half a frozen ripe banana
Experience: VERY powdery, barely edible. [/three_fourth]
[one_fourth_last] Day 5 - Naked Rice from Naked Nutrition [/one_fourth_last]

[three_fourth]

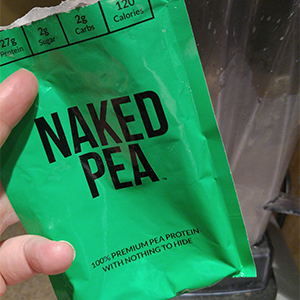
Day 6: Naked Pea

Method: Blender, milk, half a frozen ripe banana
Experience: Not as powdery as the vanilla pea, but still tasted vaguely of pea. [/three_fourth]
[one_fourth_last] Day 6 - Naked Pea from Naked Nutrition [/one_fourth_last]

[three_fourth]

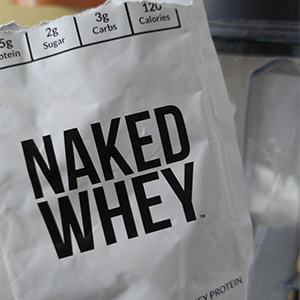
Day 6: Naked Whey

Method: Blender, milk, half a frozen ripe banana
Experience: Blended perfectly, couldn’t detect it was there. [/three_fourth]
[one_fourth_last] Day 6 - Naked Whey [/one_fourth_last]

An Apology: I also received a sample of Naked Casein — I have a photo of me trying it to prove it. However, I forgot to take notes and don’t have a strong enough recollection of my experience to share it with you.

My Recommendations for Naked Nutrition

Given my experience, I liked the Naked Whey the best. I’ve never had luck with pea protein and that was no different here. However, I really like the mission Naked Nutrition is trying to accomplish, to strip away all of the marketing and gimmicks and sell products with only the purest ingredients. So, if you’re looking for a high-quality product, give them a try. Your experience may be different than mine because your palate is different than mine.

Rating for Naked Nutrition: 3 out of 5

[one_fifth] thumbs up [/one_fifth]

[one_fifth] thumbs up [/one_fifth]

[one_fifth] thumbs up [/one_fifth]

[one_fifth] thumbs down [/one_fifth]

[one_fifth_last] thumbs down [/one_fifth_last]

NOTE: I received a free copy of this product in exchange for an honest review. If you’ve read past taste tests, you’ll know that I don’t pull my punches when I believe they are warranted. I also try to provide balanced information so you can make your own decision to buy or not buy this product, even if you disagree with my opinion.

Categories
Creative Cookery Flavor Blending

4 Fantastic Ways To Level Up Your Cooking

It doesn’t take much to level up your cooking and create a new layer of flavor and richness to the dishes you prepare. Here are some of the best possibilities that I recommend you explore. Take this advice and you’ll be amazed at how tasty your dishes become.

4 Fantastic Ways To Level Up Your Cooking

Invest In New Tech

As odd as it sounds it can be worth investing in new tech when you’re trying to level up your cooking. Why is this? Well, I could explore the example of a heat induction hob. A heat induction hob will react and change based on how you are using it and the dish that you are preparing. It will evenly heat the surface of any pan. So, you can guarantee that you get the most flavor out of anything you’re cooking. After all, any chef will tell you that heating a dish to perfection will deliver the ultimate tasty treat that you are searching for.

Level Up Your Cooking with Sauces

Try a few different sauces to see if they can bring anything new and exciting to your cooking. Companies such as esprovisions.com provide novice chefs with sauce packages so that you can choose from and sample a variety of different flavors. While Esprovisions does specialize in providing sauces for pretzels, it’s worth noting that you can also sample these and add them to different dishes and snacks. You might find a perfect match here and sometimes the right sauce is all you need to elevate one of your creations.

Mix And Match Different Flavors

Try different flavors and mix them together. It’s worth being adventurous here because you’ll never know what flavors go together unless you try them at least once. Once you start exploring the options, you’ll probably find that there are some really different and unique matches that make certain dishes you have been cooking for years come alive in fantastic, fresh ways. Take inspiration from chefs that are well known for being a little bolder with the flavors that they use. If you are brave enough you could create a brand new dish completely unique to you.

Buy A New Cook Book to Level Up Your Cooking

You might want to think about purchasing a new cookbook. The benefit of a cookbook is that you can use it as inspiration and a starting point for your own exciting recipes. If you do this, you’ll be amazed at just how much you can accomplish. Be sure to research different cookbooks and look at reviews. It’s important to make sure that the recipes are useful and easy to follow as well.

I hope you love these ideas and look forward to adding more to your cooking experiences. If you take the right steps here you’ll be amazed at the new delicious dishes that you create. They are guaranteed to tantalize your taste buds and anyone that you might choose to serve them too. All it takes is a little determination and a lot of passion.

[divider]

[one_third] Healthy Eating Worksheet [/one_third]
[two_third_last]

Take Charge of Your Health!

Changing your eating habits can be tough. But it doesn’t have to be if you take a little time to think it out and create a plan.

This Healthy Eating Worksheet will walk you through the process of creating a healthy eating plan. All you need to do is print it out, set aside some time to complete it, and then fill it out. Then you can create your plan, knowing that you have addressed potential obstacles and came up with some creative ways to handle them.

Download Now [/two_third_last]

Categories
Creative Cookery Flavor Blending Recipes

Summer Barbecue: Baked Beans and Hot Dogs Are a Great Match

July is both National Baked Beans Month and National Hot Dog Month. Now there is a match made in summer barbecue heaven!

Summer Barbecue: Baked Beans and Hot Dogs Are a Great Match

Summer Barbecue: Baked Beans

It’s summertime and that means barbecue time. This summer’s grilling season will be especially sweet after months of lockdown. One of the more popular side dishes of the season in America is baked beans.

Beans are high in protein, practically fat-free and contain more fiber than many whole grade foods. If you’re watching your carbs, however, they do count even with all that protein.

You can thank Native Americans for baked beans, who originally sweetened them with maple syrup. In the 17th Century, English colonists modified the recipe and began using brown sugar. In the 18th Century, Americans started using molasses to avoid British taxes on sugar.

Summer Barbecue: Hot Dogs

Another summer barbecue favorite is the hot dog. I remember finding a stick, sharpening one end, skewering a dog, and cooking it over an open flame when I was a kid. Yum! Hot dogs are celebrated this month at a variety of festivals across the U.S., including:

  • Alfred Village Hot Dog Day, Alfred, NY
  • Annual Hot Dog Lunch, Washington, DC
  • Boston Hot Dog Safari, Boston, MA
  • West Virginia Hot Dog Festival, Huntington, WV

You can learn about them and discover more on Wikipedia.

Maple Baked Beans with Hot Dogs

To help you celebrate these two fine foods during your summer barbecue, here’s a recipe that brings them together.

Ingredients:

  • 1 pound dried white beans
  • 6 slices thick-cut bacon, diced
  • 1 large onion, chopped
  • 1 cup real maple syrup
  • 3/4 cup tomato paste
  • 1/4 cup cider vinegar
  • 1/4 cup brown sugar
  • 1 teaspoon prepared mustard
  • 1 teaspoon salt
  • 1/2 teaspoon pepper
  • 1/2 teaspoon ground cumin
  • 1/2 teaspoon paprika
  • 4 large all-beef hot dogs, chopped

Directions:

For best flavor, make at lead one day ahead of time.

  1. Sort and since the beans. Place in a bowl and cover with water. Let soak for 30 minutes.
  2. Drain and repeat one more time. This process will reduce the gas of the beans.
  3. Place beans in a 4-quart Dutch oven and cover with two quarts of cold water. Bring to a boil.
  4. Reduce heat and simmer for 2 minutes, then remove from the heat.
  5. Cover and let stand 1 hour. Drain and rinse beans.
  6. Return beans to Dutch oven; cover with another two quarts of cold water. Bring to a boil; reduce heat and simmer for 30-40 minutes or until almost tender.
  7. Drain and reserve liquid.
  8. In a 2-1/2-quart casserole pot, combine beans with all remaining ingredients except the hot dogs.
  9. Cover and bake at 325° for 2 hours. Stir occasionally; add reserved bean liquid, if necessary.
  10. Add hot dogs and bake for an additional 30 minutes or until tender.

Carma's Cookery Creative Cooking Tips

Feel free to play around with the recipe. If you want it sweeter, increase the maple syrup and/or the brown sugar. Reduce them if you want it less sweet.

Like a spicier sauce? Increase the paprika or add in some cayenne pepper.

You can also try adding in ham or substituting salt pork for the bacon.

Another idea would be to use sausages such as kielbasa or polish sausage instead of hot dogs.

Another way to add flavor is to grill the hot dogs or sausage before adding them to the beans.

You can even cook this in your slow cooker rather than the oven. Cook it on low all day to really meld the flavors together.

Customize the recipe to suit your and your family’s taste!

Categories
Flavor Blending

Product Review: Bamboo Cutting Boards Set by Royal Craft Wood

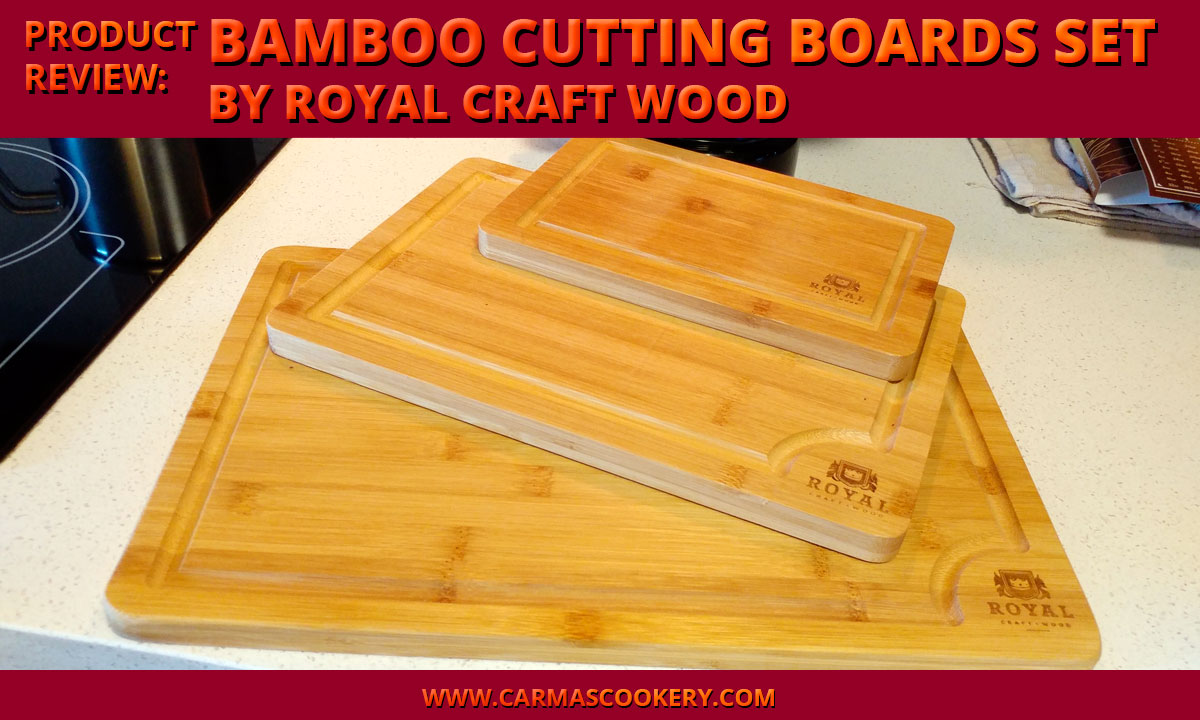
Well, I’m at it again: Reviewing another bamboo product from Royal Craft Wood. This time, it is a 3-piece cutting board set, which I received yesterday — just as I was moving out to a new home. What timing! This empowers me to start my new kitchen with brand new cutting boards that turn out to be superior to what I had before.

bamboo cutting boards

Product Description: Bamboo Cutting Board Set

My previous cutting boards were made of the traditional wood and had numerous cut marks in them. From what I’ve learned through research, I won’t have to worry about that so much with these bamboo cutting boards. Bamboo resists absorbing the odors of various foods and is because of its hardness, bamboo resists knife scaring. Because of this, bamboo cutting boards are less likely to have pockets where moisture, food particles, and bacteria can accumulate. This makes bamboo boards much more sanitary than boards made of other materials.

Bamboo has a hard density, making cutting boards made from this material nearly maintenance-free. Bamboo resists absorbing water and therefore will not warp or crack as easily as other woods.

How to Care for Bamboo Products

I mentioned this in my previous review of a Royal Craft Wood product, but it bears repeating. To help your bamboo cutting boards last, simply follow these care recommendations:

  • Wash by hand — NOT in a dishwasher. The extreme heat can damage it.
  • Don’t let the board soak in water.
  • Wipe the board dry after washing by hand.

What I Liked About Royal Craft Wood’s Bamboo Cheese Board

This may sound odd, but when I first opened the package, removing the plastic, the aroma of wood wafted up and smelled so good!

Then, the look and feel of these bamboo cutting boards: They are beautifully crafted and have nice indentations on the bottom that will make them easy to pick up.

As with the cheese board I reviewed a few weeks ago, the quality is readily apparent. They feel durable and sturdy.

And addition to all the other benefits of bamboo, I like that they are made from a sustainable and renewable resource. Bamboo grows readily, making products made from bamboo more environmentally friendly.

What I didn’t like about Royal Craft Wood’s Bamboo Cheese Board

Frankly, I can’t think of anything other than Walmart’s poor shipping. The package was supposed to arrive earlier and thus the late arrival greatly inconvenienced me. That said, it may not be Walmart’s fault. Shipping has been wonky since the COVID-19 lockdown hit.

Recommendation

If you would like a long-lasting, durable, and versatile cutting board set, complete with small, medium, and large boards, this bamboo set fits the bill. It has a lovely design, is well designed, and includes pretty much all the sizes you’ll need for a typical kitchen.

Rating for the Bamboo Cutting Board Set by Royal Craft Wood

[one_fifth] thumbs up [/one_fifth]

[one_fifth] thumbs up [/one_fifth]

[one_fifth] thumbs up [/one_fifth]

[one_fifth] thumbs up [/one_fifth]

[one_fifth_last] thumbs up [/one_fifth_last]

Pick up your board on Walmart.com here.

NOTE: I was reimbursed the cost of this cheese board in exchange for an honest review. If you’ve read past product reviews, you’ll know that I don’t pull my punches when I believe they are warranted. I also try to provide balanced information so you can make your own decision to read or not read the book, even if you disagree with my opinion.

Categories
Cooking Techniques Flavor Blending

Soups: A Guide to Types (with Tips)

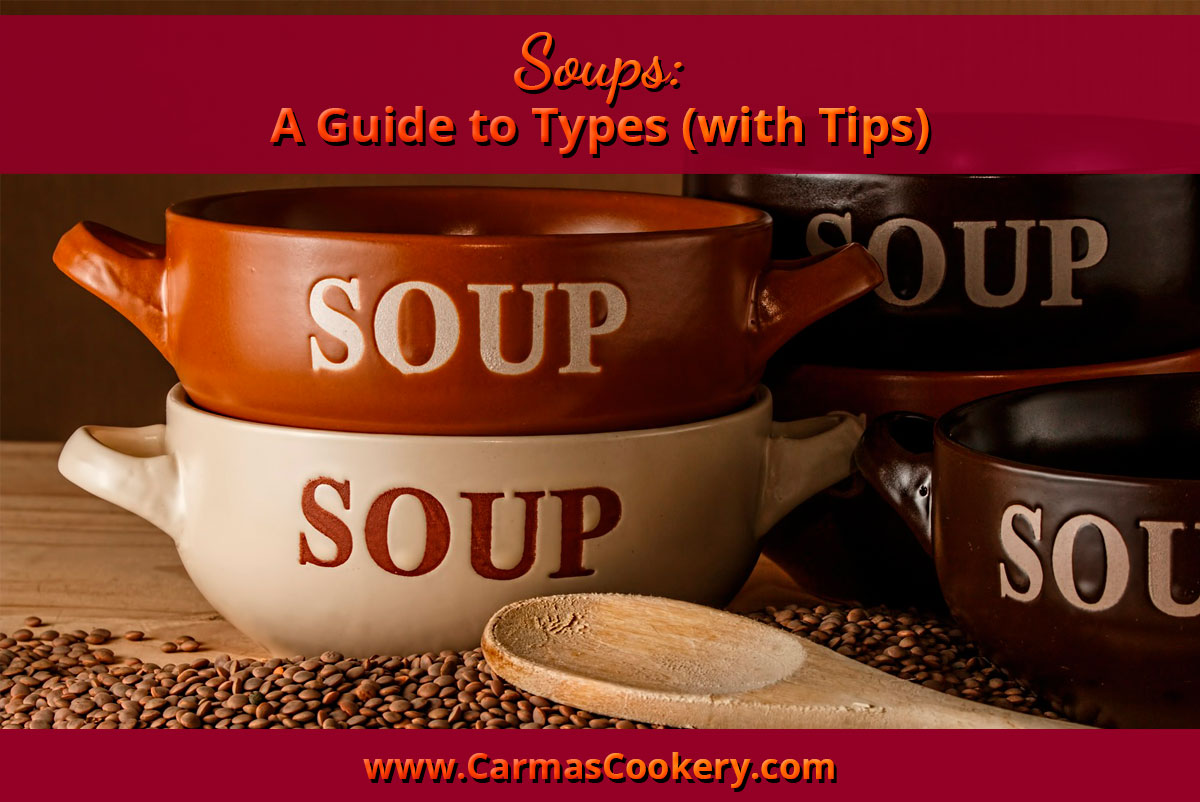
There is something comforting about a hot bowl of soup on a cold winter day. I guess that’s why January has been named National Soup Month. In honor of this occasion, I thought it was high time to provide a guide to soups, which come in a wide variety of styles. In this article, I will discuss some of the more common variations of soup and offer information and tips on preparing, serving and storing homemade soups.
Soups: A Guide to Types (with Tips)

What is soup?

The term “soup” refers to any type of liquid dish served in a bowl or cup. It is typically made by boiling vegetables, meat and/or fish in water or stock. It can also be made from fruit. I can be served warm or cold. It can be the first course of a meal, or it can be the entire meal.

A Brief History of Soup

There is evidence that soup was made as early as the neolithic age. And people have been making soup ever since. If there was meat available, it is highly likely that soup was made of it. In fact, around 6000 BC hippopotamus was the common mean found in soup!

Soup has also often been associated with bread. People would either dip bread into the soup, or soup would be poured over pieces of bread. A favorite way I like to serve chicken soup is over chunks of bread with mint leaves sprinkled over them. The combination of mint and chicken broth is surprisingly delicious.

Stock vs. Broth

Most soups start with a broth or stock as their base. But is there a difference between the two?

In many ways, the two are virtually interchangeable. The biggest difference between the two is that broth has seasoning in it and stock does not. There are also some differences in ingredients and cook time.

[one_half] Stock …

… is made by simmering a combination of animal bones (which typically contain some scraps of meat), mirepoix (a mixture of onions, carrots, and celery), and aromatics in water.

… is always involves bones, although not necessarily meat.

… is cooked for anywhere from 2 to 6 hours on the stovetop.

… has a liquidy consistency, even when chilled.

… is always left unseasoned.

… is typically used for sauces, gravies, braises, stews, and soups, etc. [/one_half]
[one_half_last] Broth …

… is any liquid that has had meat cooked in it.

… is made by simmering meat (which can contain bones, but does not have to), mirepoix, and aromatics in water for a relatively short amount of time, usually under 2 hours.

… is typically seasoned.

… is a thin, flavorful liquid that often gels when chilled.

… is used in all the same ways as stock, including soups, sauces, and braises.

… because it’s seasoned, can be favorable enough to be consumed on its own. [/one_half_last]

Bouillon is another word for broth. You can purchase bouillon cubes or powder at your local grocery store, which simply needs water added to make a broth.

Soup vs Stew

The biggest difference between soup and stew is how much liquid the dish has. Soups have more liquid and smaller pieces of meat and/or vegetable. Stews are heartier and have larger chunks of meat and/or vegetable. So, basically, stew is a heartier form of soup.

What are the different types of soup?

There are several kinds of soup that have their own, specific term. Here is a quick guide to soup types:

Bisque

A thick, smooth, rich, creamy soup that is highly seasoned and usually made from seafood. It is fo French origin and was classically based on strained crustacean broth. Newer recipes may use poultry or vegetables in place of seafood. At one time bisques were thickened with rice, but today they are more frequently thickened with roux.

Examples:

Bouillabaisse

A traditional Provençal fish stew originating from the port city of Marseille. It is highly seasoned and made of fish, shellfish, onions, tomatoes, white wine, olive oil, garlic, saffron, and herbs. Here is a recipe from Saveur.

Chowder

A thick, creamy and chunky soup or stew usually containing seafood, potatoes, and milk or cream. The word “chowder” comes from the French word “cauldron,” which means cooking kettle. Vegetables or fish stewed in a cauldron became known as chowder in English-speaking nations (a corruption of the name of the kettle in which the dish was cooked). The first chowders prepared on the North American continent were brought by French fishermen to Canada.

Clam chowder is the most commonly known, which has several varieties: Boston/New England Clam Chowder, which has a cream base, and Manhattan Clam Chowder, which has a tomato base, and Rhode Island Clam Chowder, which has a clear fish broth base. However, there are other types of chowder, as well. One of my favorites is Corn Chowder.

Consomme

A clear broth, of French origin, that has been clarified, a process that uses egg whites to remove fat and sediment. I can be served hot or as a cold jelly. Saveur has a good recipe for making this broth.

Court Bouillon

A stock made from wine, vegetables, and herbs, often including an onion studded with whole cloves. It is typically used to poach fish, seafood or vegetables.

Cream Soup

Much like a bisque, a cream soup is creamy. They are typically thickened using a white sauce, which at its most basic is a sauce made from butter, flour, and milk.

Gazpacho

Unlike most soups, gazpacho is not cooked. This Spanish soup is made from a pureed mixture of fresh tomatoes, sweet bell peppers, onions, celery, cucumber, bread crumbs, garlic, olive oil, vinegar and sometimes lemon juice. It is served cold, and may also be served “chunky-style.”

Gumbo

This American soup comes from the south and is a traditional Cajun/Creole delicacy of South Louisiana. Just like the culture that created it, it has multi-cultural influences: wild game or seafood (from the Acadians, descendants of French colonists), thickened with okra (from the Africans), file (sassafras powder from the Indians) and/or roux (from the French). Gumbo is a thick, robust soup with numerous variations including chicken and sausage gumbo, shrimp and okra gumbo, oyster gumbo and seafood gumbo.

Minestrone

A thick, Italian soup containing assorted vegetables, peas and beans, pasta (such as vermicelli or macaroni) and herbs in a meat or vegetable broth. You can easily make vegetarian or vegan varieties of this soup.

How to Remove Fat from Soup

Because many of the ingredients that go into making a good soup have a fair amount of fat or grease, you’ll need to remove excess fat. This makes for a tastier — and healthier — soup. You can remove fat during cooking or before serving. Here are some techniques you can use to remove fat:

  • Use a large spoon to skim the fat off soup as it simmers. I’ve found that metal or plastic spoons work better than wooden ones.
  • While cooking soup, place the pot slightly to one side of the burner. The off-centered bubbling will encourage fat to accumulate on one side of the pot for easier removal.
  • A leaf of lettuce dropped in a pot of soup will absorb grease from the top.
  • To remove the last spots of fat floating on the surface, drag a clean, unprinted paper towel across the top. It will soak up most of the remaining oil.
  • Refrigerate cooked stews and soups overnight before serving. The fat will rise and solidify in a layer at the top. The fat may then be removed by breaking it up into large pieces and lifting it away with a spoon.
  • When in a hurry to skim the fat from soup, float an ice cube in the soup to help congeal the fat and make it easier to remove.

How to fix overly salty soup

It can happen to anyone — you put a bit too much salt in your soup. How do you fix that without ruining the other flavors you’ve so carefully crafted? Try one of these methods:

  • Add a whole, peeled raw potato to the soup and simmer for 10 to 15 minutes. The potato will absorb the salt. Remove the potato before serving the soup. (There is no need to discard the potato — it is perfectly good for later use in another recipe.)
  • Stir in 1 teaspoon of vinegar and 1 teaspoon of brown sugar for each quart of liquid. This is not a good idea, however, if you are watching your sugar intake.

How to thicken soup

The best method of thickening most soups and stews is to remove some of the cooked vegetables, puree them in a blender, and return the pureed mixture to the soup. To prevent from getting burned by splashes of hot puree, don’t fill the blender more than one-third at a time. These two recipes use this technique to create a cream soup texture:

If your soup doesn’t have many — or any — vegetables, you can try one of these techniques:

  • Make a paste of all-purpose flour mixed with twice as much cold broth or water. The ratio of flour to liquid is 1-1/2 teaspoons of flour to 1 Tablespoon of liquid for every 1 cup of soup. Slowly stir the paste into simmering soup and continue to simmer for 5 to 10 minutes.
  • A roux of butter and flour may also be used as a thickener (much like a white sauce). The longer the roux is cooked, the darker and more flavorful it becomes. Be careful not to scorch the roux or it will give the soup an unpleasant burned taste.
  • Cream or half-and-half is another way to not only thicken but also add a sumptuous richness to your soup.
  • A slurry made from 1 part cornstarch to 2 parts liquid will also thicken soup. Do not boil, or the solution will break down.

Freezing and Reheating Soup

Most soups freeze beautifully, so you can prepare a large batch and freeze to serve at a later date. Here are some basic steps for freezing and reheating soup:

  • Chill soup in the refrigerator and skim off any fat that rises to the surface before freezing.
  • Freezing cream-based soups may cause separation. If the soup does separate while reheating, whisk vigorously with a wire whisk or try blending it in a blender for a few minutes to smooth it out.
  • Reheat frozen soups in the microwave or thaw at room temperature and heat in a heavy saucepan over low heat on the stovetop.
  • To avoid overcooking starchy ingredients like potatoes, pasta, and rice, heat thawed soup only long enough to warm throughout.

More Soup Making Tips and Facts

Tips for serving soup

  • A quart of soup will make six side dishes, or two main dishes.
  • A hot soup will help recondition the palate between meal courses or after consumption of alcoholic beverages, so plan when you serve it accordingly.

Notes on cold soups

  • Ideally, cold soups should be served in chilled dishes.
  • Adjust seasonings of cold soups just before serving. Chilled foods tend to dull the taste buds and will require more seasoning than hot soups.

Tips for flavor

  • Be aware that herbs will have a more intense flavor if added at the end of the long cooking process.
  • Savory soups and stews always taste better if made a day or two in advance, refrigerated and then reheated just prior to serving.
  • Wine is a wonderful flavor addition to soups and stews. When using wine in soup, use less salt as the wine tends to intensify saltiness. Wine should be added at a ratio of no more than 1/4 cup of wine to 1 quart of soup.
  • Beer is also a good addition to soups and stews. A good rule of thumb is 1 cup of beer to 3 cups of soup.
  • Freeze the liquids drained from canned mushrooms or vegetables for later use in soups or stews.

Cooking Tips

  • Since liquids boil at a lower temperature at high altitudes, cooking time may need to be extended at altitudes above 2500 feet.
  • Soups and stews should only simmer while cooking, never brought to a hard boil.

Final Comments About Soup

As with most dishes, the best soups are made with a base of homemade broth and fresh ingredients, however, this can be very time-consuming and labor-intensive. If you wish, time spent in the kitchen preparing soup may be reduced by using canned or frozen broths and vegetables while still yielding an excellent result.

Remember: There are no really good quick soup recipes because any truly good soup needs time during preparation for the flavor to fully develop. Always plan on providing enough time to prepare a really good soup or stew.

[divider]

References:

  • Wikipedia
  • The Dictionairy
  • A 2005 article by Janice Faulk Duplantis

[divider]

[one_fifth] Superfood Soups [/one_fifth]

[four_fifth_last]

Want to make healthier soups?

Making sure your home-made soups have superfoods in them can really give a boost to their nutritional value. Download your copy of Superfood Soups today!

Learn More | Buy Now [/four_fifth_last]
Categories
Cooking Techniques Creative Cookery Flavor Blending

A Meat Lovers Heaven

Are you one of the meat lovers? When it comes to eating meat, you’re either really into all the different types of meat, or you really don’t care one way or the other. The world is divided as to how much meat we should be eating, and if we should be eating any at all. But all of these conspiracy theories created by people who love to shake the world, should not distract you away from the benefits of meat.

I admit, eating it in large quantities is not going to do your digestive system any good. But meat is something you’re most likely only going to eat once a day, in your evening meal. When you do, you’re getting so much protein and vitamins and minerals, that it would be a shame to give it all up. And some people have to eat meat or they’ll get sick!

But for those of you who are serious meat lovers, giving up is just not on the agenda. Eating meat is life, and the flavors it creates, and the texture it adds to a dish, just can’t be replicated. This article is dedicated to those of you who know you just can’t live without your meat fix. I’m going to show you the different ways you can step up your meat game.

Countries around the world have taken cooling meat to the next level, and simply sticking it in the pan and waiting for it not to be raw is not an option anymore. So if you’re ready to step up your game, sit back and relax, and see what you think of these ideas.

A Meat Lovers Heaven

Different Ways of Cooking Meat

Let’s start off with the most important part. So many of people are missing out on beautiful tasting meat, simply because they stick to cooking it in the pan with just a little bit of olive oil or butter to make sure that it doesn’t stick. But this is most definitely not the way you should be cooking your meat, especially if you’re always looking for the finest tasting option.

True meat lovers own a smoker. Smoking meats is what so many big chain restaurants do in the U.S., and what nearly all of the smaller family businesses use. It’s literally the secret key–that’s not so secret–however, many people just don’t implement this cooking method.

You can get little smokers that can sit in your garden while your meat is slowly smoke-cooked. This type of cooking method is the best with brisket and steaks, simply because it produces that deep smokey flavor while leaving the meat so tender and juicy. You’d have to do your research as to how long to cook each meat, but generally, you’ll have to learn by trial and error. This is a super good, long term investment, and I promise you won’t regret it if you give it a go for the summer!

Different Meats To Try

If you call yourself a meat lover, I have this question for you: How often do you venture outside the common two? The two types of meat that most people seem to eat are chicken and beef. Pork seems to be the meat left out of the picture so often, but it’s one of the most flavorsome meats when you cook it right. But this is the part that so many people get wrong, including myself. How many times have I made pork and ended up with a dry lump of meat? I’ve lost count. My husband, on the other hand, makes an awesome pork steak that is juicy and flavorful! Go figure.

The problem with cooking port often starts with the cut. If you don’t get a good cut of meat, it won’t come out right. So first of all, think about sourcing something such as brine pork ribs. Ribs are massively underestimated, but when seen on a menu in a restaurant, soon they get the standing ovation they deserve.

However, at home, it’s just not common to see pork ribs. Here’s the scoop: This dish starts in the morning. Get a big enough dish, and coat the ribs in your favorite BBQ sauce. Go a bit fancy, and source one that you know restaurants use. Leave it to soak all day, and then slow roast them in the oven in the evening. That strong BBQ flavor, alongside juicy slow-cooked meat, is a winning combination. Have a side dish of beans, corn on the cob, and maybe a few chips or fries, and you’ve got yourself a succulent meat dish we know you’ve been sleeping on!

The Best Country for Meat Lovers

If you really love meat, then you should definitely think about going on a little meat lovers adventure around the States. So many restaurants serve the craziest meats, cooked to perfection. Just going there simply to eat food is enough, but you’re all aware of the super cool things you could do alongside that. So do your research, and find out what states are the best for well-cooked meats!

And don’t stick to the obvious, sit-down restaurants either. Some of the best pulled pork I’ve ever had was cooked in a smoker in the parking lot of an Ollie’s in Maryland.

Categories
Creative Cookery Flavor Blending

Brookies and Kitchen Creativity

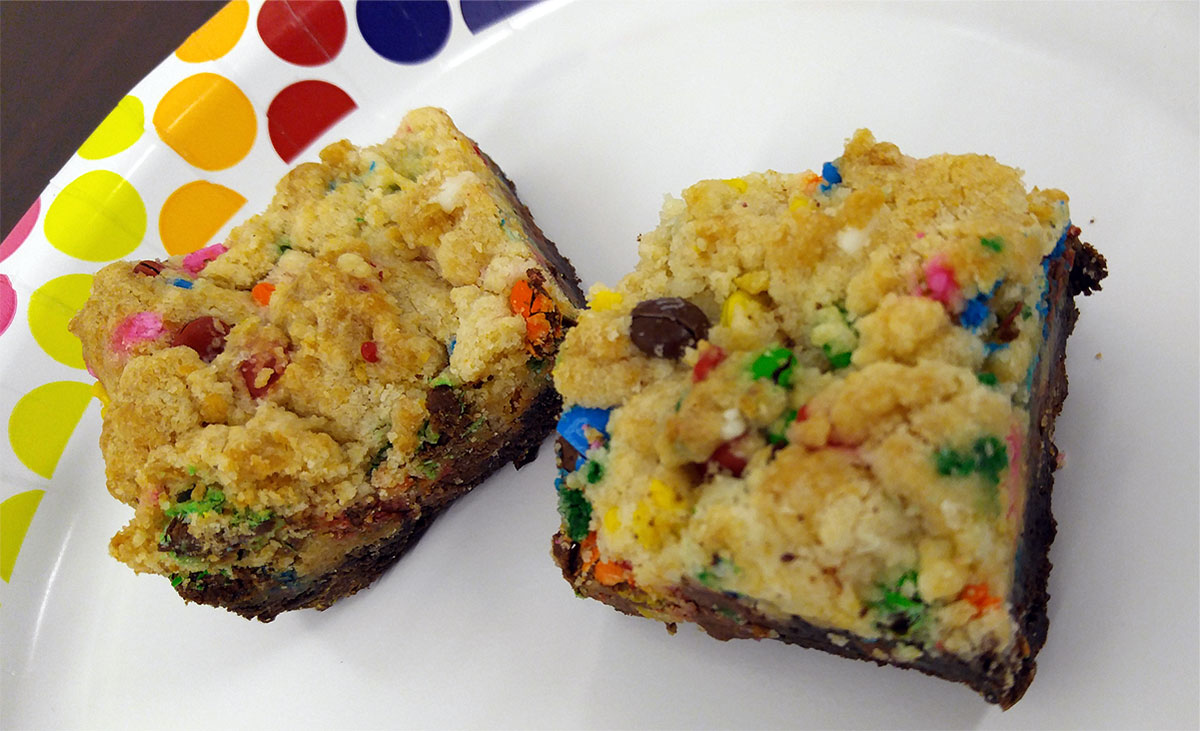
This past week I had my first experience with brookies. In case you don’t know, a brookie is part brownie, part cookie. The recipe I used had a layer of brownie topped with a layer of sugar cookie. I add in some mini M&Ms and rainbow sprinkles. People loved them! This experience got me to thinking of all the different kinds of brookies you could make.

rainbow brookies

The recipe I used is based on cookie mixes, so I’ll start there.

Brookie Layer 1: The Brownie

I used a dark chocolate brownie mix with miniature M&Ms mixed in, but you could use any brownie mix and any mix-ins (or none) you desire. In fact, it could be fun to experiment with blondies or other-than-chocolate-flavored brownies.

  1. Follow the instructions for the brownie mix.
  2. Add mix-ins (see list below for suggestions) if you wish
  3. Spread over the bottom of a 13×9-inch pan that has been coated with cooking spray.

Brookie Layer 2: The Cookie

I used a sugar cookie mix with miniature M&Ms and rainbow sprinkles mixed in, but you could use any cookie mix and any mix-ins (or none) you desire. In fact, see notes below for some other cookie mixes that could be fun.

  1. Follow the instructions for the cookie mix.
  2. Add mix-ins (see list below for suggestions) if you wish
  3. Drop by spoonfuls on top of the brownie batter.

Bake about 40 minutes or until the brownies are set and the exposed cookies are lightly golden brown. Cool for an hour and a half before serving. Cut into five by four rows.

Suggested Mix-Ins

These are just suggestions. Feel free to be as creative as your taste buds will let you be.

  • Mini M&Ms
  • Chopped nuts
  • Shredded coconut
  • Rainbow sprinkles
  • Chocolate jimmies
  • White chocolate chips
  • Chocolate chips
  • Peanut butter chips
  • Butterscotch chips
  • Toffee bits
  • Miniature peanut butter cups
  • Caramel bits
  • Butterfinger candy bits
  • Crushed Oreo cookies
  • Craisins


Suggested Cookie Mixes

I’m listing cookie mixes because that is the easy way to go, but you could just as easily use from scratch brownie and cookie mixes and get even more creative.

  • Chocolate chip cookie mix
  • Double chocolate chip cookie mix
  • Oatmeal cookie mix
  • Snicker Doodle cookie mix
  • Gingerbread cookie mix
  • Lemon cookie mix
  • Chocolate crinkle cookie mix
  • Peanut butter cookie mix
  • White chip macadamia nut cookie mix
  • Molasses cookie mix
  • Salted caramel

Unleash Your Kitchen Creativity

Not only can you get creative with your brownie and cookie base, as well as your mix-ins, you can get creative with how you form these brookies. Traditionally, they are a sheet cookie. But you could layer them in muffin or mini-muffin tins, as well.

The possibilities are mind-boggling. I’m definitely going to give some of these ideas a try! How about you?


The owner of this website has made a commitment to accessibility and inclusion, please report any problems that you encounter using the contact form on this website. This site uses the WP ADA Compliance Check plugin to enhance accessibility.