Carma Spence has been experimenting in the kitchen since she was four years old and loves trying out new recipe ideas. She is the author of Bonkers for Bundt Cakes and Your Perfect Pie, as well as author and contributor to several more non-food-related books. With Carma's Cookery, she is taking her passion for empowering people and blending it with her passion for cooking, gift-giving and entertaining.
This may surprise you, but one of the industries that have thrived across the world during the pandemic is the food industry. With a growing number of successful food delivery services, there has never been a better time to boost the your food company’s visibility or even start a new food company altogether. Food really does bring people together, and the popularity of ordering restaurant-quality meals and having them delivered to your front door shows no sign of stopping anytime soon.
So what should you know before jumping into opening up a new food company?
Check what permits you need for a food company
Sure, you can build a company from the safety of your kitchen. Create baked goods, bread, speciality meals and so on. But you still need to make sure you have the correct permits and are trading legally. This is especially important if you plan to use food delivery services to deliver your goods to customers. You also need to make sure you are aware of health codes regarding preparing foods and keeping excellent hygiene levels in your working area at all times.
Look at Your Competition
How many other businesses sell what you are planning to sell? It may be that the demand is greater than the supply for certain foods, for example Asian food is always a popular option, as is pizza. Make sure the market isn’t saturated by small restaurants and food outlets and bigger, nationwide chains that can easily meet demand without a problem. You can check out Food industry reports to see how well your sector and the local area is performing.
Products and Pricing
The quality of the ingredients and the type of packaging you use will all need to be factored into the final meal costs and pricing options. You will be responsible for making sure the food is not only delicious but arrives at the customer’s house safely and preferably hot if it is meant to be. This will affect whether or not people return to order from you and the feedback they leave.
Delivery options
Restaurants and food outlets reach more customers when signed up to one of the major food delivery networks. They take a portion of your fee and charge delivery but take care of getting your goods to the customer. It may seem like you are losing a lot of money initially and deciding to go out on your own is also a viable option. However, you need to be sure you can reach your ideal customer base and keep up with demand and deliveries yourself.
Marketing a food company
You need to have an online presence so people can check you out and see what you have to offer. Making yourself accessible online through a website or social media can really help people spread the word about how amazing your food is. Reviews, tags and shares on social media–it all counts towards building yourself a reputation. The better your reputation, the more chance you will have of succeeding with the support of your customer base.
Invest in good quality photography to really show off what you make and don’t be afraid to be who you are and share your journey, how you make your food and what you are about. The more authentic you are, the more people feel they can connect with you. Social media is a great place to build this relationship with people.
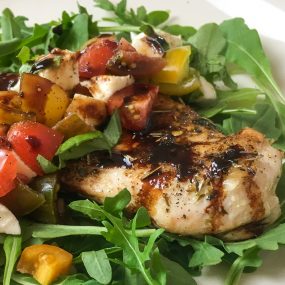
This savory stovetop chicken recipe features the delicious flavors of a traditional Caprese salad. Sweet grape tomatoes, fresh Mozzarella, basil, and a rich balsamic glaze elevate otherwise basic chicken breasts to a whole new level. You’ll want to work this one into your regular weeknight dinner rotation because you can get it from the refrigerator to the table in just twenty minutes!
2bonelessskinless chicken breasts, butterflied and pounded thin
1teaspoonItalian seasoning
½teaspoongarlic powder
Sea salt and black pepper,to taste
½cupbalsamic vinegar
2teaspoonspure maple syrup
1cupgrape tomatoes,quartered
½small red onionfinely diced
8oz.Ciliegine fresh Mozzarella,quartered
¼cupfresh basil leaves,thinly sliced
Instructions
Heat olive oil in a large skillet over medium heat.
Season the prepared chicken breasts with Italian seasoning and garlic powder on both sides and add to the hot skillet.
Season with salt and black pepper, to taste.
Cook until the chicken is cooked through, approximately 3-4 minutes per side.
While the chicken is cooking, combine the balsamic vinegar and maple syrup in a small saucepan and set over medium heat.
Simmer until the mixture thickens and is reduced by half, stirring frequently for approximately 5-6 minutes.
In a medium bowl, combine grape tomatoes, red onion, fresh Mozzarella, and basil. Season with salt and black pepper, to taste, and stir to combine.
When the chicken is done cooking, turn off the heat and move the skillet to a cool burner.
While still in the skillet, top each chicken breast with the tomato and mozzarella mixture and cover for a couple of minutes or just until the tomatoes are warmed through.
To serve, transfer the chicken to a serving platter or individual plates. Top each breast with the tomato mixture and a drizzle of balsamic glaze.
Tip: For easier cleanup, place the chicken breasts between two sheets of plastic wrap before pounding with a meat mallet or rolling pin.
Choosing the Best Balsamic Vinegar for Your Balsamic Glaze
What is balsamic vinegar and why is it used so often to flavor foods? It is a very dark, concentrated, and intensely flavored vinegar from Italy, made from freshly crushed grape juice, including all the skins, seeds, and stems (a combination called grape must). The best tasting balsamic vinegar is aged in wooden barrels, much like wine is.
That said, balsamic vinegar is not to be confused with red wine vinegar. They are not the same and can not be switched out in this recipe. Balsamic is darker, sweeter, and thicker than red wine vinegar, which is why it makes a better glaze.
When you go to the grocery store to buy your balsamic, you will find that there is some variety. The price will give you some clue to the quality but pay more attention to the name. What you want is Aceto Balsamico Tradizionale di Modena (or Reggio Emilia). Write that down on a piece of paper, stick it in your wallet and take it with you to the store. You don’t want to get confused and accidentally purchase the lower quality kinds of vinegar with similar names Aceto Balsamico di Modena IGP and aceto balsamico.
Kitchen Creativity is so often about making substitutions that make sense for your tastes, your locality, or just for the fun of it. Here are some substitution ideas for this recipe.
Instead of using maple syrup, use honey. This will make the glaze sweeter.
Want a darker, less sweet glaze? Try using molasses instead of maple syrup. It will give it a bittersweetness.
Live in Wisconsin, Minnesota, or someplace else that you can find cheese curds, try those instead of the Mozzarella.
Get colorful and use yellow grape tomatoes. They are sweeter than the red ones.
Up the Italian ante and toss in some kalamata or green, garlic-stuffed olives.
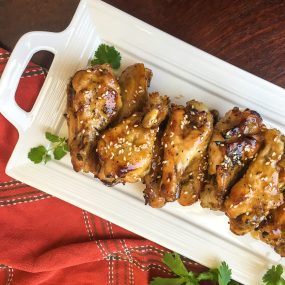
If you liked the Instant Pot® Barbecue Chicken Wings, you’re going to love these Sesame Garlic Wings! I love the combination of sweetness from the honey and kick from the fresh ginger, mingled with the always yumminess of garlic.
Place the metal trivet inside Instant Pot® and add one cup of water.
Arrange seasoned wings on top of the trivet before securing the cover in place. Switch the vent to “Sealing” and set the “Manual” setting to 8 minutes.
Sesame Garlic Sauce
In a small saucepan over medium heat, stir together the soy sauce, sesame oil, honey, butter, ginger, and garlic powder. Cook, stirring frequently until butter is melted and the mixture is thoroughly combined. Remove from heat and set aside.
Assembly
When cook time on Instant Pot® is complete, allow pressure to naturally release for 10 minutes, then do a quick release for any remaining steam.
Remove lid and transfer wings to a large bowl. Set aside and cool slightly.
Meanwhile, position the top oven rack in the top position and pre-heat the broiler to high.
Line a large, rimmed baking sheet with aluminum foil and place a wire cooling rack on top. Set aside.
Pour 1/3 of the sesame garlic sauce on top of the wings and toss to coat.
Transfer the wings to the wire rack on the prepared baking sheet and place under the broiler for 3-4 minutes or until the wings start to get crispy and develop some color.
Turn the wings and repeat on the remaining side.
Remove from the oven and toss the wings with half of the remaining sesame garlic sauce.
Sprinkle with white sesame seeds and serve immediately with the remaining sauce on the side.
Working with Fresh Ginger
Giger root can be tough to work with, but there are a few ways you can make it easier.
Freeze it. Frozen ginger root is much easier to work with, and both cuts and shreds a bit easier than fresh. However, it doesn’t keep in the freezer long, so if you don’t use it a lot, this isn’t a great option.
Store it in the ground. This one sounds weird at first, but when I tried it, it really worked. I purchased a ginger root at the grocery store, and a nice pot, and some potting soil at a garden store. And then I buried the root in the pot and kept the pot on my kitchen counter. When I needed some ginger, I dug it up, cut off what I needed, and then re-buried it. This kept the root fresher longer. In fact, it even started to grow!
Buy pre-frozen and grated ginger. Dorot makes a fresh frozen crushed ginger product that is very easy to use. I’ve reviewed it on the blog before.
Why the sesame garlic combo?
Sesame garlic noodles. Spinach with sesame and garlic. Why does sesame go with garlic so well? I did some digging and here’s what I found out:
First, sesame has a stronger affinity with soy sauce, ginger, sesame oil, honey, scallions, and rice vinegar than it does with garlic. Good thing many of those are in this recipe, eh?
Why … no one would tell me!
So I got logical.
The flavor profile of the sesame seed is mild, sweet, and nutty. The flavor profile of garlic is pungent with slight sulfurous notes. Interestingly enough, I discovered that sweet and pungent are two of the five tastes identified in ancient Chinese tradition, the others being bitter, salty, and sour. Each taste maps to an element and sweet maps to earth, which pungent maps to metal. Where does one find metal? In the earth!
So there you have it! Sesame garlic go together because earth and metal go together! How’s that for a scientific answer to your question.
I’ve got a different idea for unleashing your kitchen creativity today: A Honey Experiment. Go to your local Farmer’s Market and buy several different kinds of local honey, from the light to dark varieties. Then make these wings with each kind and see if you can taste the difference!
This delicious and easy vegan vegetable soup recipe can be adapted in countless ways to incorporate whichever fresh vegetables and herbs you have available or prefer. Be sure to add a splash of fresh lime juice just before serving to brighten the flavors!
Add olive oil to the Instant Pot® and select the “Sauté” function. Add garlic, celery, carrots, red onion, and garlic powder. Season with salt and black pepper, to taste. Stir to combine.
Sauté, stirring occasionally, until fragrant and vegetables start to turn golden brown, approximately 4-5 minutes.
Add broth and stir to combine, scraping any brown bits off the bottom of the pot in the process. Turn the unit off.
Add potatoes, bay leaves, and chopped tomatoes to the pot.
Put the lid on and lock it into place. Switch the vent to “Sealing” and set the “Manual” setting to 3 minutes.
When the cooking time is complete, allow pressure to release naturally for 10 minutes, then manually release any remaining pressure.
Remove the lid and discard the bay leaves.
Stir in the baby kale and lime juice, and season with additional salt and black pepper, if desired. Stir to combine and serve immediately.
Note: Although this recipe uses an Instant Pot to cut down the cooking time, you can make this recipe the traditional, long-form style using a saute pan for the saute portion of the cooking and a Dutch oven or large pot for the rest of the cooking time.
What is the difference between Vegetable, Vegetarian, and Vegan Soup?
Here’s a simple answer:
A vegetable soup can use beef, chicken, or a combination of both broths as a base.
A vegetarian vegetable soup can’t, but it can have egg or dairy products in it.
A vegan vegetable soup cannot have any animal products in it whatsoever.
How do you make a soup your own? You play with the main ingredients, the flavor ingredients, and the serving style. Here’s what I mean:
Main Ingredients
The main ingredients in this soup are celery, carrots, onion, red potatoes, cherry tomatoes. That is three root vegetables, one starchy root vegetable, and one acidic vegetable. If you want to maintain a similar balance, but give the soup a different twist, you want to keep that same basic formula. Here are sub substitution ideas:
fennel, parsnips, red onion, purple potatoes, and Roma tomatoes
shallots, purple carrots, Vidalia onions, yams, and yellow grape tomatoes
leeks, turnips, white onions, sweet potatoes, and grape tomoatoes
Flavor Ingredients
This recipe is fairly conservative with the flavor ingredients, using only garlic powder, sea salt, black pepper, and bay leaves. So rather than substituting, I recommend adding. What fresh herbs are in season when you make this soup? Maybe you can add some of those in? Some of my favorite soup herbs include:
Basil
Rosemary
Thyme
Sage
Serving Style
A basic serving style is to pour the soup in a bowl and there you go. But you don’t always have to do it that way. There are ways to serve soup that can enhance the flavor, as well. Here are some ideas:
Serve with crackers. There are vegan crackers available.
Serve in a bread bowl. Find — or bake your own — vegan round bread loaf, slice off the center, cut out the middle, pour in the soup — delish!
Serve Spanish style. This is something I learned from my family. It works especially well with chicken soup but can work with other soups, as well. Cut bread (in this case, vegan bread) into cubes. Place the cubes at the bottom of the soup bowl. Sprinkle with dried mint leave (fresh doesn’t work well). Pour the soup over and eat.
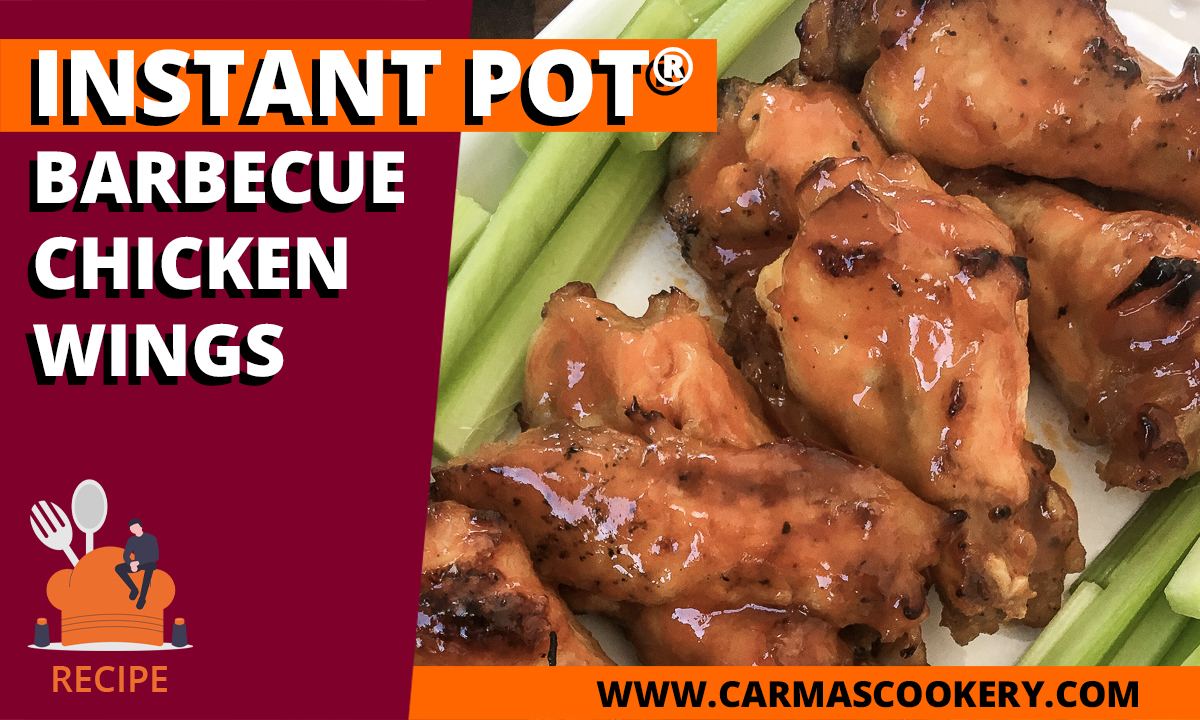
Nothing beats the convenience of an Instant Pot® for quick, easy, and healthier chicken wings. Once cooked, a quick trip under the broiler is all you need to get that nice crispy finish.
Sprinkle wings with garlic powder and season with salt and black pepper, to taste.
Place a metal trivet inside the Instant Pot® and add one cup of water.
Arrange seasoned wings on top of the trivet before securing the cover in place. Switch the vent to “Sealing” and adjust the “Manual” setting to 8 minutes.
While the wings cook, in a medium bowl, whisk the barbecue sauce, melted butter, and remaining garlic powder until thoroughly combined. Set aside.
When done cooking, allow the pressure to naturally release for 10 minutes, then do a quick release for any remaining steam. Carefully remove the lid and transfer the wings to a large bowl. Set aside until just cool enough to handle.
Meanwhile, position the top oven rack in the top position and pre-heat the broiler to high.
Line a large, rimmed baking sheet with aluminum foil and place a wire cooling rack on top. Set aside.
Pour 1/3 of the barbecue sauce on top of the wings and toss to coat.
Transfer the wings to the wire rack on the prepared baking sheet and place under the broiler for 3-4 minutes or until the wings start to get crispy and develop some color.
Turn the wings and repeat this process.
Remove the baking sheet from the oven and toss the wings with half of the remaining barbecue sauce.
Serve immediately with the remaining sauce on the side for dipping.
Notes
This recipe is written for fresh or thawed wings. If using frozen wings, add 3-4 minutes to the active cook time.
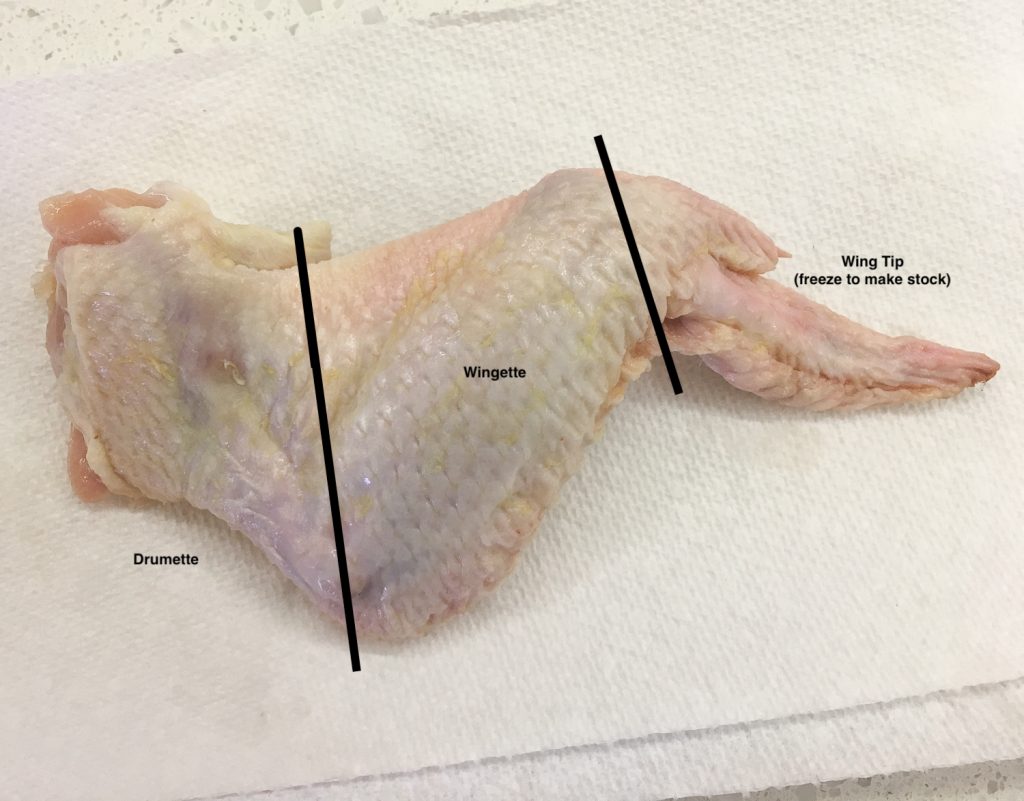
You can save time by purchasing already-trimmed wings. However, you can save some money by trimming them yourself. See the photo below for the approximate location of where to cut each whole wing. They are a little easier to trim AFTER they’ve been cooked. Immediately freeze the tips to make chicken stock later.
What’s the flap about chicken wings?
Do buffalos have wings? Of course not! But, when you cut up a chicken wing to look like a mini-drumstick and mini-thigh, then slather it with Buffalo sauce (named from the City, not the animal), you’ll have Buffalo Wings.
Of course, you don’t have to slather them with Buffalo sauce. You can use any kind of sauce you like. In this recipe, I suggested barbecue sauce, but honey mustard sauce would work just as well.
In fact, you can fry, grill, smoke, or bake the chicken wings before tossing them with a sauce, rub or glaze. This is where your kitchen creativity comes in.
The ubiquitous chicken wing bar snack was a happy accident, according to History Daily. A bar owner mistakenly ordered chicken wings, when she meant to order chicken necks. This was in 1964, and back then the wings were considered the throw-away portion of the chicken. Her husband convinced her to accept her error, and so necessity became the mother of kitchen innovation! She had so many of the darn things, she didn’t know what to do. So, one night she cooked them, tossed them in hot sauce and served them with celery stalks and bleu cheese dressing to her son and his friends. They loved them and the famous Buffalo Wings were born.
As I suggested above, you can easily make chicken wings with your own signature flair. Here are the basic steps:
Choose your cooking method. Will you fry, grill, smoke, or bake your wings?
Choose your flavor enhancer. Will your wings be slathered in a sauce? Messy, but yummy! Will they be rubbed down with herbs and spices? Less mess, but also tasty. Will you glaze them? Very similar to a sauce, but less messy. And one more idea to choose from: Will you marinate them?
That’s it. However, you can see that given those options, there are probably hundreds of combinations available to you.
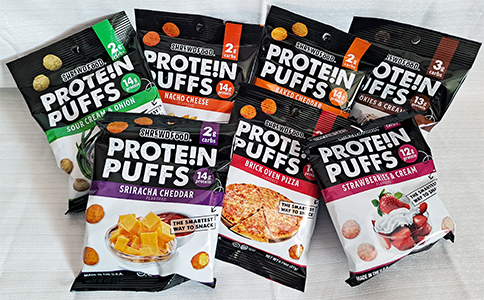
Late last year, I started changing my diet to be low carb and high protein. In fact, my goal each day is to have eaten more grams of protein than I have of carbs. That’s how I happened upon Shrewd Food in my search for snacks that would fit this new diet. They produce a variety of high-protein, low-carb snacks. I purchased their Baked Cheddar Flavored Protein Puffs. I was pleased.
About a week after I started munching on these protein snacks, I received an email that offered to provide me samples of all their flavors in exchange for an honest review. That was an offer I couldn’t refuse!
Shrewd Food currently offers four types of snacks: Puffs, Croutons, Cookies, and Dippers. All of the snacks, except the cookies, start with a protein puff, which is very much like a cheese puff without the cheese on it.
According to Shrewd Food’s website, their protein puffs “are gluten-free, non-GMO, contain no peanuts, or tree-nuts, soy-free, egg-free, Kosher dairy and have no artificial flavors, colors, or preservatives.” Sounds like a pretty awesome snack, right?
But how do they taste?
I think, for the most part, pretty darn good! Here are my thoughts on each snack.
Shrewd Food Protein Puffs
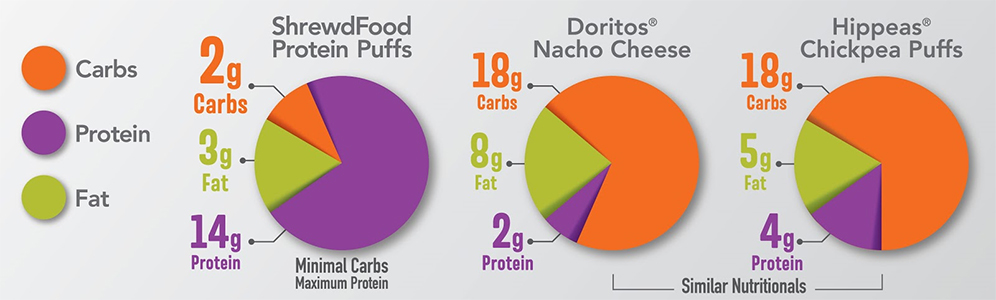
[one_half] Shrewd Food Protein Puffs come in a variety of both sweet and savory flavors. These were my favorite, in part because each one contained way more protein than carbs, making it easy for me to bump up my protein if my carbs looked like they were getting too high. Most, if not all, contained 14 grams of protein and only 2 grams of carbs.
Sweet Flavors: Cookies & Cream, and Strawberries & Cream [/one_half]
[one_half_last] [/one_half_last]
[three_fourth]
Baked Cheddar
The Baked Cheddar Protein Puffs tasted a lot like cheese puffs to me. I really enjoyed them and have ordered more. They are crunchy, lightly cheesey, and the serving size was just right.
Protein: 14 g Carbs: 2 g Fat: 3 g Calories: 90 [/three_fourth]
[one_fourth_last] [/one_fourth_last]
[three_fourth]
Brick Oven Pizza
I was surprised to find that the Brick Oven Pizza Protein Puffs actually tasted like a pepperoni pizza or a cheese pizza with a kick. If plain cheese isn’t your bag, then this flavor might be a good option.
Protein: 14 g Carbs: 2 g Fat: 3 g Calories: 90 [/three_fourth]
[one_fourth_last] [/one_fourth_last]
[three_fourth]
Nacho Cheese
I was afraid the Nacho Cheese Protein Puffs would be spicy. But they weren’t, so I was able to enjoy them. They tasted much like the Backed Cheddar Protein Puffs, just slightly different.
Protein: 14 g Carbs: 2 g Fat: 2.5 g Calories: 90 [/three_fourth]
[one_fourth_last] [/one_fourth_last]
[three_fourth]
Sriracha Cheddar
Alas, I ate only two of these protein puffs. They were way too spicy for me. After one, I didn’t feel the kick, so I had a second. That’s when my tongue began to burn. Before that, they tasted good.
Protein: 14 g Carbs: 2 g Fat: 3 g Calories: 90 [/three_fourth]
[one_fourth_last] [/one_fourth_last]
[three_fourth]
Sour Cream & Onion
I really liked the flavor of these protein puffs. However, it was not a flavor that I associate with “sour cream & onion.” I’m not sure how to describe it other than tasty.
Protein: 14 g Carbs: 2 g Fat: 3.5 g Calories: 90 [/three_fourth]
[one_fourth_last] [/one_fourth_last]
[three_fourth]
Cookies & Cream
If you’re expecting these to taste like Oreo cookies, you’ll be disappointed. If found that not too sweet and slightly chocolatey. However, I did enjoy them and will buy them in the future.
Protein: 13 g Carbs: 3 g Fat: 3 g Calories: 90 [/three_fourth]
[one_fourth_last] [/one_fourth_last]
[three_fourth]
Strawberries & Cream
I found Shrewd Food’s Strawberries & Cream Protein Puffs to be lightly sweet. I could definitely taste the strawberry. In general, I liked them.
Protein: 12 g Carbs: 4 g Fat: 3 g Calories: 90 [/three_fourth]
[one_fourth_last] [/one_fourth_last]
Overal Impression of Shrewd Food Protein Puffs
I am very happy to have found a solid snack that I can munch on without increasing my carbs too much. The only negative thing I’d have to say about these snacks is that they stuck to my teeth, much like white bread does.
Shrewd Food Protein Croutons
[two_third] I don’t know if Shrewd Food will be coming out with another flavor, but these Parmesean Herb Protein Croutons were da bomb! I’d totally snack on these without a salad! They were basically the same as the protein puffs, but with a stronger flavor profile.
Protein: 10 g Carbs: 2 g Fat: 2 g Calories: 60 [/two_third]
[one_third_last] [/one_third_last]
Shrewd Food Protein Cookies
[one_half] The protein cookies come in two flavors: Oat & Berry and Oat & Chip. I found both of them to be very similar in flavor. They were lightly sweet and crispy. The texture reminded me of some bran cookies I had many years ago. Also, like pretty much every protein cookie I’ve found, the carbs are greater than the protein.
Protein: 8 g Carbs: 25 g Fat: 7 g (Oat & Berry), 8 g (Oat & Chip) Calories: 200 [/one_half]
[one_half_last] [/one_half_last]
Shrewd Food Protein Dippers and Keto Dippers
Both the protein and keto dippers come in both dark chocolate and milk chocolate flavor. Comparing the two, I couldn’t taste the difference. They are basically the protein puffs dipped in differently formulated chocolate.
The milk chocolate dippers were sweet and crunchy. The dark chocolate dippers were the same, only less sweet. Both reminded me, in texture, of malt balls. If you have a sweet tooth but want to eat low-carb these are really good options.
The main difference between the Protein Dippers and the Keto Dippers was in their nutritional profile. Therefore, you would choose one over the other depending on your nutritional goals.
[one_half] [/one_half]
[one_half_last] [/one_half_last]
[one_half] Dark Chocolate Protein: 10 g Carbs: 14 g Fat: 7 g Calories: 150
Milk Chocolate Protein: 10 g Carbs: 13 g Fat: 8 g Calories: 160 [/one_half]
[one_half_last] Dark Chocolate Protein: 8 g Carbs: 2 g Fat: 11 g Calories: 140
Milk Chocolate Protein: 7 g Carbs: 3 g Fat: 11 g Calories: 150 [/one_half_last]
Overall, I give Shrewd Food snacks a big thumbs up. Whether you like one flavor or another is more a matter of personal taste. All of the products I tried tasted at least good. Some I liked more than others. If you’re on a high protein, low-carb diet and get the munchies, reach for a Shrewd Food snack.
NOTE: I received a free copy of these products in exchange for an honest review. If you’ve read past product reviews, you’ll know that I don’t pull my punches when I believe they are warranted. I also try to provide balanced information so you can make your own decision to buy or not buy this product, even if you disagree with my opinion.
I have a soft spot for Apple Crumble (and Apple Crisp) because it is one of the recipes my teacher used in my first cooking class in high school. However, it can be high in sugar, carbs, and other ingredients that many people today are trying to avoid. So I offer you this treat.
One taste of this delicious dessert and you’ve won’t believe it is both gluten and refined sugar-free. The addition of fresh thyme adds a subtle savory note to the otherwise sweet flavor profile of this classic recipe.
Place top oven rack in the center position and pre-heat oven to 350°F. Grease an 8” x 8” baking dish and set it aside.
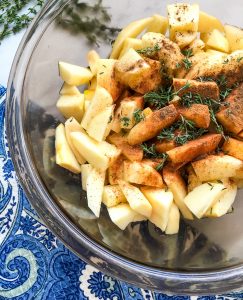
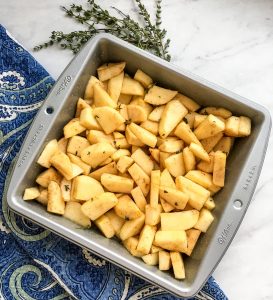
In a large non-reactive bowl, toss apples with fresh lemon juice.
Add maple syrup, apple juice, cinnamon, allspice, thyme leaves, and salt. Toss to combine and set aside.
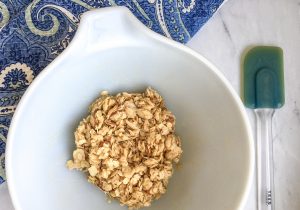
In a separate bowl, combine topping ingredients and stir until oats are thoroughly coated and all ingredients are well combined. Set aside.
Pour apple mixture into the prepared baking dish and spread into an even layer.
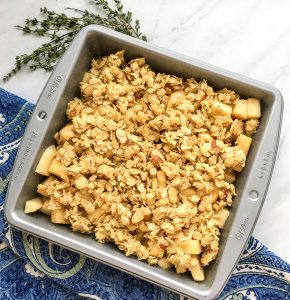
Spread the topping evenly across the top in a uniform layer, as well.
Place into the preheated oven and bake for 30 minutes. If the top layer is nicely browned, cover the dish loosely with aluminum foil to prevent over-browning.
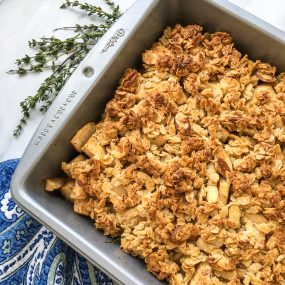
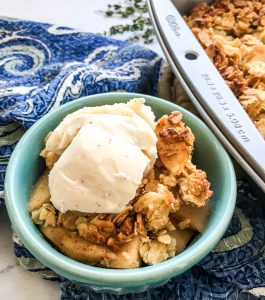
Continue baking for another 15-20 minutes or until the apple crisp is nice and bubbling. Remove from the oven and set aside to cool for 5-10 minutes.
Serve warm with some vanilla bean iced cream or freshly whipped cream, if desired.
Tip: Choose firm apples, such as Granny Smith or Pink Lady, for this recipe. These varieties will hold up well to the heat of baking without turning to mush. Read my apple tips on the page for Cinnamon Baked Apples.
What is the difference between an Apple Crumble and an Apple Crisp?
If you’re a Brit, Aussie, or Kiwi, then you are probably asking this question because in the UK, Australia, and New Zealand, the term “Apple Crumble” refers to both. However, here in the United States, as well as in Canada, we make a distinction between the two desserts.
An Apple Crisp, also called an Apple Streusel, is made with a streusel topping. Streusel is made by cutting together a fat, usually butter, some flour, sugar, and more often than not, some cinnamon. The topping is crumbly and sweet. If you use a leavened flour, such as Bisquick (which is my go-to), then it puffs up a little, as well.
An Apple Crumble, on the other hand, has a topping made from rolled oats and brown sugar. In this recipe, I use honey instead — thus removing the refined sugar.
Interestingly enough, if you try to look up the history of the Apple Crumble, you find a lot of information about the Apple Streusel, which was invented in Britain around World War II. Other related dishes include:
Apple Cobbler, which has a biscuit topping
Apple Brown Betty, which has a buttered bread topping
From what I could gather in my research — and I’ll have to dig deeper at a later time — is that most of these recipes were created out of something akin to necessity. The cook didn’t have the ingredients to make an apple pie, so they invented something that worked with what they did have. That is how much kitchen creativity happens — taking a look at the ingredients on hand and pulling them together in new ways.
Wondering how you can unleash your kitchen creativity on this recipe while preserving its gluten-free and processed-sugar-free qualities. Here are a couple of ideas:
Try molasses instead of honey. Molasses is made from brown sugar, so you’ll get a bit of the recipe’s original qualities. However, it will be less sweet than honey or brown sugar.
Try a different gluten-free flour. You can substitute almond flour with oat flour, buckwheat flour, cashew flour, or sunflower seed flour. You can also experiment with coconut flour, but it will change the flavor profile significantly enough that you’ll need to play around with other ingredients, as well.
Substitute the allspice for cloves. They have very similar flavor profiles.
Use another natural syrup instead of maple syrup. Molasses is a good choice. You can also try out honey or agave nectar.


![Shrewd Food: Snacks for a Low-Carb Lifestyle [Taste Test]](https://www.carmascookery.com/wp-content/uploads/2021/01/shrewd-food-taste-test.jpg)
![Shrewd Food: Snacks for a Low-Carb Lifestyle [Taste Test]](https://www.carmascookery.com/wp-content/uploads/2021/01/shrewd-food-taste-test-1024x614.jpg)
 [/one_half_last]
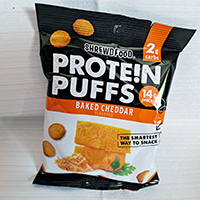 [/one_fourth_last]
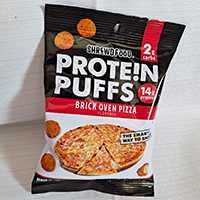 [/one_fourth_last]
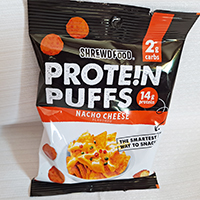 [/one_fourth_last]
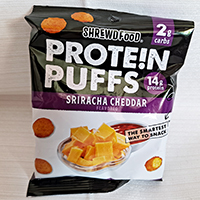 [/one_fourth_last]
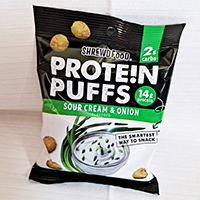 [/one_fourth_last]
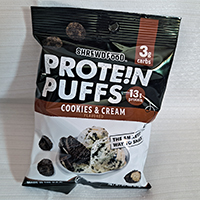 [/one_fourth_last]
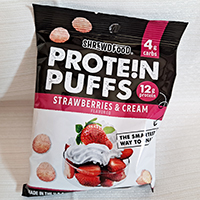 [/one_fourth_last]
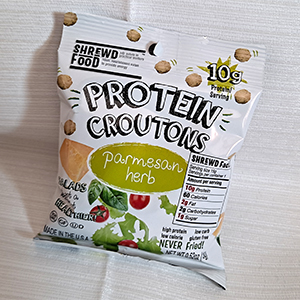 [/one_third_last]
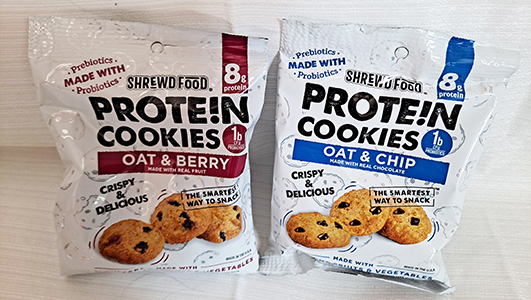 [/one_half_last]
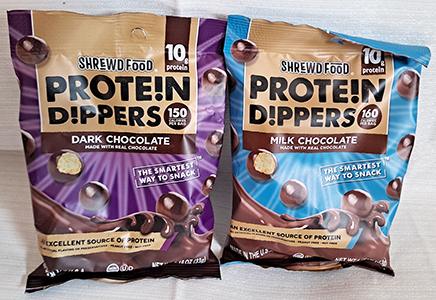 [/one_half]
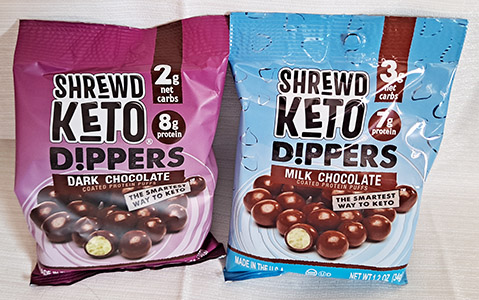 [/one_half_last]
 [/one_fifth]